Check Point SAML
You can use Check Point SAML in Identity and Trust.
Prerequisite
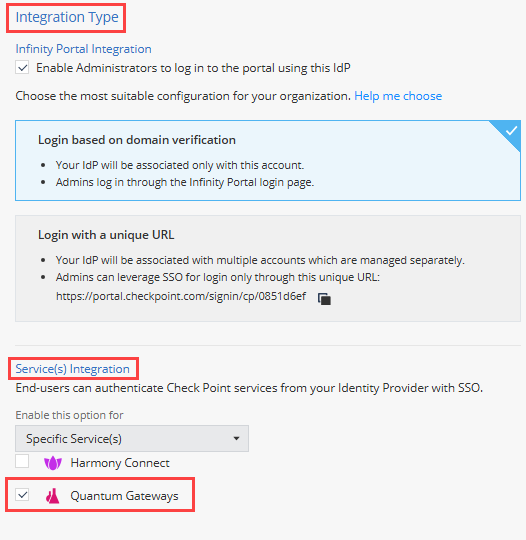
In an Identity Provider integration, you must enable Integration Type > Service(s) Integration for:
-
All Services, or
-
Specific Service(s) > Quantum Gateways
After you configure this setting, the SAML card appears on the Integrations page.
To enable this setting:
-
Go to Identity and Trust and select Integrations from the menu bar.
-
Hover over an Identity Provider card, click the three dots, and click Edit.
-
Navigate to Integration Type > Service(s) Integration and select one of the above options.
For example:
Overview
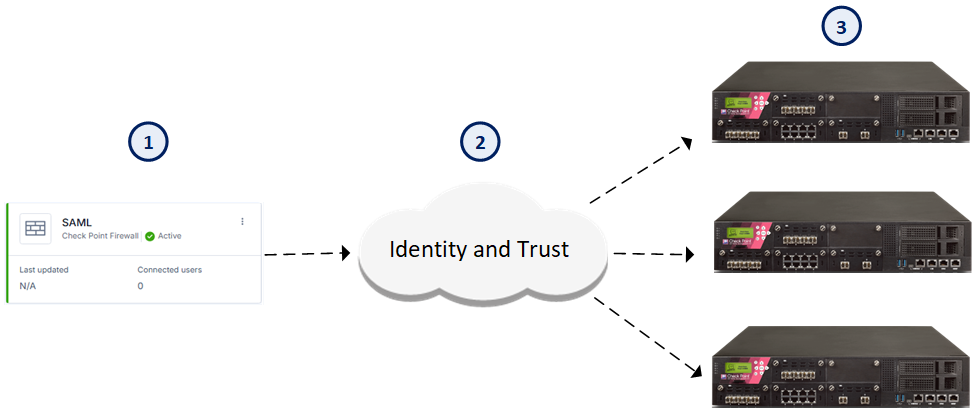
Identity and Trust integrates with Security Gateways to provide SSO support through SAML. To enable this integration, you must allow Identity and Trust to save session data. Connect the SAML card (1) to grant this permission. After activation, Identity and Trust (2) saves session information for each authenticated user and shares it with other Security Gateways (3) while the session is valid.
|
Item |
Description |
|---|---|
|
1 |
SAML card |
|
2 |
Identity and Trust |
|
3 |
Security Gateways |
|
|
Note - Check Point SAML only supports end users that authenticate themselves through Identity Awareness. Other Software Blades on the Security Gateway are not supported (for example, Remote Access VPN, Mobile Access). |

To use SAML with Identity and Trust:
-
Go to Identity and Trust and select Integrations from the menu bar.
-
On the Integrations page, in the Check Point products section, locate the SAML card, and click Connect.
The status of the SAML card changes from Inactive to Active.
To monitor the SAML integration:
|
Card Status |
Description |
Action Required |
|---|---|---|
|
Inactive |
The SAML integration is available but not connected to Identity and Trust. |
Click Connect to enable SAML functionality. |
|
Active |
The SAML integration is active for Identity Provider. |
No action needed. |
To disconnect the SAML integration:
-
Navigate to the SAML integration card and click the card options.
-
Select Disconnect and Confirm.
The SAML card no longer appears on the Integrations page and Identity and Trust has stopped receiving new user logins from SAML. You can reconnect the integration at any time.
To hide an Inactive card on the Integrations page:
-
Navigate to the SAML integration card and click the card options.
-
Select Dismiss and Confirm.
The SAML card no longer appears on the Integrations page. This action does not change the Service Integration setting on the IdP. You can reconnect the integration at any time.
To show the hidden / disconnected SAML card and connect the service:
-
On the Integrations page, click Add Integration.
-
Select Check Point products > SAML.
-
Click Connect.
The SAML card appears in the Check Point products section with the status Active. Identity and Trust collects user login information, saves the session data, and shares the data with other Security Gateways.
To remove the SAML integration:
-
Navigate to the SAML integration card and click the card options.
-
Select Remove.
The SAML card is removed from the Integrations page. If you configure the prerequisite again in an Identity Provider integration, the card appears in the Integrations page, and you can connect the service.