Inputs
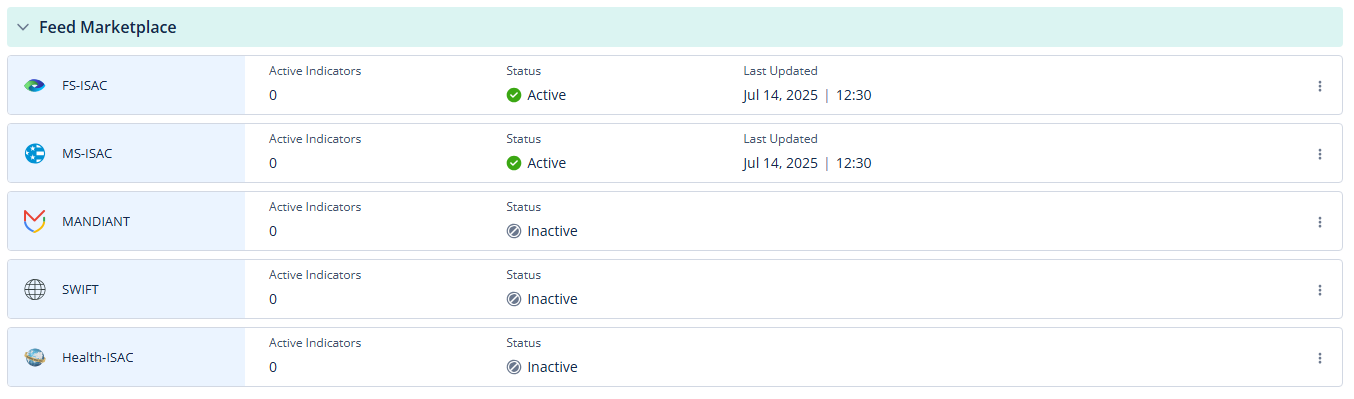
In the Inputs page, you can add IoCs from various feeds (sources) to IoC Management (formerly Infinity IoC):
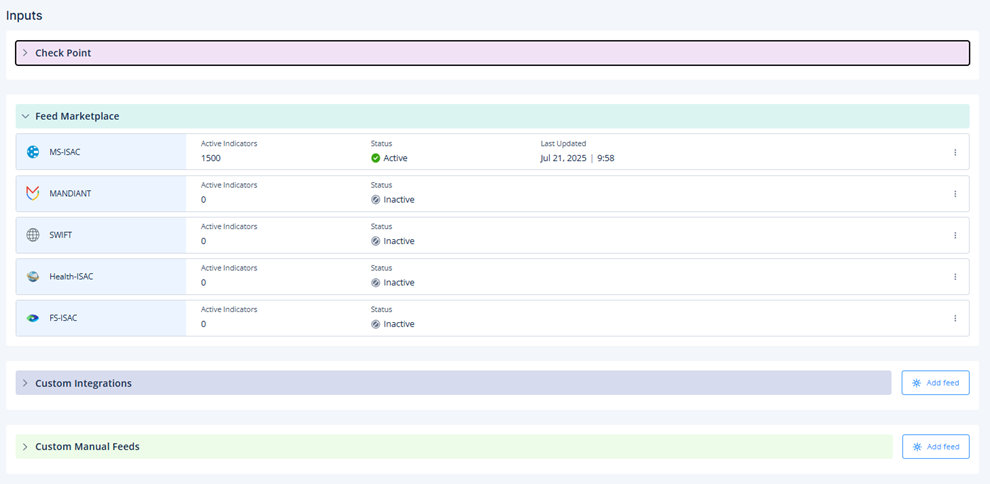
You can filter the feeds by their statuses:
-
Active
-
Error
-
Inactive
To manage the feeds, see Managing Feeds.
Check Point Feeds
The Check Point section includes all feeds created by Check Point:
-
XDR
-
Infinity ERM

Infinity ERM Feed
Prerequisites
The integration with IoC Management requires a dedicated ERM user account. The Username and Password are standard ERM credentials created for integration.
Each ERM user consumes one license seat. Verify you have an available seat before requesting these credentials from Check Point Support.
-
Verify License Availability
Before opening a support ticket, ensure that your ERM account has at least one free user license. To check your current license balance:
-
Access the Infinity ERM Administrator Portal.
-
Navigate to Account Settings > License Management.
-
Confirm that at least one user seat is available.
-
-
Request ERM Integration Credentials
After license availability is confirmed:
-
Open an ERM support ticket with Check Point Support.
See sk183369 - How to open a support ticket for ERM.
Optionally, you can refer to this instructional video.
-
In the ticket, request the ERM support team to provide a Username and Password for the IoC Management integration.
-
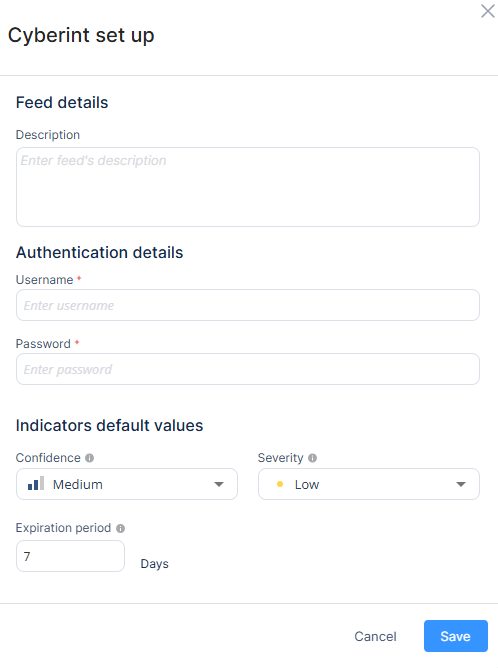
Setting Up the Infinity ERM Feed
-
Click
 in the feed row.
 -
Click Set up.
-
Enter the feed description.
-
Enter the Username and Password provided by your Customer Success Manager.
-
In the Indicators default values section, select the values to be applied to indicators with missing data:
-
Confidence
-
Severity
-
Expiration period

Note - In the Indicators table, if the indicator displays the default values, then it is indicated with a tool tip Inherited from feed.
-
-
Click Save.
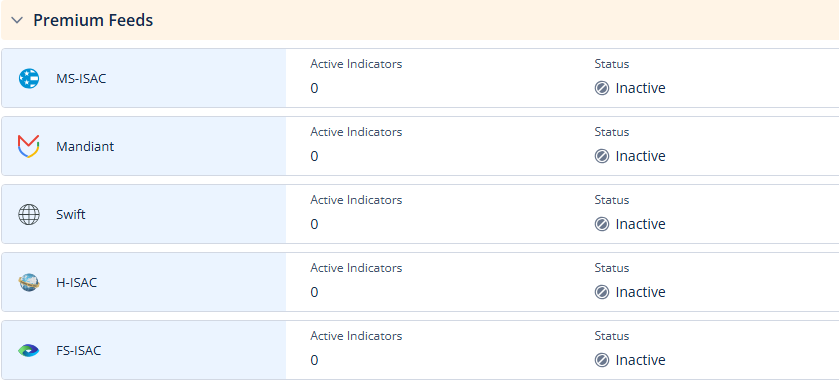
Premium Feeds
The Premium Feeds section includes feeds that require valid authentication credentials or API keys. Access to these feeds is only available to customers with an active membership or a purchased subscription.
|
|
Note - Feeds are synced every two hours. |
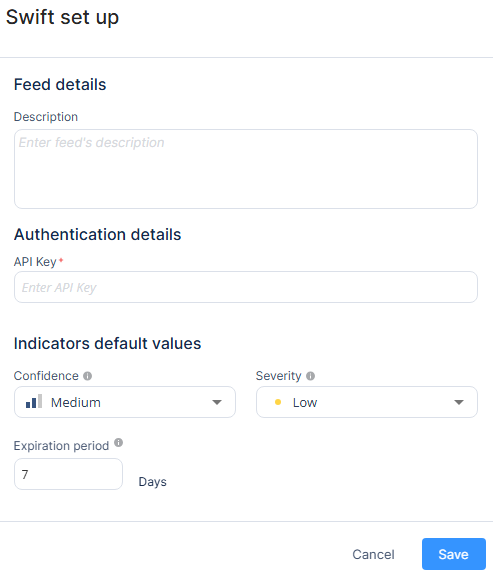
Activating a Premium Feed
-
Click
in the feed row. -
Click Set up.
-
In the Feed details section, enter the feed description.
-
In the Authentication details section, enter the authentication credentials or the API key.
-
In the Indicators default values section, select the values to be applied to indicators with missing data:
-
Confidence
-
Severity
-
Expiration period
Note - In the Indicators table, if the indicator displays the default values, then it is indicated with a tool tip Inherited from feed.
-
-
Click Save.
Open Source Feeds
The Open Source Feeds section includes external open source feeds that are freely accessible.
|
|
Note - Feeds are synced every two hours. |
Activating an Open Source Feed
-
Click
in the feed row. -
Click Set up.
-
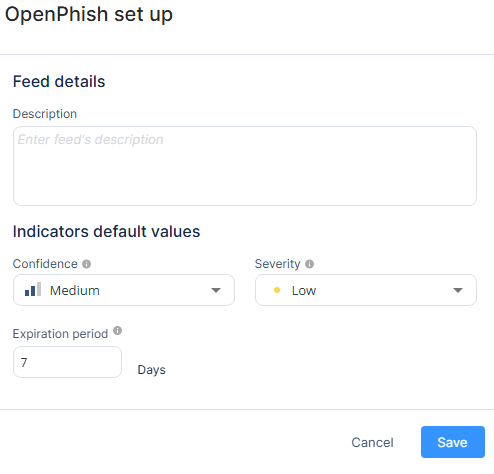
In the Feed details section, enter the feed description.
-
In the Indicators default values section, select the values to be applied to indicators with missing data:
-
Confidence
-
Severity
-
Expiration period
Note - In the Indicators table, if the indicator displays the default values, then it is indicated with a tool tip Inherited from feed.
-
-
Click Save.
Custom Integrations
In the Custom Integrations section, you can integrate custom feeds. Supported feed formats are:
-
STIX/TAXII 2.1 with/without authentication
-
MISP (JSON) with/without authentication
-
Line Separated Format without authentication
|
|
Note - If the IoC file is placed in a local network behind a firewall, see sk182201 to create a new feed. |
To create a new custom integration:
-
Go to Custom Integrations and click Add feed.

-
Select the format of your feed:
-
STIX/TAXII
-
MISP
-
Line Separated Format
-
-
Enter these:
-
Name
-
URL
-
(Optional) Authentication details
-
In the Indicators default values section, select the values that will be applied to indicators with missing data:
-
Confidence
-
Expiration period
Note - In the Indicators table, if the indicator displays the default values, then it is indicated with a tool tip Inherited from feed.
-
-
-
Click Save.
Custom Integration Sync
After creating a new integration, it may take up to 5 minutes to sync. If the sync is successful, then:
-
STIX / TAXII feeds are synced every 2 hours
-
MISP feeds are synced every 2 hours
-
Line Separated Format feeds are synced every 12 hours
If the sync is unsuccessful, it attempts to sync every five minutes until the sync is successful. If the sync is unsuccessful after six attempts, an error message appears.
To initiate an immediate sync, you can edit and save the feed without any changes.
Custom Manual Feeds
In the Custom Manual Feeds section, you can manually add IoCs.
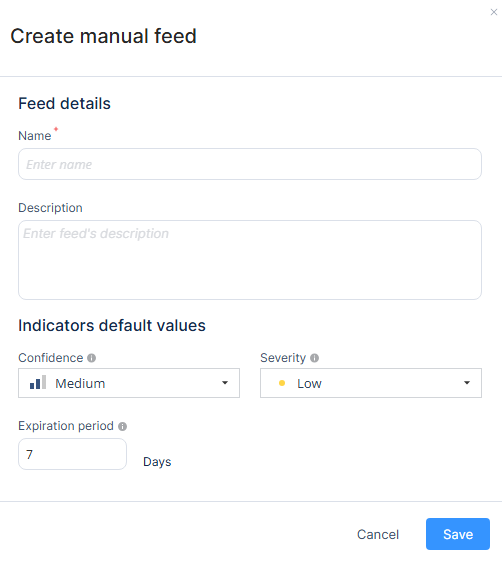
To create a new manual feed:
-
Go to Custom manual feeds and click Add Feed.

-
Enter these:
-
Name
-
(Optional) Description
-
-
In the Indicators default values section, select the values that will be applied to indicators with missing data:
-
Confidence
-
Severity
-
Expiration period
Note - In the Indicators table, if the indicator displays the default values, then it is indicated with a tool tip Inherited from feed.
-
-
Click Save.
Adding IoCs to a Custom Manual Feed
-
Click the feed you want to edit.
-
To create a new IoC, do one of these:
-
To add manually up to 50 IoCs:
-
Click New.
-
In the Create Indicator window, enter these:
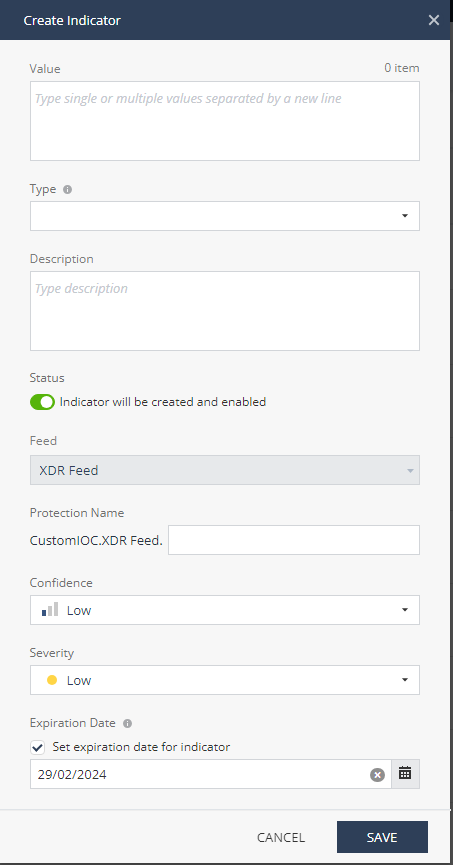
-
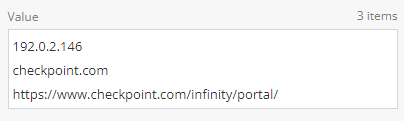
Indicator Value - Value of the IoC. To enter multiple IoCs (up to 50), enter each IoC in a separate line.
-
Type - The system automatically detects the IoC type based on the Indicator Value.
Note - If you enter multiple IoCs types in the Indicator Value field, the system auto-detects the Type and a new IoC is created for each entered value.
-
(Optional) Description
-
Protection Name - A unique name to identify the IoC in log files.
- Confidence
-
Severity
-
Expiration Date - The Set expiration date for indicator checkbox is selected by default.
If you do not want to set an expiration date, clear the checkbox and the system sets the Expiration Date as Never.
-
-
Click Save.
-
-
To import IoCs from a file, click Import (up to 10K IoCs)
In the Import List window, select the file, click Upload and then click Save.
-
-
To edit the details of an IoC, select the IoC and click Edit.
In the Edit Indicator window, make the necessary changes and click Save.
Managing Feeds
-
Click
in the feed row.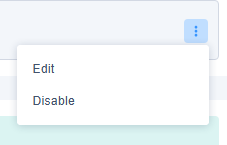
-
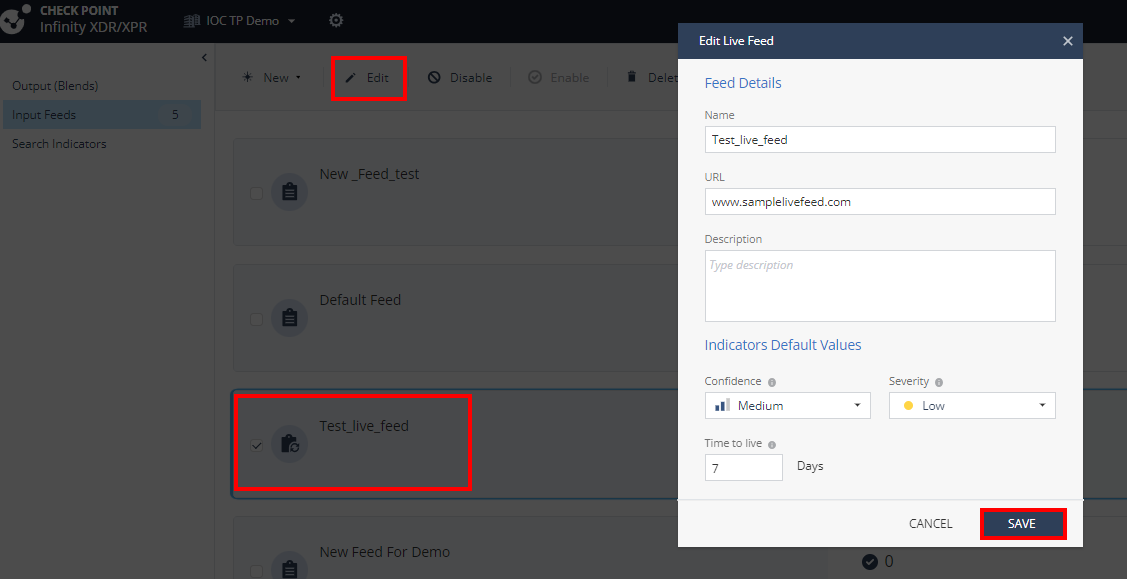
To edit a feed, click Edit.
The Edit window appears.
-
Make the necessary changes and click Save.
-
To disable all IoCs in a feed, click Disable.
-
To view a feed, click the feed row.
The system displays the feed details and the indicators table.
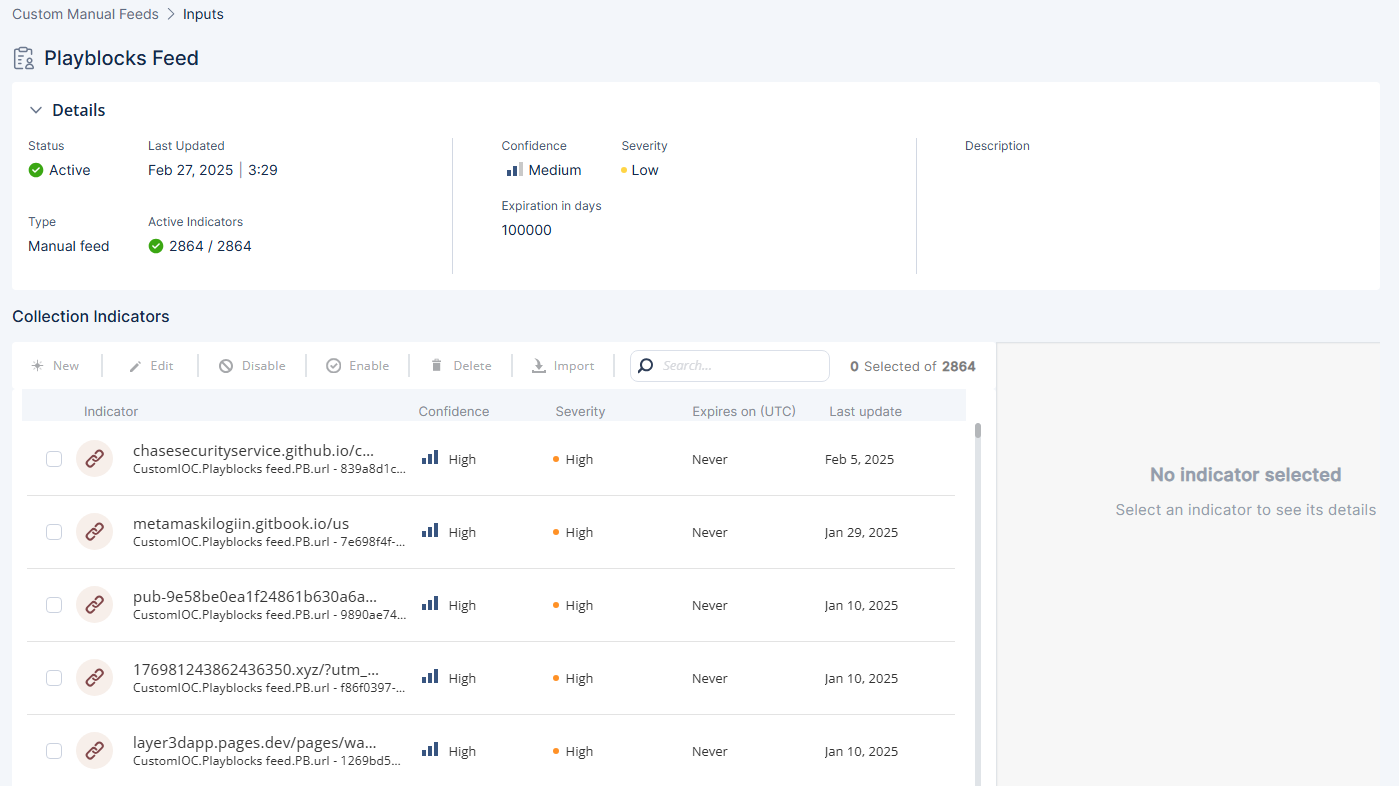
The indicators table displays the following:
Item
Description
IoC type
Icon Description 
IP address

File (MD5, SHA1 or SHA256)

Domain. For example, checkpoint.com

URL. For example, https://www.wikipedia.org/wiki/Internet

Disabled IoC. The disabled IoC row is grayed out by default.
Indicator
IoC name and Protection name.
Confidence
Confidence level of the IoC detection.
If it displays the default Confidence value inherited from the feed, then it is indicated with a tool tip Inherited from feed.
Severity
Severity of the IoC.
If it displays the default Severity value inherited from the feed, then it is indicated with a tool tip Inherited from feed.
Expires in (UTC)
Time until the IoC expires, in the UTC time zone. After the IoC expires, it is automatically deleted.
 indicates that the IoC expiration date is soon.
Last update
Date on which the IoC was last updated.
-
To search for an IoC, in the Search field, enter the value, protection name or description of the IoC and press the Enter key.
-
Enter a minimum of three and maximum of up to 100 characters. If the characters exceed 100, then the system omits the extra characters and shows the search results for the trimmed value.
-
The system shows a maximum of 200 search results.