Integration with SOTI MobiControl UEM

00:03: This guide provides detailed instructions on integrating Harmony mobile with Saudi 00:07: mobicontrol, uem and configuring settings in both applications to streamline 00:12: employee training processes efficiently. 00:09: Log into the Saudi mobicontrol web console, make sure you have the administrator 00:13: role in the portal. 00:15: Let's begin by creating a new user to do that. 00:18: Click the menu icon 00:20: Go to users and permissions. 00:23: Go to the user's Tab and click Plus. 00:26: Enter the username and password and select the roles. 00:29: You want to assign to the user. After that, click save. 00:34: Assigned the necessary permissions to the user and click save. 00:38: Next, you need to create a client ID and client Secret. 00:42: For that, click the menu icon and go to global settings. 00:46: Go to Services, API client and then click the plus icon. 00:52: Enter a name for the new API, client and click generate. 00:56: The system generates the client ID and client secret copy 01:00: and save them. Then click okay. Note that you cannot view the client 01:04: secret after closing this window. If lost, you must generate 01:08: a new API client. 01:11: Next to create a new device group, go to devices. 01:16: Click new group, new route group. 01:19: Enter a group name and click create. 01:22: Next to add devices to this group, click the menu icon and go to policies. 01:28: Go to enrollment and click new enrollment policy. 01:31: Select the device you want to add here? We show how to add an iOS device. 01:37: Enter a name for the enrollment policy and click next. 01:41: Select the enrollment type and click next. 01:45: Select, whether user authentication is required to enroll the device and then select 01:49: the device group to add the device. 01:52: Skip the auto enroll section and click next. 01:56: Click finish. 01:58: Select the required option to distribute the enrollment details and then click okay. 02:04: Now, let's configure the integration in the harmony mobile administrator portal. 02:09: Log into Infinity Portal and access the harmony. 02:12: Mobile administrator portal. Go to settings Integrations. 02:17: Click add and then uems. 02:20: From the uems list, select Saudi and click next. 02:24: Enter a name for your integration in the server. 02:27: Address field enter the URL to access your Saudi mobicontrol web 02:31: console. 02:33: Enter the username and password of the user you created in the Saudi mobicontrol, 02:37: web console. 02:40: Enter the client ID and client secret generated in the Saudi mobicontrol 02:44: web console. 02:46: Click verify, and then next. 02:49: In the synchronization section, select the device groups in Saudi mobicontrol, 02:53: uem that you want to synchronize with Harmony mobile administrator portal. 02:58: Then click verify and next 03:01: In the tagging section, select the device characteristics that you want to communicate to 03:05: the uem. Then click verify and next 03:10: In the deployment section, copy and save the token. 03:12: Use the token value when you perform the application configuration in 03:17: the uem. Then click finish. 03:20: When the integration is complete, the Saudi mobicontrol uem 03:24: pane appears on the Integrations page, 03:28: Thank you.

Preparing UEM for Integration

Prerequisite

Administrator role in SOTI MobiControl Web Console.

Creating Users

To create a new user:

  1. Log in to the SOTI MobiControl Admin Console.

  2. Click at the top-left corner.

  3. Click Users and Permissions.

    The Users and Permissions page appears.

  4. On the left panel, go to the Users tab and then click +.

    The New User window appears.

  5. Enter these:

    1. Username - Name of the user.

    2. Password - Password for the user.

    3. Roles - Turn on the toggle button for the role(s) you want to assign to the user.

  6. Click Save.

Assigning User Permissions

To assign permissions to a user:

  1. Log in to the SOTI MobiControl Admin Console.

  2. Click at the top-left corner.

  3. Click Users and Permissions.

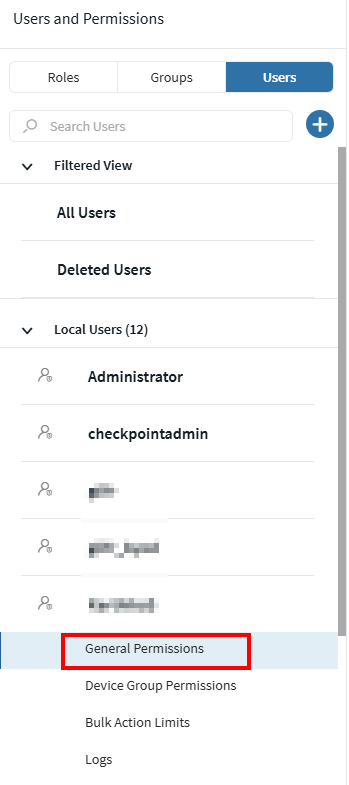
  4. On the left panel, go to the Users tab and expand Local Users.

  5. Click the user name and then click General Permissions.

  6. Select the necessary permissions and click Save.

Creating Client ID and Client Secret

  1. Log in to the SOTI MobiControl Admin Console.

  2. Click at the top-left corner.

  3. Click Global Settings.

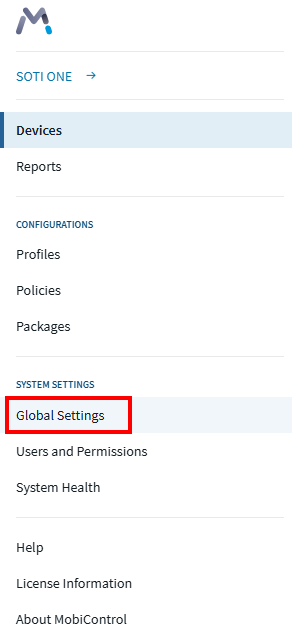
    The Global Settings page appears.
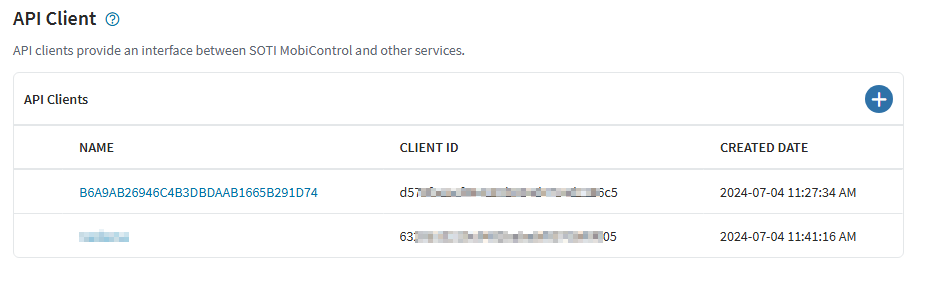
  4. On the left panel, go to ServicesAPI Client.

    The API Client page appears.

  5. Click +.

    The Add API Client window appears.

  6. In the Name field, enter a name for the new API client.

  7. Click Generate.

    The system generates the Client ID and Client Secret. Copy and save them.

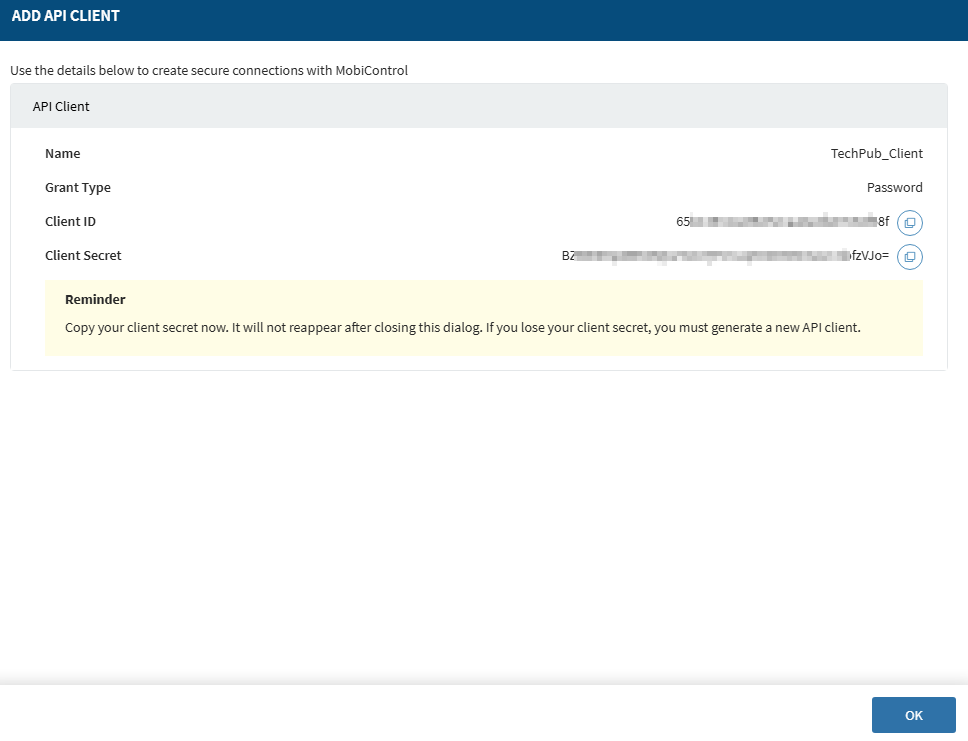
    Important - The system does not show the Client Secret after closing this window. If lost, you must generate a new API client.

  8. Click OK.