Troubleshooting POCs
Use the following tools for troubleshooting during POCs.
Run Diagnostics Push Operation
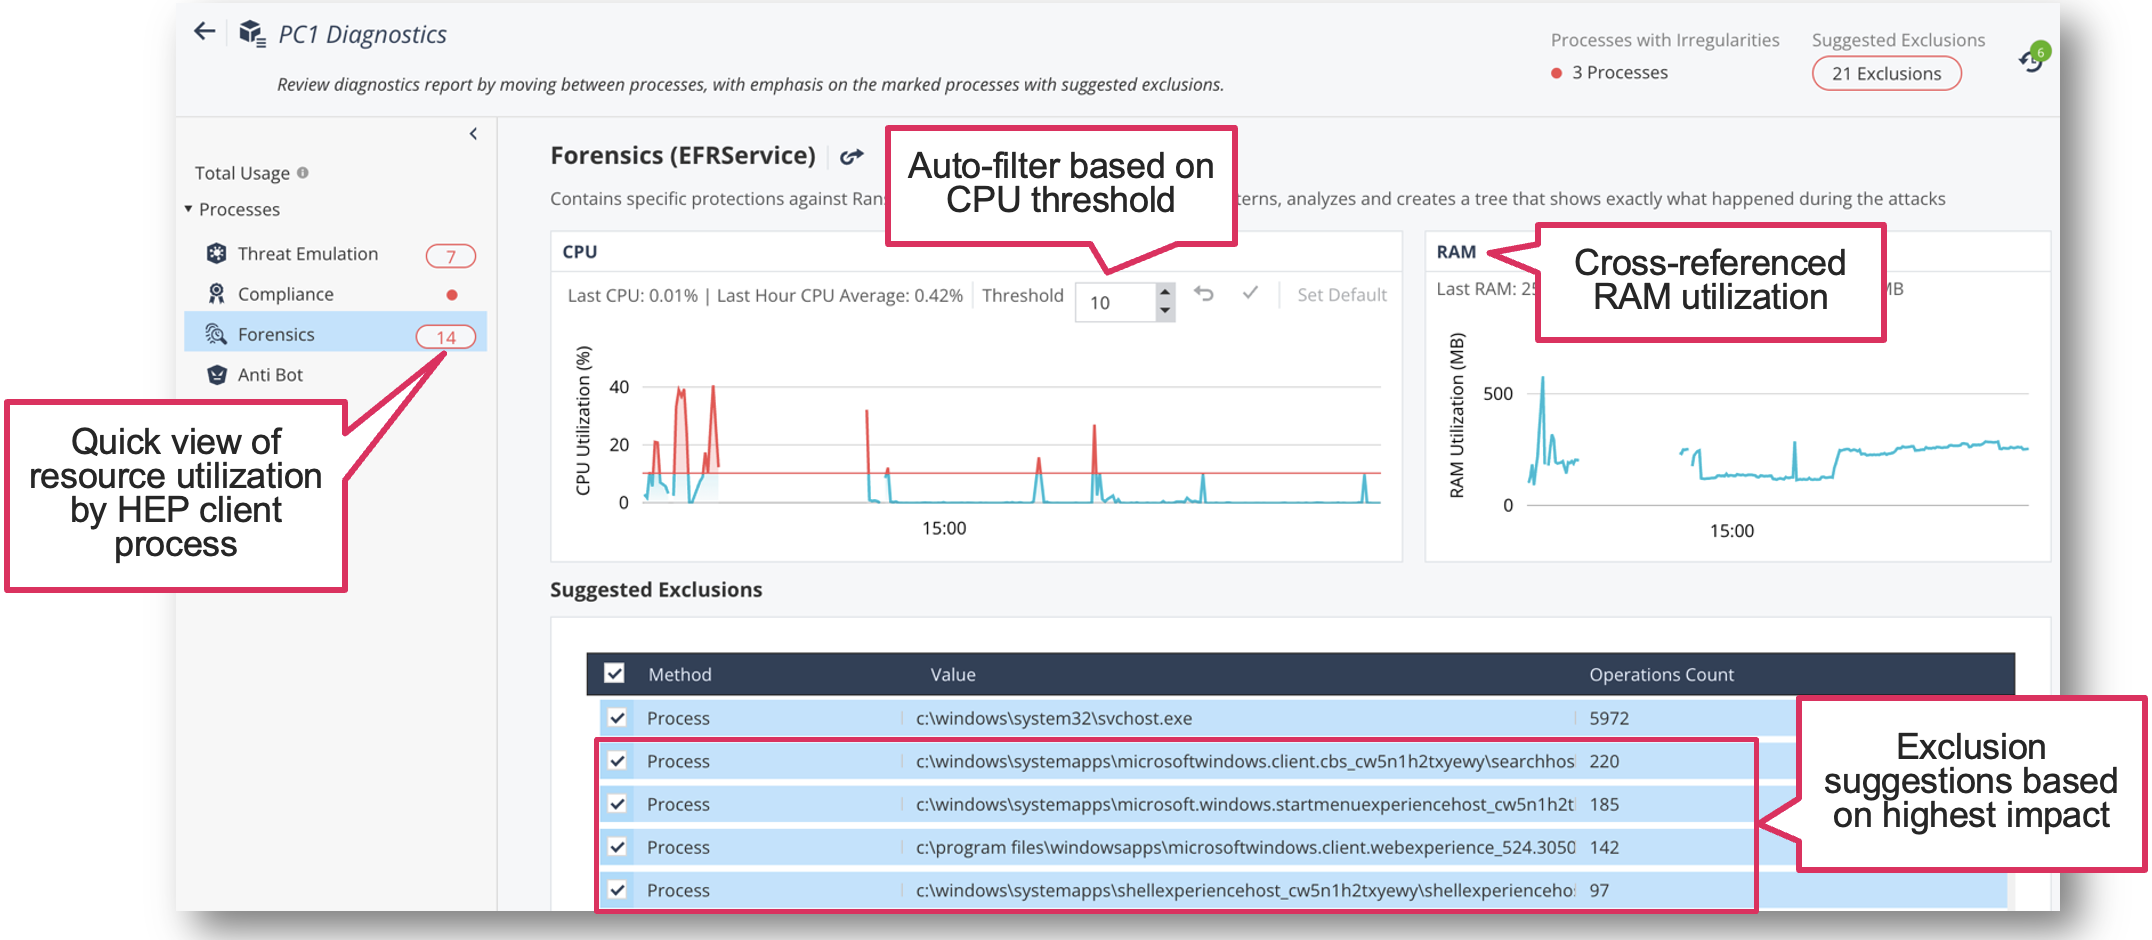
To troubleshoot CPU and RAM usage caused by Threat Prevention blades, use a Run Diagnostics Push Operation. The system generates an automated process exclusion list after reviewing the interactive report. For more information see, Show Last Diagnostics Report section in Harmony Endpoint EPMaaS Administration Guide.
|
|
Caution - It is not safe to add all the suggested exclusions, example, svchost.exe, powershell.exe. For assistance, involve Check Point TAC, local engineers and Harmony Endpoint architects. |

Behavioral Guard Low Memory Mode
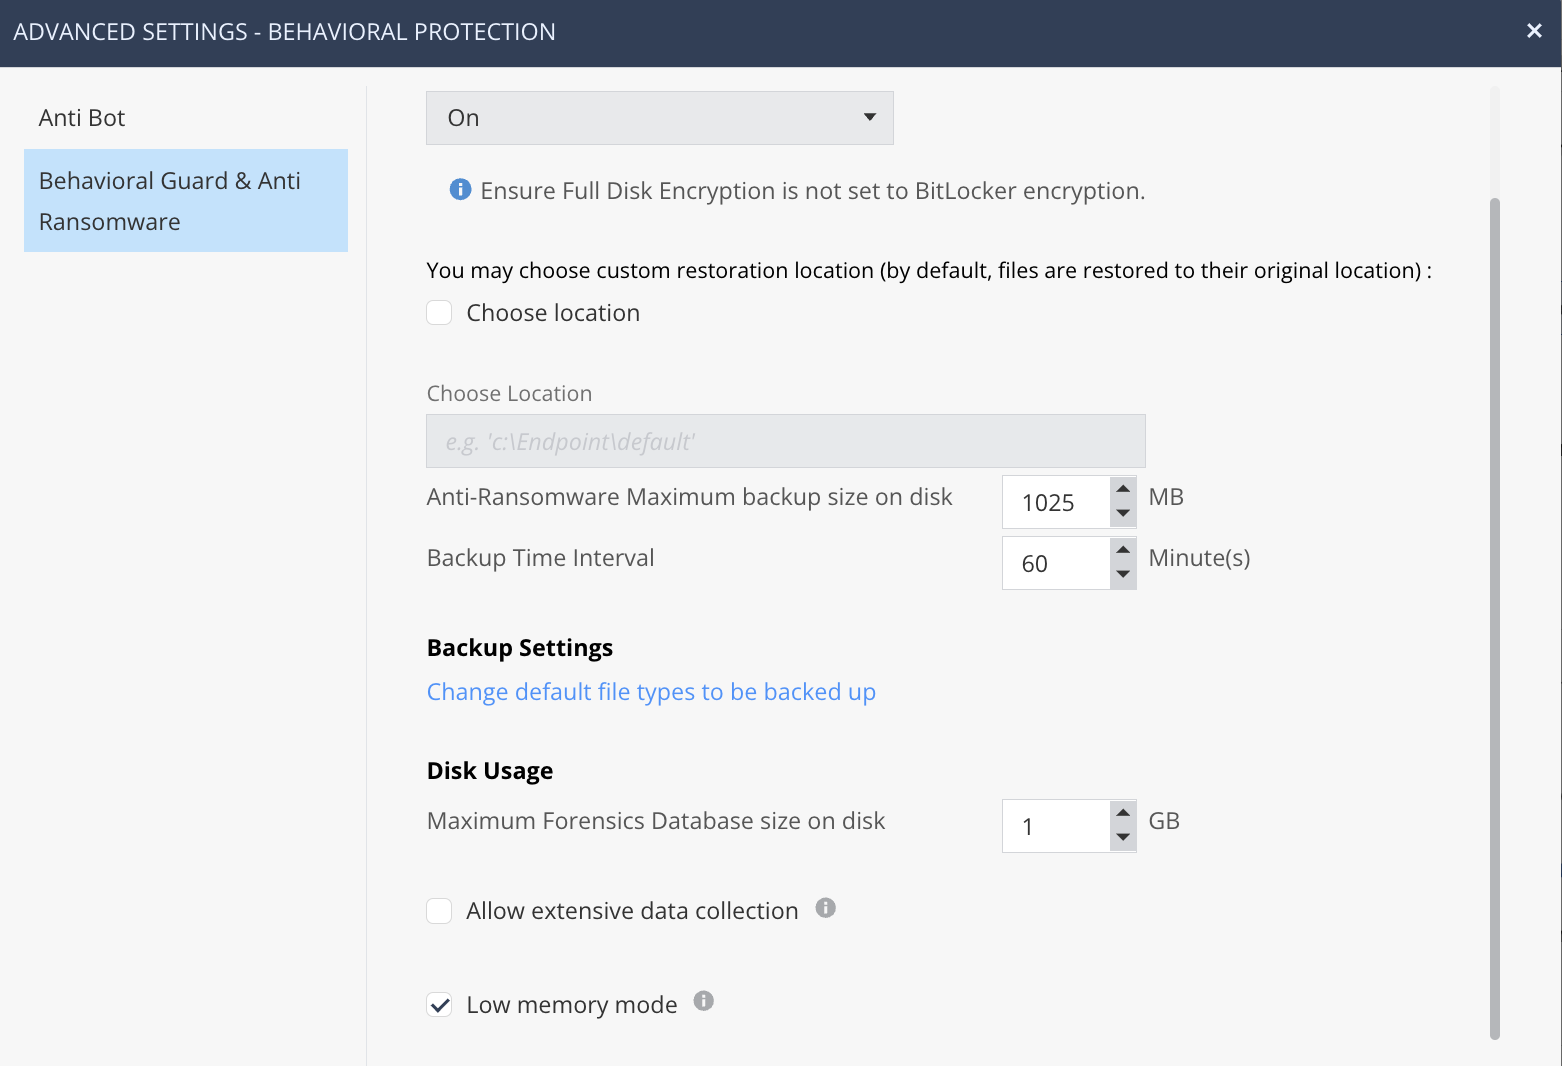
To reduce RAM consumption on low-spec machines, enable Behavioral Guard (BG) Low memory mode in the Advanced policy settings. Low memory mode significantly reduces memory utilization by retaining only the most recently matched signatures. While it slightly reduces the catch rate, it remains at an effective level.
Disable Capabilities
For troubleshooting purposes, you can temporarily disable selected client blades (except for Data Protection blades) from the client UI with the following steps:
-
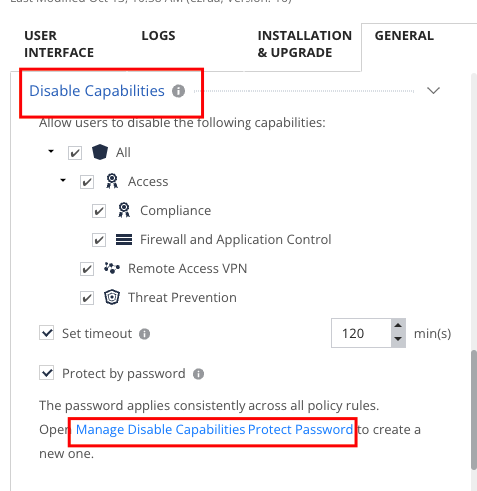
Go to Client Settings policy > General and select the blades to be disabled and set a password.

-
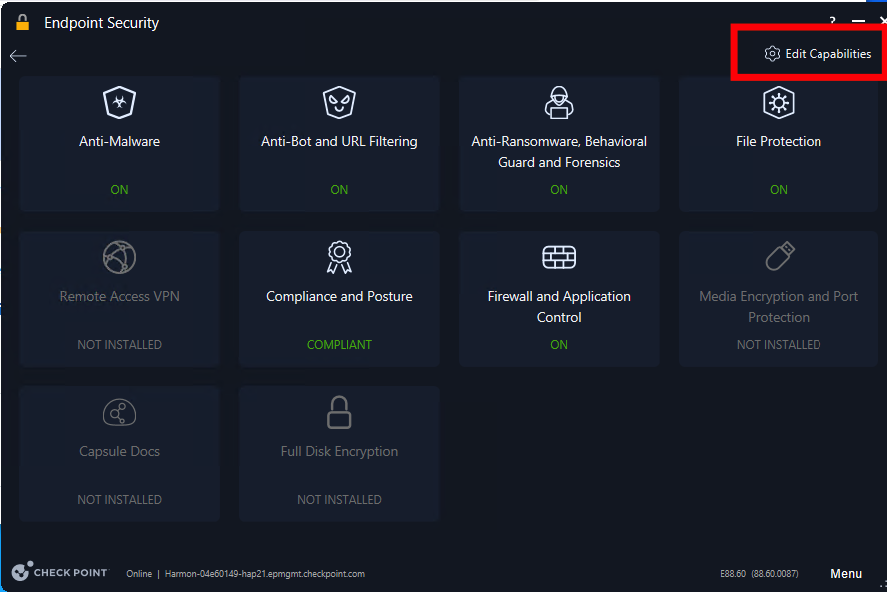
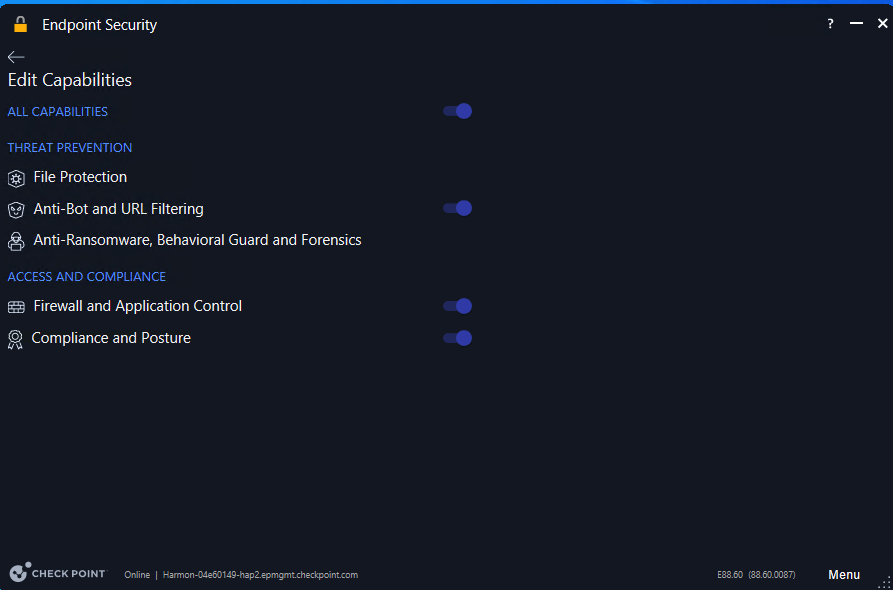
On the Endpoint Security client, go to Overview > Edit Capabilities.
-
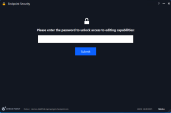
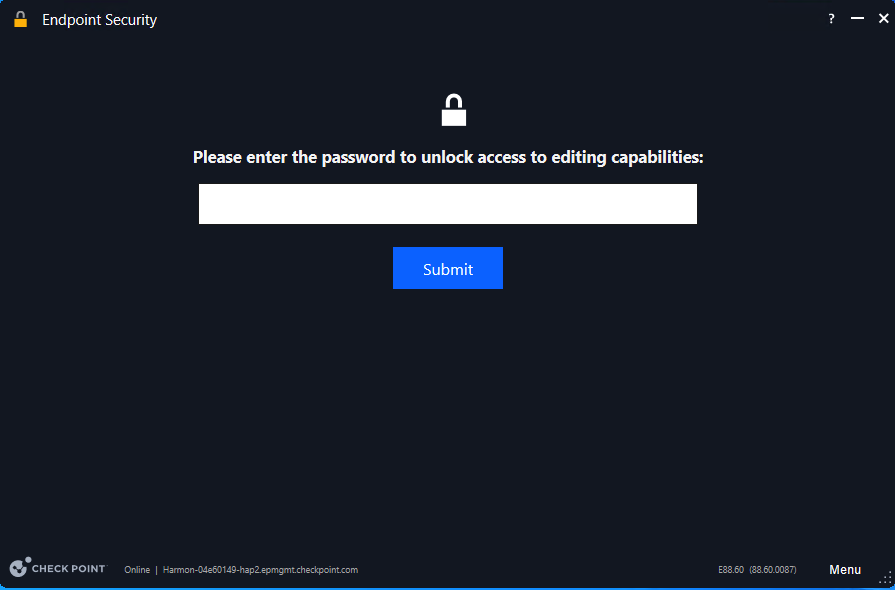
Enter the password and choose the blade to disable.

Uninstall Capabilities
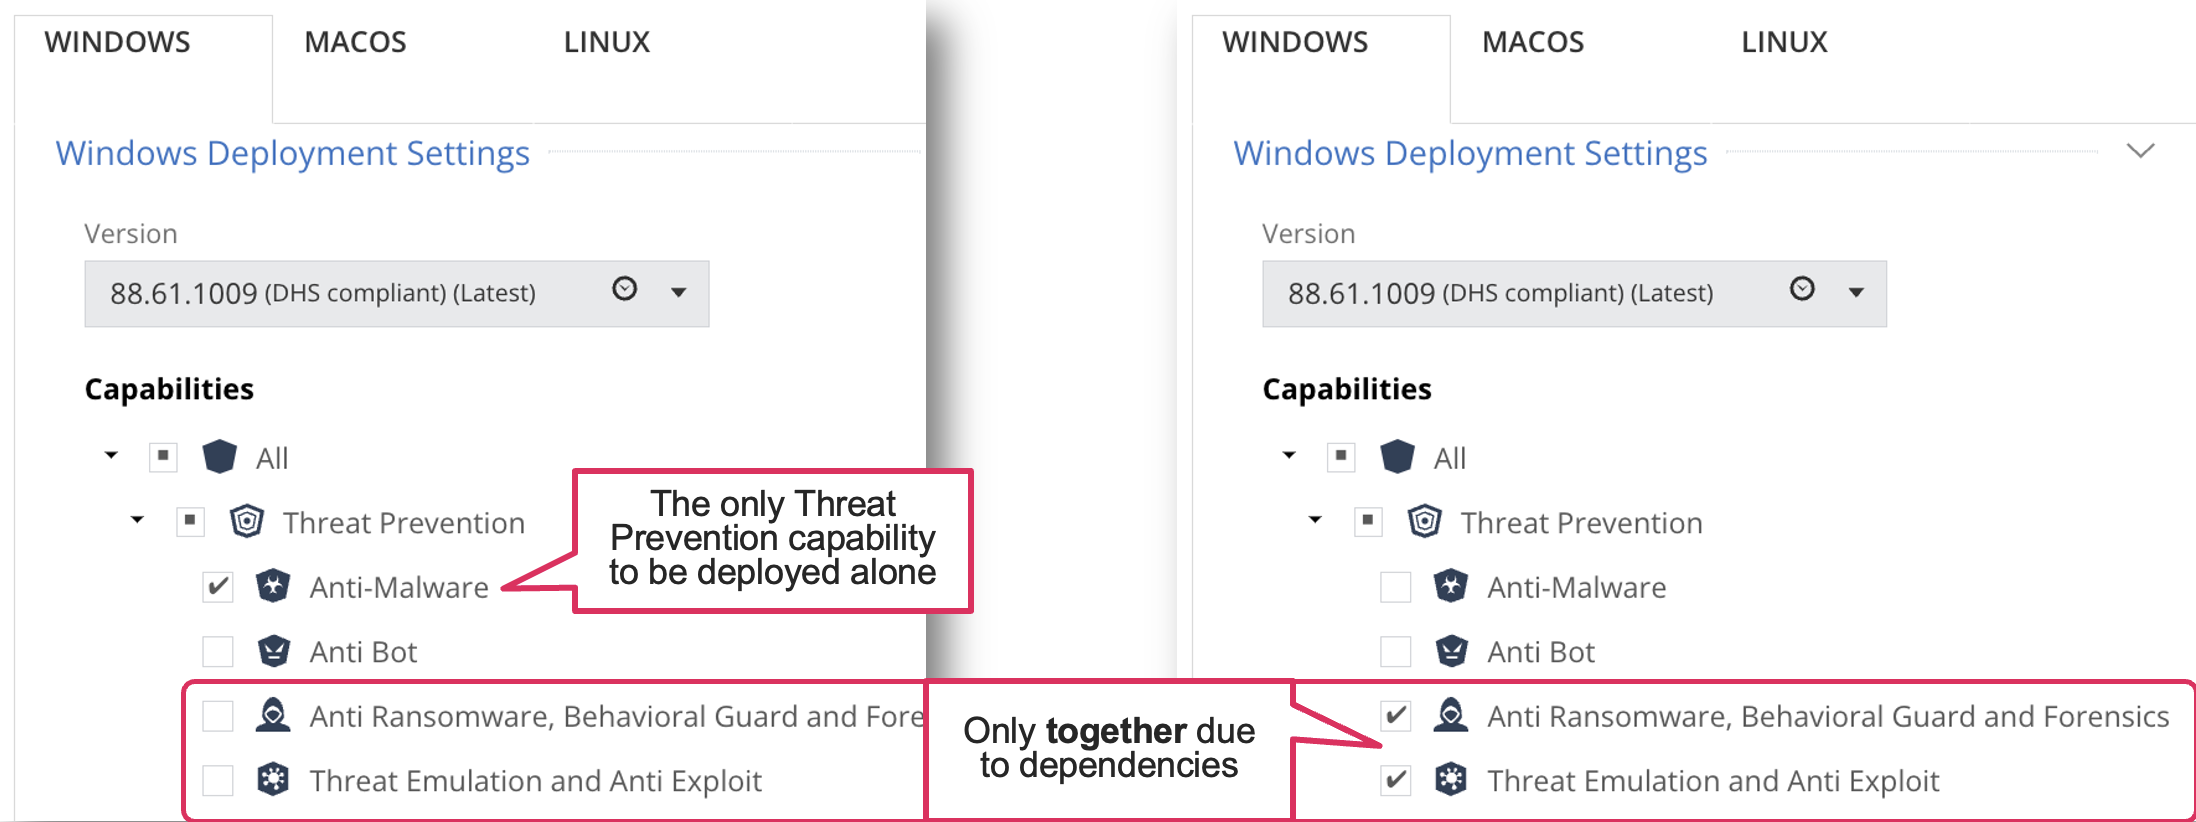
For troubleshooting purposes, you can temporarily uninstall selected security blades from the client via Software Deployment policy.
|
|
Caution - Do not change client version and capabilities at the same time. |
CPinfo
For client issues which require support tickets and TAC investigation, collect Harmony Endpoint security client logs.
To collect Harmony Endpoint client logs:
-
Do one of these:
-
Collect CPinfo from the client machine. See sk90445.

-
Manually collect relevant log files under
C:\ProgramData\CheckPoint\Logs\-
For Connectivity, deployment, upgrade issues, see
cpda.log -
For File sandboxing, browser extension features (Threat Emulation
 Check Point Software Blade on a Security Gateway that monitors the behavior of files in a sandbox to determine whether or not they are malicious. Acronym: TE. & Extraction, Zero-Phishing), Anti-Exploit, Static Analysis ML issues, see
 TELog.log.
-
-
-
Open a Service Request with TAC:
-
Escalate to local Check Point SE or Harmony Endpoint Architect.
Troubleshooting Browser Extension
For Browser extension issues, check the following:
-
Force a policy update by terminating all browser processes and restarting the browser.

Note - Browser processes may still be running in the background by default.
Alternatively, manually refresh the browser policy.
chrome://policy/
edge://policy/
brave://policy/
-
Verify that the current policy version has reached the client with the following flow:
-
On the Harmony Endpoint Administrator Portal, go to Web and Files Protection > versions > Threat Emulation.
-
On the Endpoint Security client, go to Advanced > View Policies.
-
-
On the browser, verify that the
te_cloud_api_keyis valid and is the expected license key:chrome://policy/edge://policy/brave://policy/


Client Troubleshooting Logs
Use the following log locations to troubleshoot issues.
|
Issue |
Logfile |
Comment |
|---|---|---|
|
Browser Extension errors |
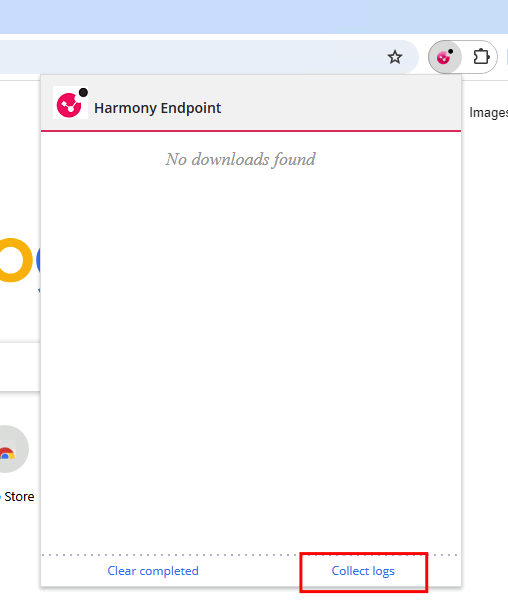
To collect the browser extension log file, from the Extension UI, go to Collect Logs.
|
Once collected, the log file will be available in the Downloads folder: |
|
Harmony Endpoint UI errors, deployment errors |
Harmony Endpoint client logs (CPinfo) |
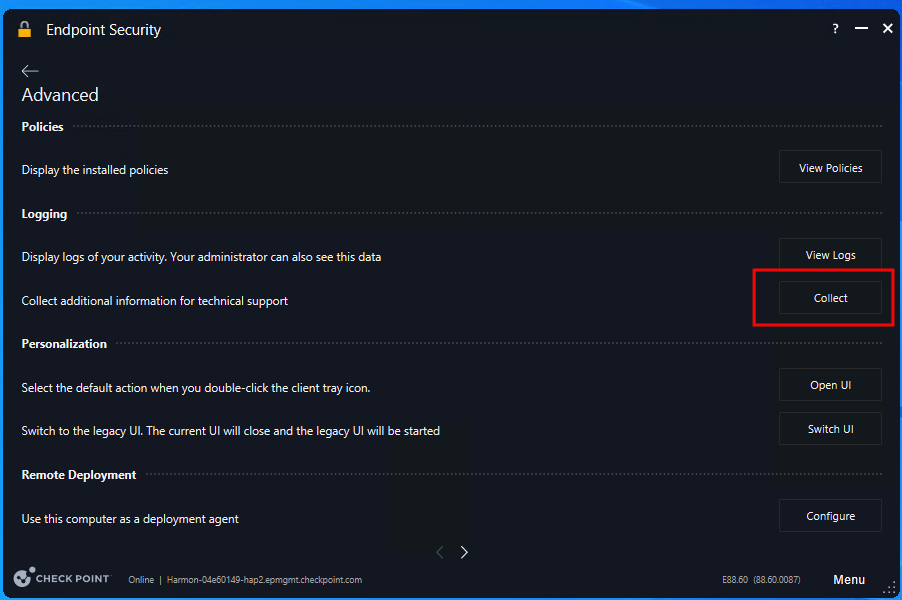
Collect logs from Endpoint Security client: Go to Advanced > Collect. |
|
Crashes / Dump Files |
|
|
|
Deployment issues |
|
|
|
False Positive / False Negative |
Use the following steps:
|
Wait for 15 minutes after False positive/False Negative and then copy EFR.db aside. Compress the files and create a zip file.
|