Configuring Threat Emulation (TE) Appliance for Endpoint Security
Prerequisites
For TE Appliances:
-
TE Appliance running on R81.10 or later.
-
TE Appliance has a valid Check Point license.
-
Internet connection for the TE Appliance.
For Device:
Use a Windows or a macOS machine with Endpoint Security Client connected to the Endpoint Security Management Server![]() Dedicated Check Point server that runs Check Point software to manage the objects and policies in a Check Point environment within a single management Domain. Synonym: Single-Domain Security Management Server..
Dedicated Check Point server that runs Check Point software to manage the objects and policies in a Check Point environment within a single management Domain. Synonym: Single-Domain Security Management Server..
Step 1 - Configure the TE Appliance on SmartConsole
-
 Configure the Security Policies
Configure the Firewall Rulebase as Accept to enable communication during the initial configuration.
-
Add a new profile
-
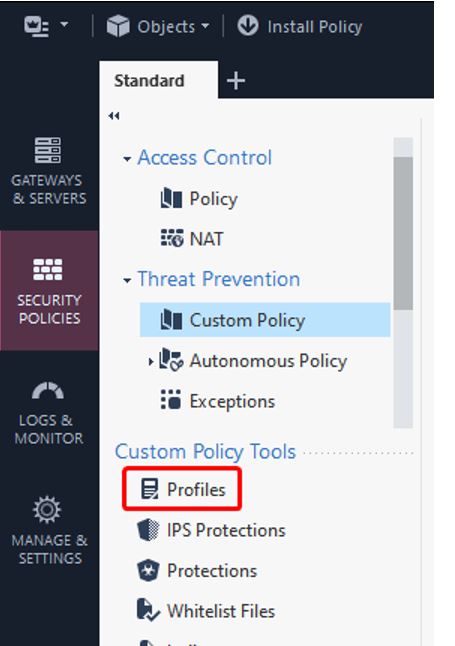
Go to the Security Policies tab.
-
In the Custom Policy Tools section, click Profiles.
-
Click New.

-
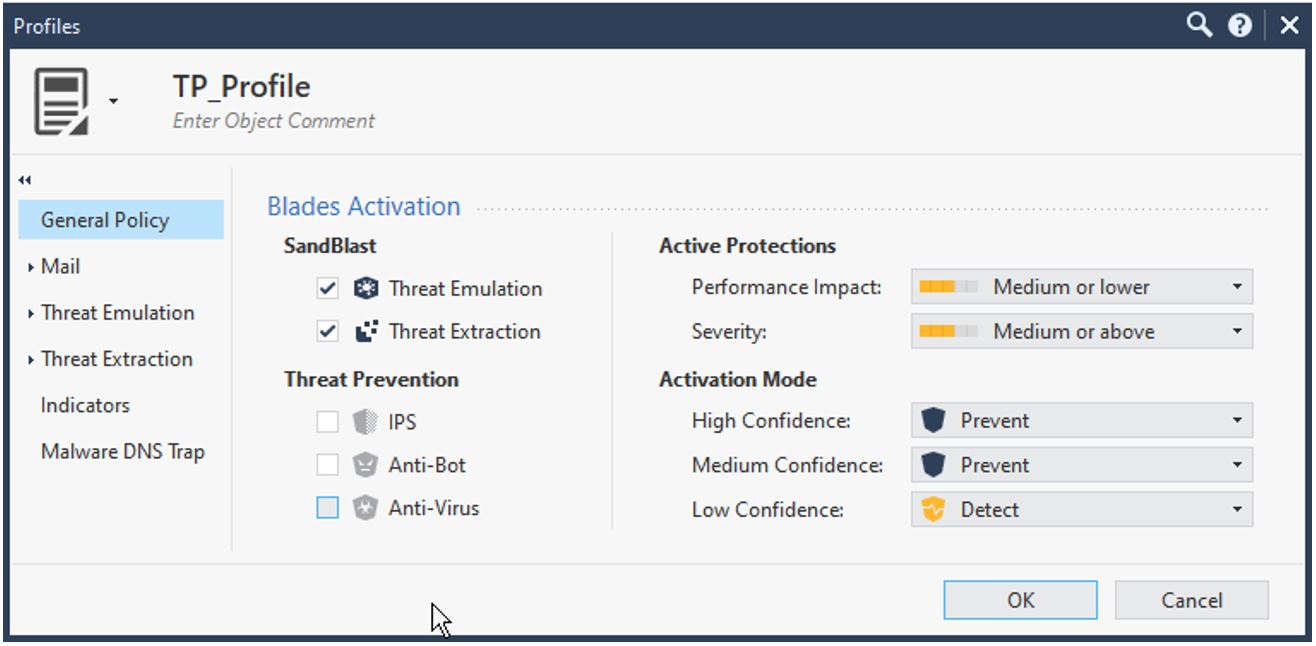
Enter a name for the profile . For example, TP_Profile.
-
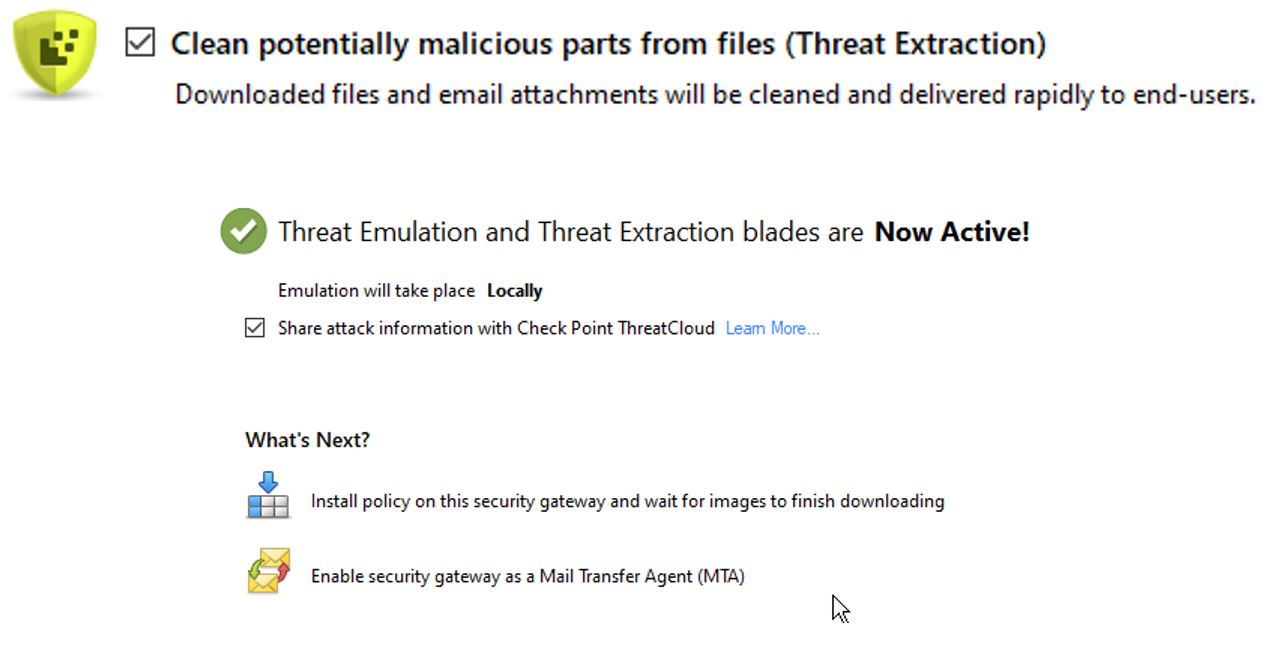
Enable Threat Emulation and Threat Extraction. Ensure that all other features are disabled.
-
Click OK.
-
-
Set up a profile for Threat Prevention policy
-
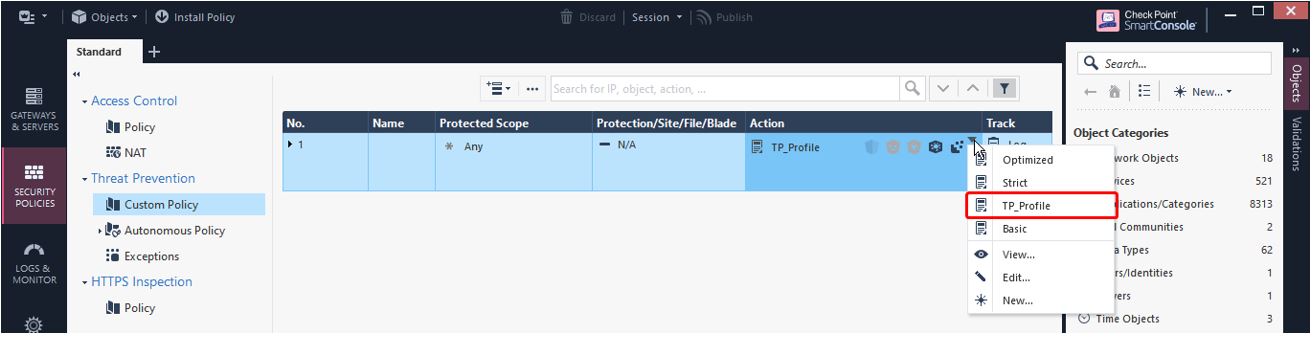
Navigate to Threat Prevention > Custom Policy.
-
Select the profile name you created while creating the new profile.
-
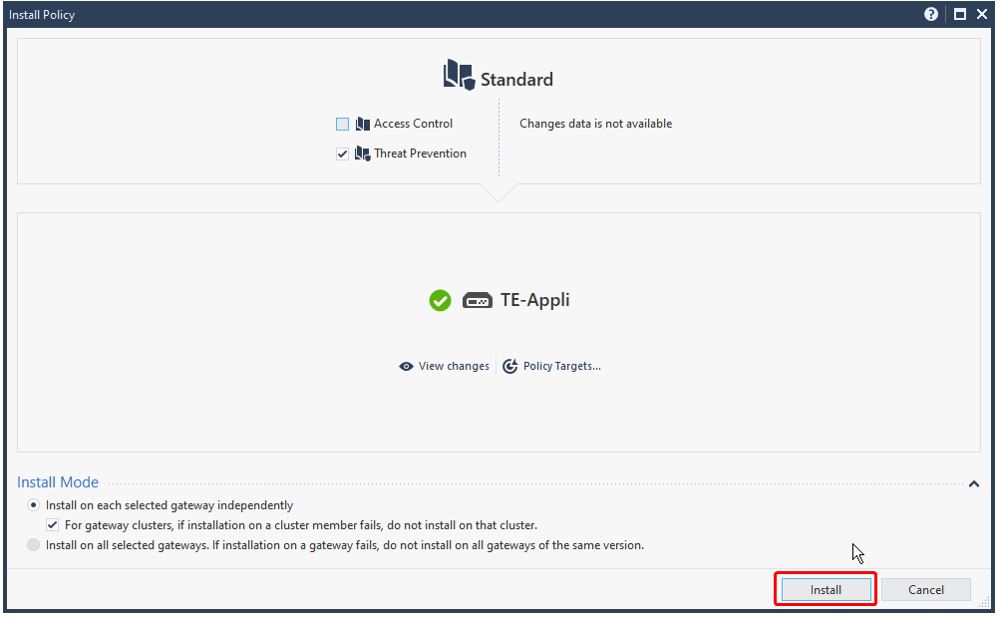
Click Install to apply the changes to the TE Appliance.
-
-
Configure the Gateway Object for TE Appliance
Set up the Secure Internal Communication (SIC)

Note - SIC
Secure Internal Communication. The Check Point proprietary mechanism with which Check Point computers that run Check Point software authenticate each other over SSL, for secure communication. This authentication is based on the certificates issued by the ICA on a Check Point Management Server. is auto-configured during the initial configuration. To reset the password, following these steps:-
Open SSH Client and type Expert mode.
-
Enter
cpconfigin the command line. -
Select Secure Internal Communication from the menu.
-
Once prompted, set a new SIC password.
-
Step 2 - Create a TE Appliance Object in the SmartConsole
-
Define a Gateway Object
-
Open SmartConsole.
-
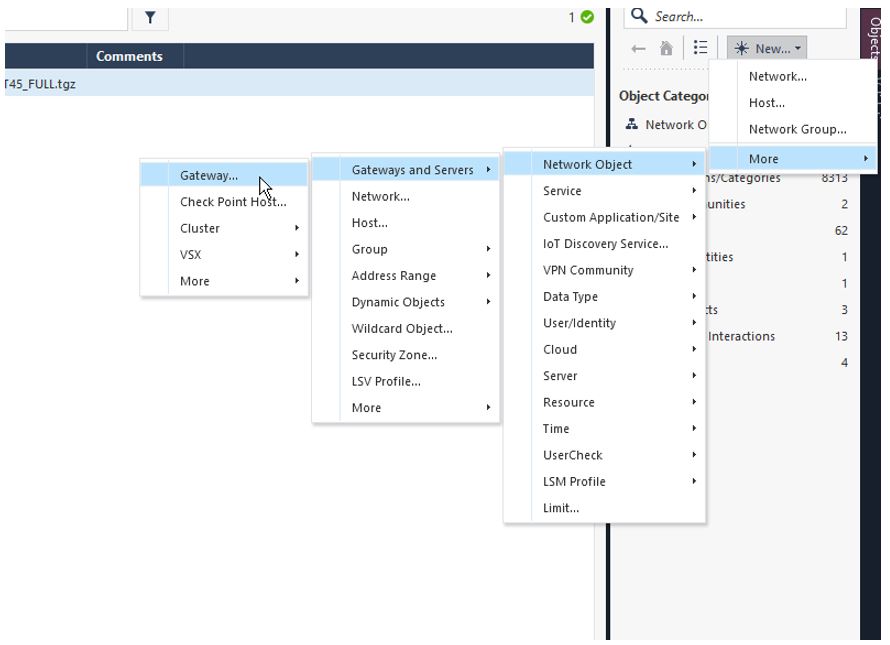
Go to Gateway> Gateways and Servers > Network Object > New Gateway.
-
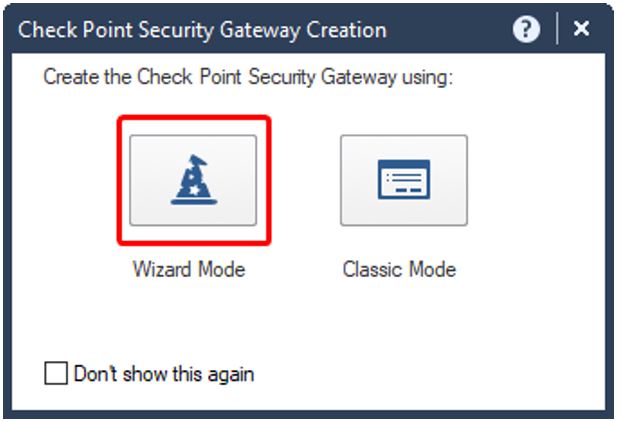
Select Wizard Mode.
-
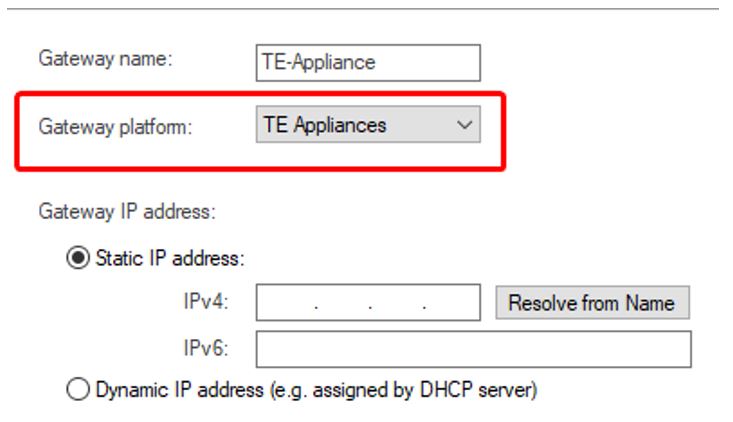
In the Gateway platform, select TE Appliances and enable Static IP address.
-
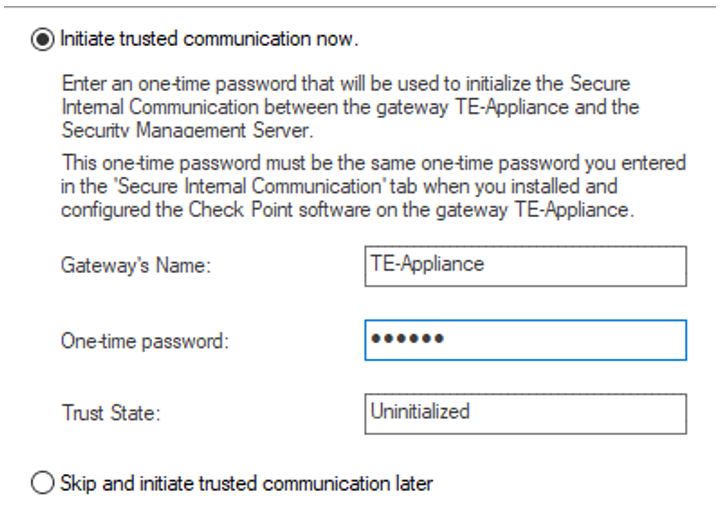
Enter the SIC password.
Note - Ensure that the Trust State is Initialized
-
-
Complete the Wizard setup.
-
-
Install the Security Policy
-
In the Gateway Object Properties, navigate to the Threat Prevention tab.
-
In the Blades section, do these:
Navigate to the Main Menu in the SmartConsole
Check Point GUI application used to manage a Check Point environment - configure Security Policies, configure devices, monitor products and events, install updates, and so on. and click Install Policy for the changes to appear.To enable Threat Prevention Features:
-
In the Custom Threat Prevention section, enable Threat Emulation Blade.
-
Set the Threat Emulation location to Locally on this Threat Emulation Appliance

-
Enable Threat Extraction.
-
Save and close the settings.
-
-
-
Configure UserCheck Settings on the TE Appliance
-
To enable HTTPS for the UserCheck Portal, go to TE Appliance Object > UserCheck> Settings
Ensure that the URL starts with either an IP address or an FQDN.
-
By default, the system uses the built-in SSL certificates in SmartConsole. If you want to use your own SSL certificates, navigating to the Certificates section, click Import and upload the valid SSL certificate.
-
Ensure that the UserCheck portal is enabled to be accessible to all interfaces by navigating to UserCheck settings > Accessibility > Accessible from all interfaces.
Note - This setting enables the Security Gateway
Dedicated Check Point server that runs Check Point software to inspect traffic and enforce Security Policies for connected network resources. to receive requests from the Security Management Server Check Point Single-Domain Security Management Server or a Multi-Domain Security Management Server. via internet. To ensure secure communication, check the configuration of the Threat Prevention API. -
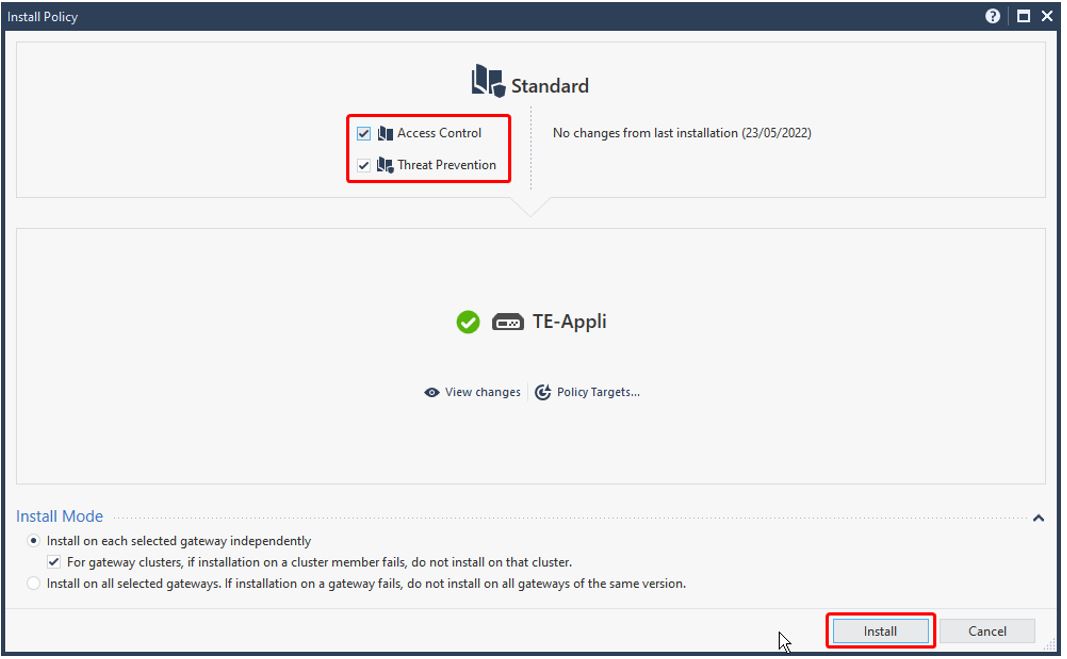
Install both policies on the TE Appliance to apply the changes.
-
Step 3 - Enable Threat Prevention API
-
To modify API Settings using the GuiDBedit tool, close all the active SmartConsole sessions.
-
Launch the GuiDBedit tool and connect to the Security Management Server.
-
Press CTRL+F and search for the
enable_scrub_web_servicefield. -
Change the value of all the matching entries to true.
-
Save the configuration by navigating to File> Save All and close the GuiDBedit Tool.
Note - For the API to properly function, set the
enable_scrub_web_serviceentry to true. -
In the SmartConsole, open TE Appliance Object Properties
-
Navigate to the Threat Extraction tab.
-
Enable Web API.
-
Connect to the SSH Client and switch to Expert mode to enable API access and logging.
-
Open the /opt/CPUserCheckPortal/phpincs/conf/TPAPI.ini file in a text editor. For example, VI editor.
-
Locate
logs_api_enabledand change its value to TRUE.
Note - When Threat Prevention is used, you can retrieve the original File by allowing logging for Zero Phishing
Check Point Software Blade on a Security Gateway (R81.20 and higher) that provides real-time phishing prevention based on URLs. Acronym: ZPH.. -
Execute the following commands to configure and enable the web service.
[Expert@HostName:0]# pkill scrubd-
[Expert@HostName:0]# /opt/CPUserCheckPortal/scripts/configure_scrub_web_service.sh enable
Note - If no API key has been set, the script will auto-generate a random key. This key can be viewed and modified in the /opt/CPUserCheckPortal/phpincs/conf/TPAPI.ini file.
-
[Expert@HostName:0]# mpclient restart UserCheck
-
Run the following command on TE Appliance to enable Logging for Threat Emulation
Check Point Software Blade on a Security Gateway that monitors the behavior of files in a sandbox to determine whether or not they are malicious. Acronym: TE..[Expert@HostName:0]# tecli advanced remote emulator logs enable
Note - This requires a Threat Emulation Engine Update 6 or later. For more information about upgrade instructions and version details, see sk95235.
-
To check the configuration of the TE Appliance and to respond to the Threat Emulation API, enter https://<IP_Address_of_TE_Appliance>/UserCheck/TPAPICheck in a browser.
A 404 Page Not Found message indicates that the API endpoint is reachable and active.

|
|
Note - If you receive an Insecure Response or face certificate error in your browser, it may be caused by one of the following:
|
Step 4 - Threat Emulation Configuration in Check Point Portal
-
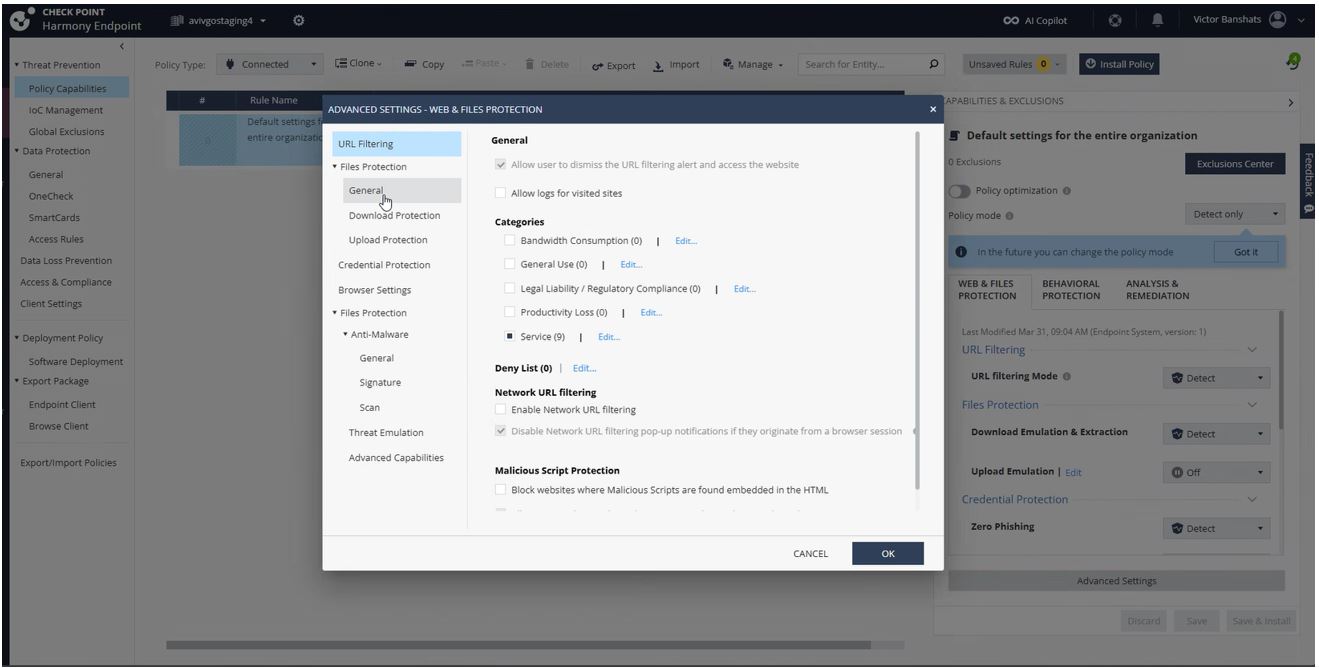
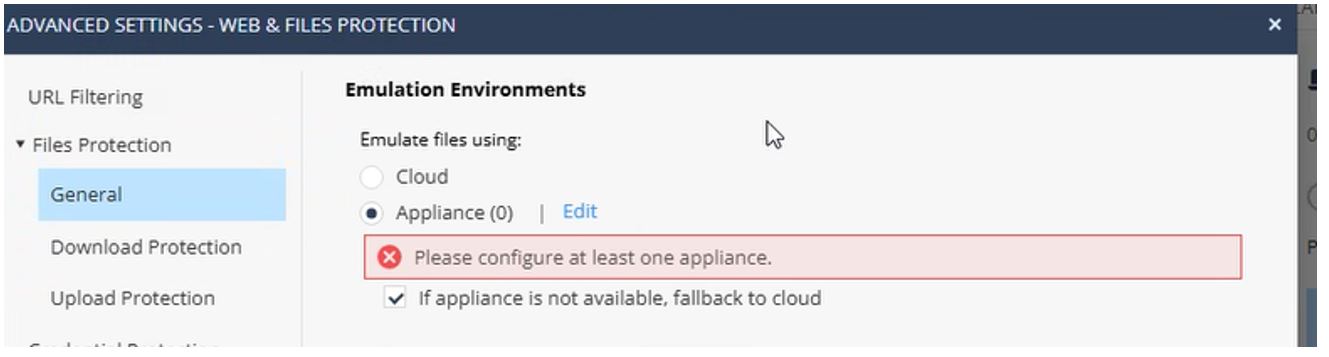
Navigate to Policy Capabilities > Threat Prevention > Web & Files Protection > Advanced Settings> Files Protection > General.
-
Change the Cloud option to Appliance.
-
Enable the If Appliance is not available, fallback to cloud checkbox.
-
Click Edit.
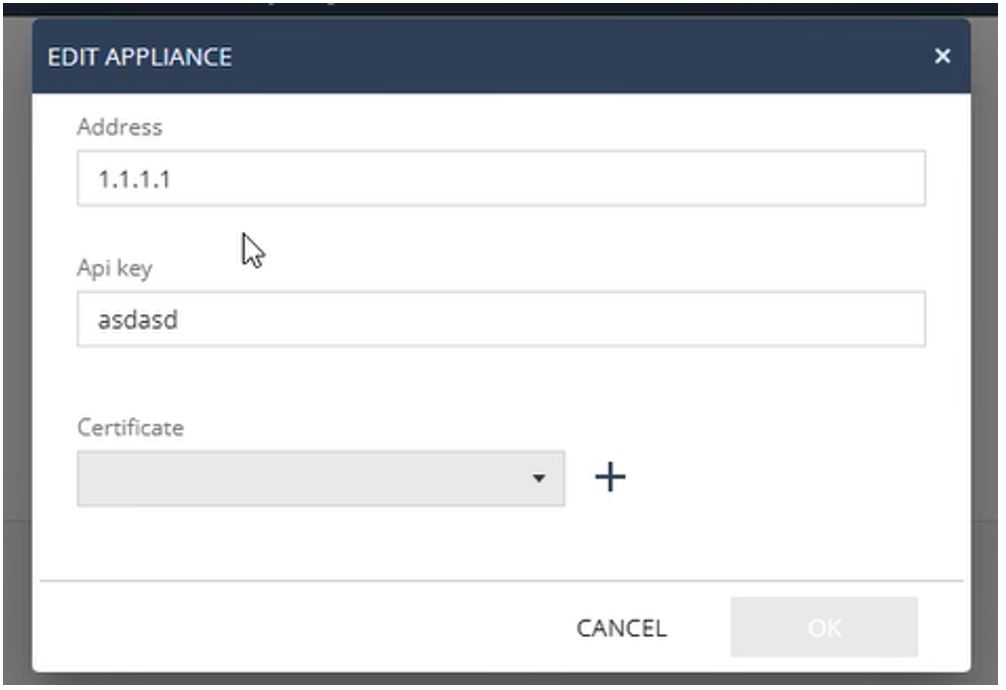
-
In the Address field, enter the FQDN or IP address of the Appliance.
-
Enter the API key.
Note - For instructions on generating and handling API key, see Check Point Portal Administration Guide.
-
You can use the default SSL certificate from the Check Point Portal or add your own SSL certificate.
Note - If you use your own SSL certificate, ensure that you install and distribute the SSL certificate to all the endpoint clients (Windows and macOS).
-
Click OK.
-
Click Save and then Install Policy.
Known Limitations
-
Secure Internal Communication (SIC) must be successfully established between SmartConsole and the on-premises TE appliance. This is the same SIC trust mechanism used between Management Servers or between Management and Gateways. As SIC relies on specific TCP ports for trust communication, these ports must remain open and reachable between the Endpoint Cloud server and the TE appliance.
-
Certain backend configuration values require modification through Check Point internal tools (for example, GuiDBEdit). If such changes are required, contact Check Point Support for assistance.
-
Using a TE appliance with an Endpoint Cloud server in a fully air‑gapped environment is not supported.