Appendix C - Deploying Harmony Endpoint Security Client Using Microsoft Intune
You can use Microsoft Intune or Microsoft Endpoint Manager to deploy Harmony Endpoint Security Client on Windows-based endpoints.
Use Case
If you already use Microsoft Intune or Microsoft Endpoint Manager to manage your organization’s endpoints, you can also use the same Microsoft Intune or Microsoft Endpoint Manager to deploy Endpoint Security Client on these managed endpoints.
Prerequisites
-
A Microsoft 365 account/subscription. for Microsoft Intune or Microsoft Endpoint Manager.
-
You must be a Global Administrator or an Intune Service Administrator (Intune Administrator) to deploy the Harmony Endpoint Security Client. For more information on roles and permissions, see Role-based access control (RBAC) with Microsoft Intune.
-
You must have enrolled Windows endpoints to Microsoft Intune or Microsoft Endpoint Manager. For more information, see Set up enrollment for Windows endpoints.
-
Before you deploy Harmony Endpoint Security Client, make sure all your enrolled endpoints are contained in a single group. If you do not have such a group, create a new group and assign your endpoints and users to it.
Preparing the Harmony Endpoint Client Windows Package for Deployment
-
Log in to Infinity Portal and access the Harmony Endpoint Administrator Portal.
-
Go to Overview and click Download Endpoint on the top banner.
You can also click Policy > Deployment Policy > Software Deployment and click Download Endpoint on the top banner.
-
Select the required Download version and Virtual group for Windows.
-
Click Download.
The EndpointSetup.exe file downloads.
-
Create an MSI file from the downloaded EndpointSetup.exe file by running this command.
EndpointSetup.exe /CreateMSIThe EPS.msi file is created.
Harmony Endpoint Configuration
After you deploy the Harmony Endpoint Security Client, the installation does not start immediately. The user can postpone the installation for up to 48 hours.
To start the Harmony Endpoint Security Client installation immediately, before Creating the Harmony Endpoint Windows App in Microsoft Intune , do these:
-
Log in to Infinity Portal and access the Harmony EndpointAdministrator Portal.
-
Go to Policy > Client Settings.
-
In the right section Capabilities & Exclusions, click the Installation & Upgrade tab.
-
Clear the Enable the user to postpone the client installation or upgrade checkbox and click Save.
-
Click Install Policy to deploy the rule
 Set of traffic parameters and other conditions in a Rule Base (Security Policy) that cause specified actions to be taken for a communication session. to the endpoints.
 -
In the Install Policy pop-up screen, click Save & Install.
Creating the Harmony Endpoint Windows App in Microsoft Intune
-
Log in to Microsoft Intune or Microsoft Endpoint Manager admin center.
-
Go to Apps. In the section By Platforms, select Windows.
The Windows apps page opens.
-
Click Add.
-
In the Select app type pane, select Line-of-business app, and click Select at the bottom.
The Add app page appears.
-
Under the App information, click Select app package file.
-
In the App package file pane, upload the EPS.msi file you created in Preparing the Harmony Endpoint Client Windows Package for Deployment and click OK.
-
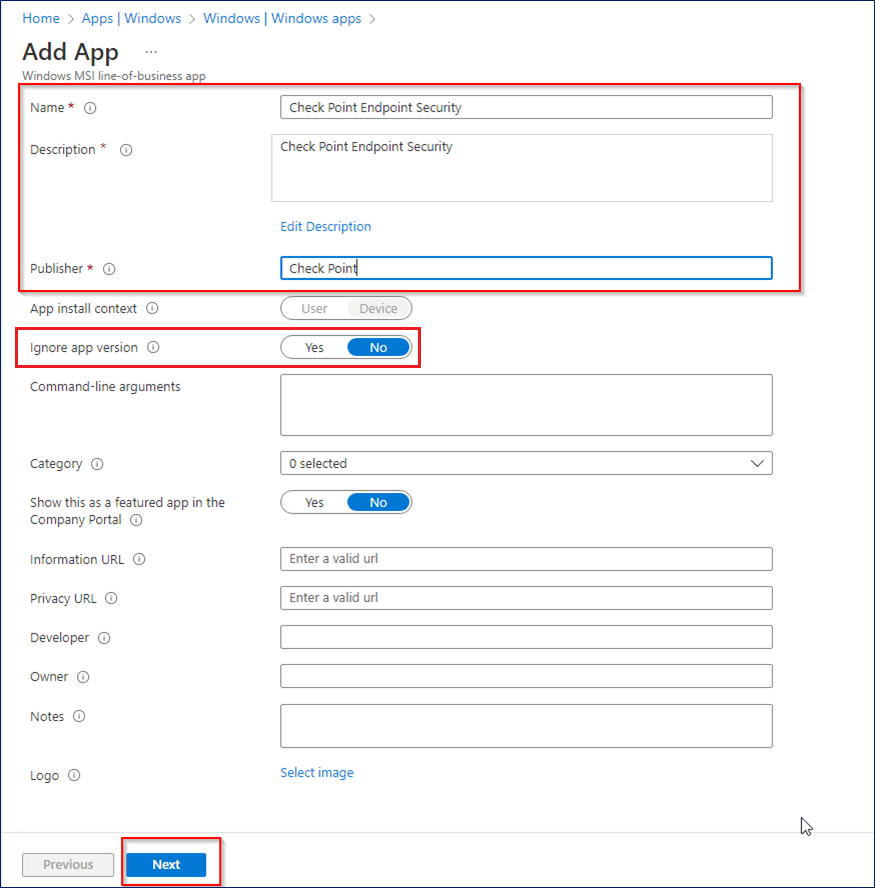
Enter the Name, Description, and Publisher information.
-
Select Yes for Ignore app version and click Next.
-
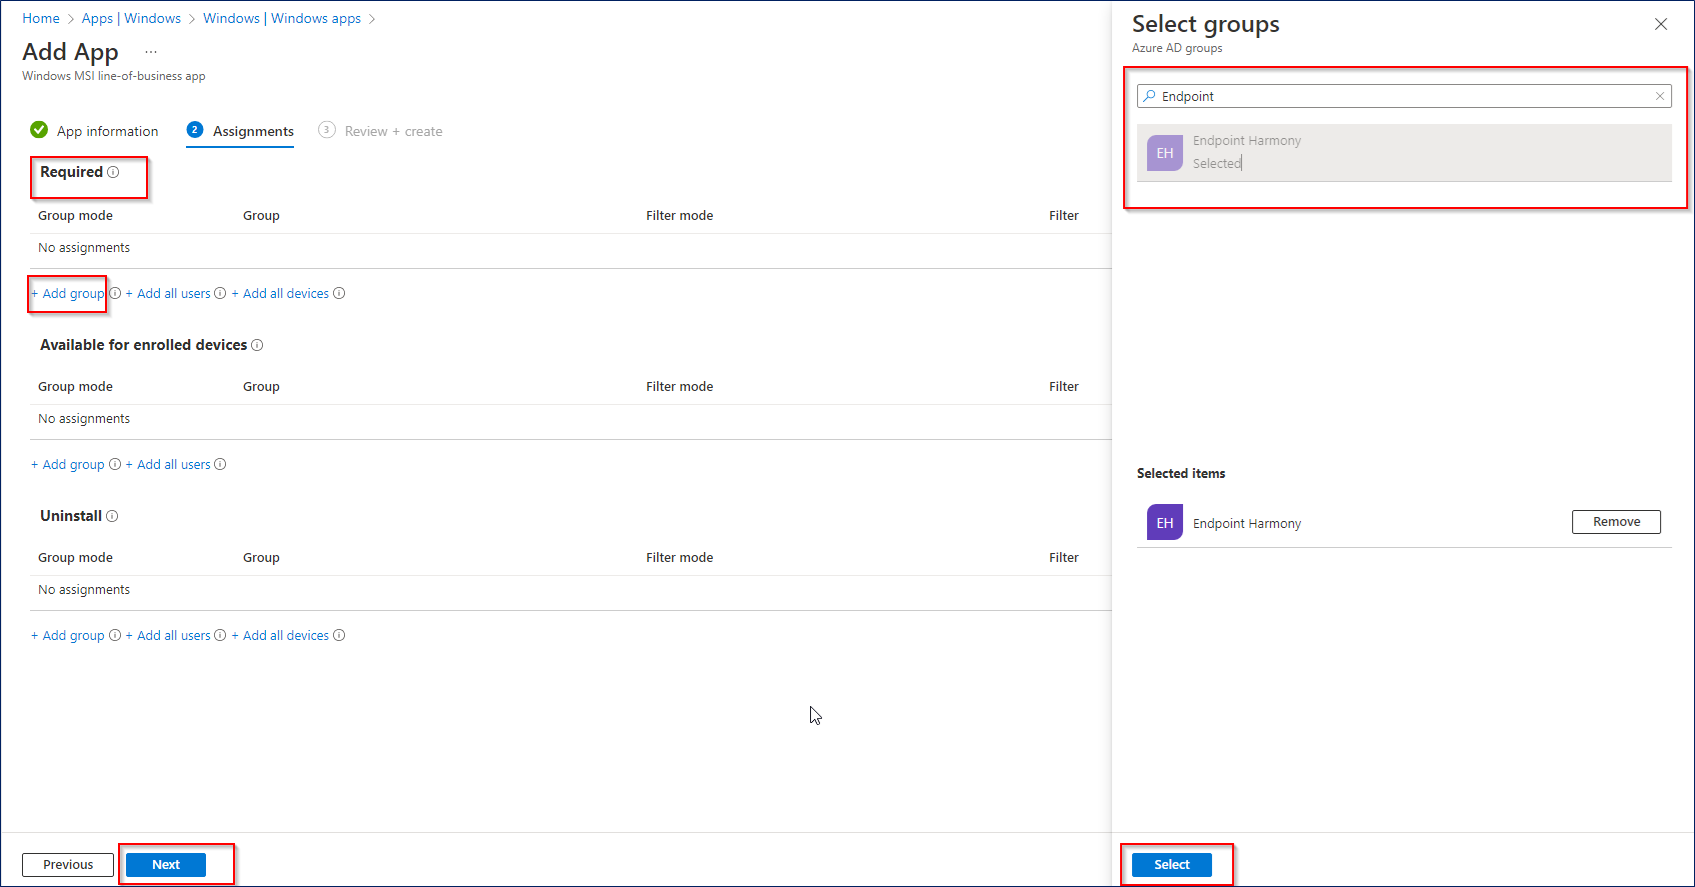
Go to Assignments tab and assign the app to the groups that you want to deploy Harmony Endpoint Security Client. For more information, see Assign apps to groups with Microsoft Intune.
-
In the Assignments tab, under Required, click Add group.
-
In the Select groups pane, select the relevant group and click Select.
-
In the Add app page, click Next.
-
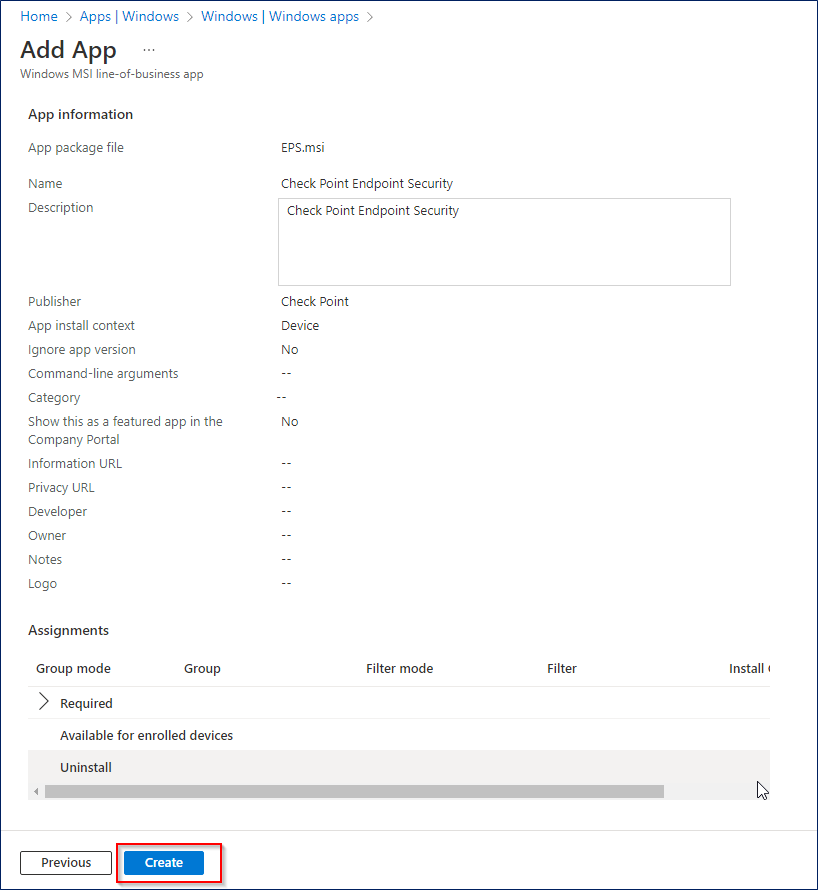
Review the information and click Create.
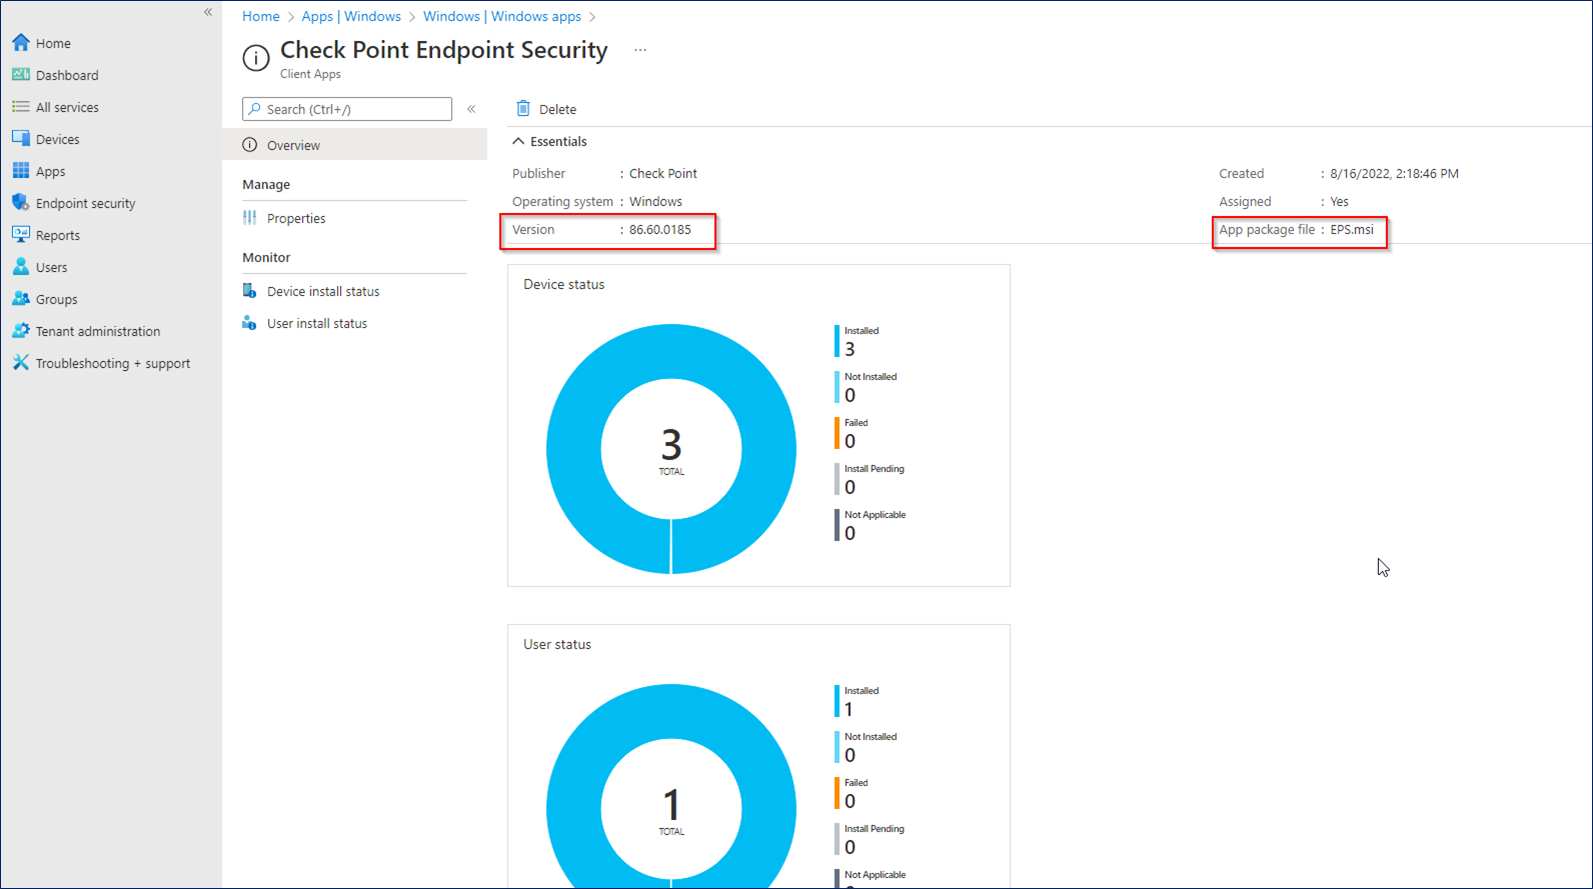
After the EPS.msi file is uploaded, you can see information about the newly created app.


