Creating the List of Applications on the Reference Device
You need to generate a list of the applications on your reference device. This is a Windows device with a tightly-controlled disk image that contains the typical applications used on protected Endpoint devices in your organization. If you have several different standard images, set up a reference device for each.

|
Important - The reference device must be free of malware. |
To generate the list of applications, run the Appscan command on the reference device. This generates an XML file that contains the details of all the applications and operating system files on the device. In the XML file, each application, and each application version, is uniquely identified by a checksum. A checksum is a unique identifier for programs that cannot be forged. This prevents malicious programs from masquerading as other, innocuous programs.
To collect a list of applications on the reference device:
-
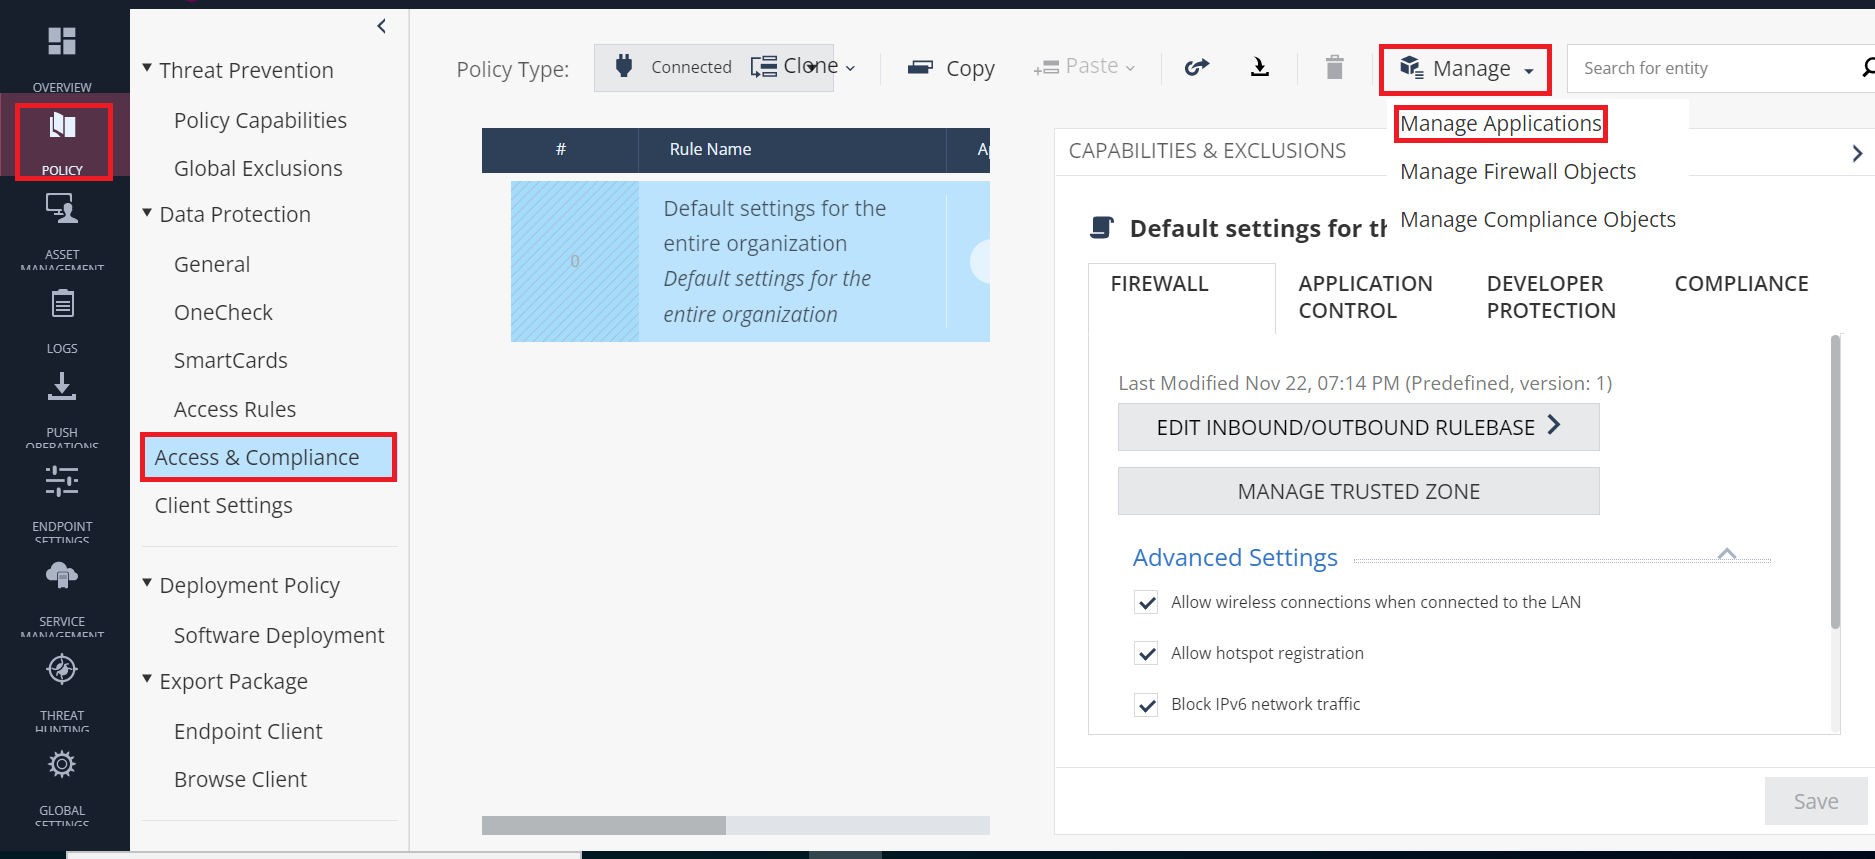
Go to Policy > Access & Compliance > Manage > Manage Applications.
-
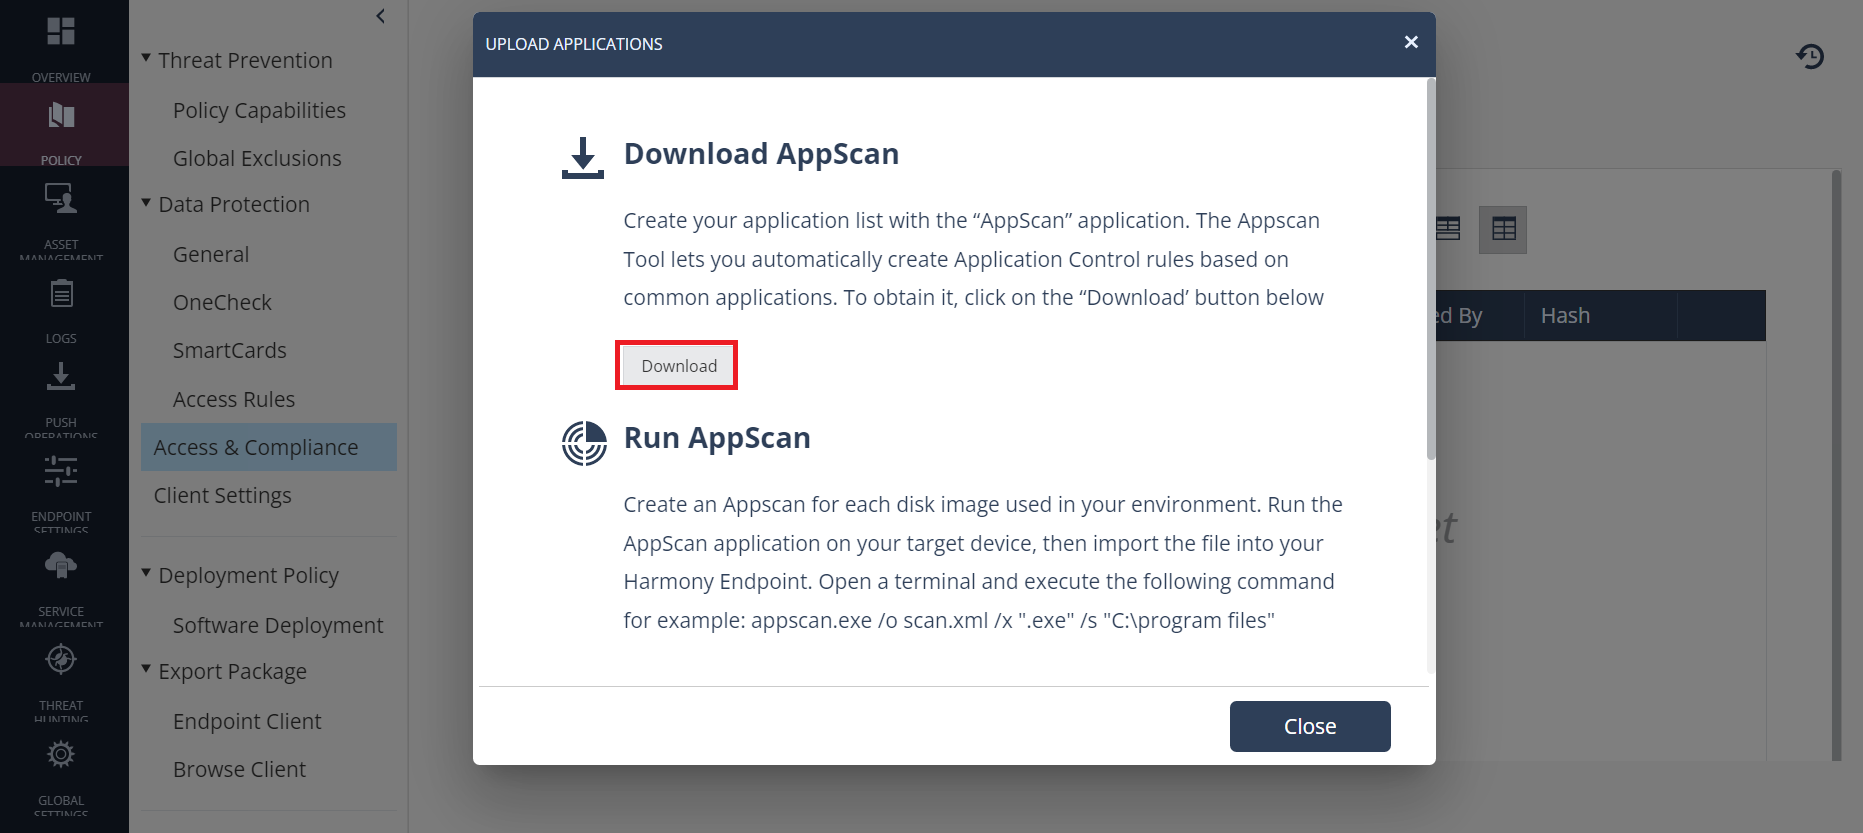
Under Manage Applications, click Upload Applications.

The Upload Applications window appears.
-
Under Download Appscan, click Download.
-
Run the Appscan application on your target device with the applicable parameters. See Appscan Command Syntax.
This creates an Appscan XML file for each disk image used in your environment. When the scan is complete, an output file is created in the specified directory. The default file name is
scanfile.xml.
Appscan Command Syntax
Description
Scans the host device and creates an XML file that contains a list of executable programs and their checksums.
Syntax
|
|
Parameters
|
Parameter |
Description |
|---|---|
|
|
Sends output to the specified file name. If no file name is specified, |
|
|
Output file name and path. |
|
|
Specifies the directory, including all subdirectories, to scan.
|
|
|
Specifies the file extension(s) to include in the scan.
|
|
|
Include all executable files in the specified directory regardless of the extension. Do not use |
|
|
Includes additional file properties for each executable. |
|
|
Shows progress messages during the scan. |
|
|
Shows progress and error messages during the scan. |
|
|
Shows warning messages during the scan. |
|
or
|
Shows the command syntax and help text. |
Examples
-
C:\>appscan /o scan1.xmlThis scan, by default, includes .exe files in the current directory and is saved as
scan1.xml. -
C:\>appscan /o scan2.xml /x ".exe;.dll" /s "C:\"This scan includes all .exe and .dll files on drive C and is saved as
scan2.xml. -
C:\>appscan /o scan3.xml /x ".dll" /s c:\program filesThis scan includes all .dll files in
c:\program filesand all its subdirectories. It is saved asscan3.xml. -
C:\>appscan /s "C:\program files" /eThis scan includes all executable files in
c:\program filesand all its subdirectories. It is saved as the default file namescanfile.xml.