Viewing Computer Information
Asset Management View
The
|
|
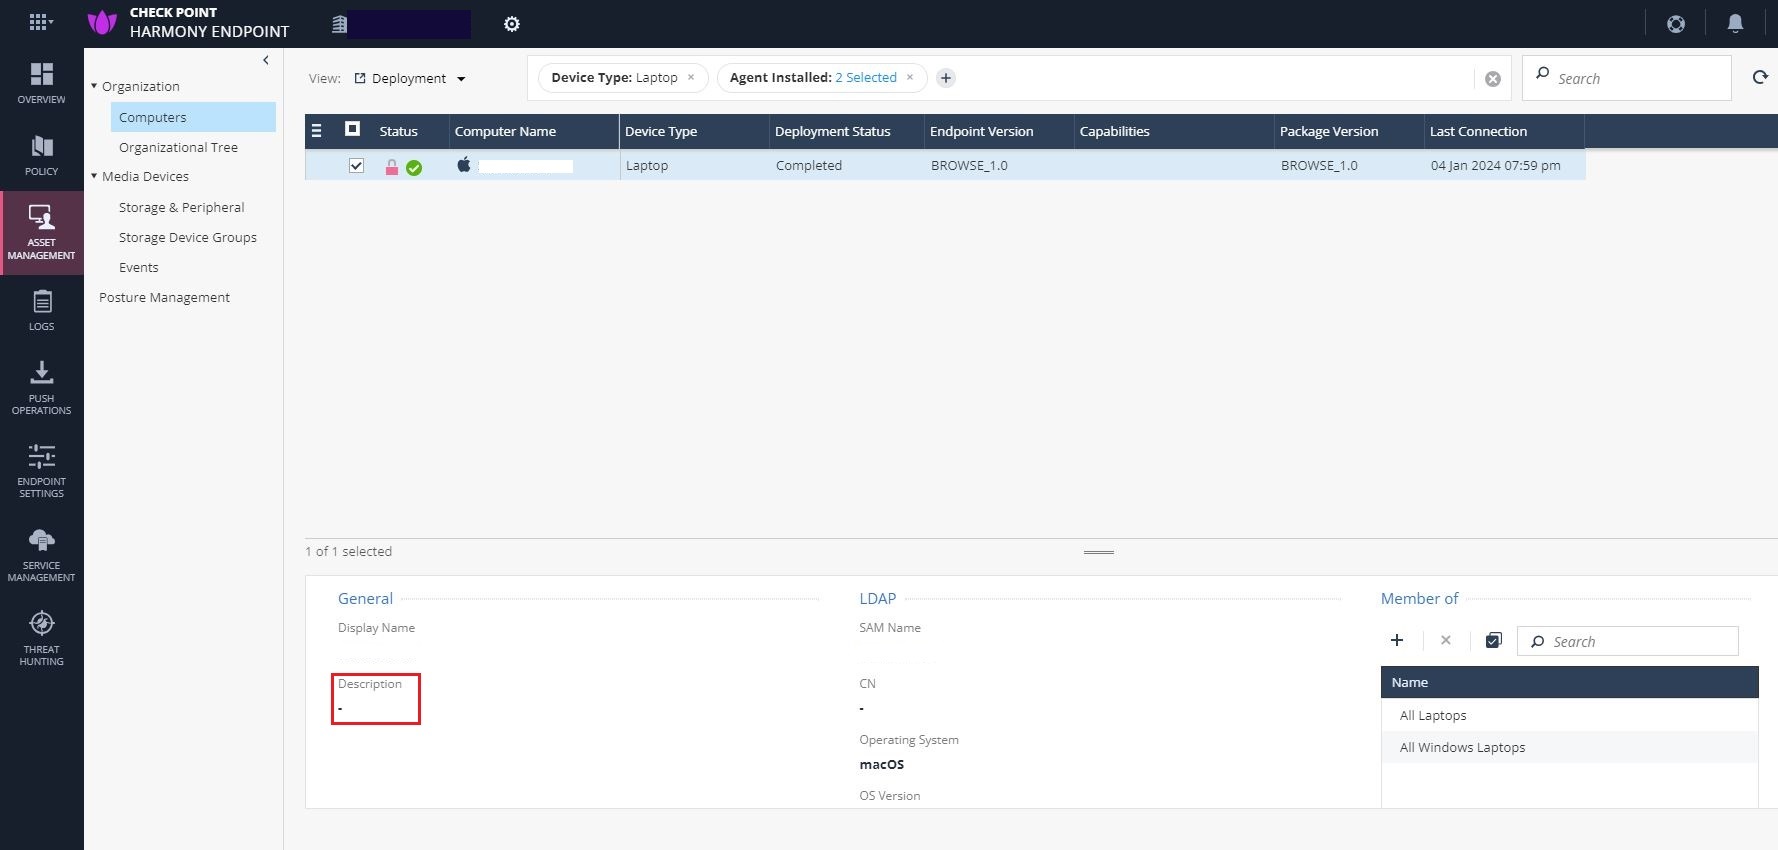
Note - The General > Description at bottom pane shows the text entered in the Active Directory for the asset. If no text is entered, it is blank. |

Select a View
From the View drop-down on the top left, select a preconfigured view:
-
Deployment
-
Compliance
-
Health
-
Full Disk Encryption
-
Anti-Malware
-
Host Isolation
-
Anti-Bot
-
Policy Information
-
Custom
Creating a Custom View
You can create a custom view with the filters and table column you specify.
To create a custom view:
-
Apply the filters and select the required columns for the table and click Update. For more information, see Table Filters and Column Description.
-
From the View drop-down, click Save View.
The Save New View window appears.
-
In the View name field, enter a name for the view. For example, Active Laptops.
-
In the Select what will be saved in this view section, select the required checkbox:
-
Filters
-
Table Columns
-
-
Click OK.
-
To delete a Custom View:
-
From the View drop-down, go to Custom Views.
-
Hover over the custom view and click
 .
.
-
Status Icon
The icon in the Status column shows the client or computer status.
|
Status Icon |
Description |
|---|---|
|
|
Indicates |
|
|
Indicates Browse Security client. |
|
|
Indicates that the client connection is active. |
|
|
Indicates that a new computer was discovered that has no client installed. |
|
|
Indicates that the computer was deleted from the Active Directory or from the Organizational Tree. |
|
|
Indicates a pending Network One-Time Logon or Network Password Change request from a user.
Notes:
|


Filters
Use the Filters pane on the top of the screen to filter the information in the table.
To add filters:
-
In the Filters pane, click +.
-
Select the required filter or search for the filter using the Search bar. For information on the filters, see Table Filters and Column Description.
-
Click Update.
The system updates the table automatically for the added filters.
To modify the table:
-
Click
 on the top left header of the table.
 -
To select the columns for the table, search and select the columns.
-
To change the column position in the table, drag and drop the column to the required position.
-
Click Update.
Tip - The URL in the address bar of the web browser captures the filters you specify for the table. You can bookmark the URL to go to the Asset Management > Computers page and view the table with the specified filters.
|
Filter / Column Name |
Description |
||
|---|---|---|---|
|
Status |
Status of the connected computer. For more information, see Status Icon. |
||
|
Computer Name |
Name of the connected computer. |
||
|
Active |
Active computers. Computers that have communicated with Endpoint Security in the last 30 days. |
||
|
Deleted |
Deleted computers. |
||
|
Domain Name |
Domain name of the connected computer. |
||
|
Agent Installed |
|
||
|
Endpoint version |
|
||
|
Operating System |
Version of the Operating System installed on the computer. |
||
|
Device Type |
Type of the computer (Desktop or Laptop). |
||
|
Compliance status of the computer. |
|||
|
Admin Comment |
Comment for the device. For example, This computer is used by Bob and Jane. |
||
|
Deployment Status |
Deployment status of the computer. |
||
|
Deploy Time |
Time when the client was installed on the computer. |
||
|
Inactive Capabilities |
Capabilities that are not active on the computer. Reasons can be any of these:
|
||
|
Deployment Error Code |
Error code of the failed deployment. |
||
|
Deployment Error Description |
Error description of the failed deployment. |
||
|
OS Build |
Operating System build number of the computer. |
||
|
Organizational Unit |
Active directory tree of your organization. |
||
|
FDE Status |
|||
|
FDE Version |
Full Disk Encryption engine version. |
||
|
Pre-boot |
Full Disk EncryptionPre-boot screen status of the computer. |
||
|
Pre-boot Status Updated On |
Full Disk EncryptionPre-boot screen status last update time. |
||
|
TPM Id |
Trusted Platform Module (TPM) Manufacturer ID of the computer. |
||
|
TPM Status |
TPM status of the computer. |
||
|
TPM Version |
TPM specification version implemented in the computer. |
||
|
Isolation Status |
Isolation status of the computer. |
||
|
Last Connection |
Last connection date of the computer. |
||
|
Endpoint CPU Tuning |
Recommended CPU tuning usage based on the Run Diagnostics Push Operation performed either manually or automatically every 4 hours.
Click the tuning recommendation level to view the diagnostics report. |
||
|
Synced On |
Sync date of the computer. |
||
|
Last Logged In User |
Last logged in user name on the computer. |
||
|
Last Logged In FDE User |
Last logged in user name on the Full Disk Encrypted computer. |
||
|
Anti-Malware blade status of the computer. |
|||
|
Anti-Malware Updated on |
Last update time of the Anti-Malware blade. |
||
|
Virtual Groups |
Pre-defined and custom virtual groups of the computer. |
||
|
Full Disk Encryption locked users that are pending for help (One-Time Logon or Password Change) |
|||
|
Anti-Malware Dat Version |
Dat version of the Anti-Malware. |
||
|
Dat Date |
Dat date in a human readable format (Example: 09 Apr 2018 10:52 AM) |
||
|
Total Infected |
Number of files infected on the computer as detected by Anti-Malware. |
||
|
Anti-Malware Infections |
Anti-Malware name of infections found on the computer. |
||
|
Package Name |
Software Deployment package name (Example: Check Point Endpoint Total Security x64) |
||
|
Package Version |
Client version installed on the computer (Example: 86.25.5060) |
||
|
Software Deployment Policy Name |
Deployment policy name installed on the computer. |
||
|
Software Deployment Policy Version |
Deployment policy version installed on the computer. |
||
|
Anti-Bot blade status on the computer. |
|||
|
Protection Name |
Anti-Bot protection name. |
||
|
Scanned on |
Anti-Malware last scan time. |
||
|
Total Quarantined |
Number of files quarantined by Anti-Malware. |
||
|
Compliance Violations |
Name of compliance violation on the computer. |
||
|
Smart Card Status |
Smart Card blade status on the computer. |
||
|
Enforced & Installed Policy Name |
Enforced and installed policy name. |
||
|
Enforced & Installed Policy Version |
Enforced and installed policy version. |
||
|
Threat Emulation availability status. |
|||
|
Threat Emulation Reputation Status |
Threat Emulation reputation status. |
||
|
Static Analysis Update |
Last time when the Threat Emulation Static Analysis was updated. |
||
|
Offline Reputation Update |
Last time when the Threat Emulation Offline Reputation was updated. |
||
|
Behavioral Guard Update |
Last update time of Behavioral Guard. |
||
|
Installed Patch |
Installed DA Windows patch version. For information on patch upgrade, see Local Deployment Options. |
||
|
Policy Profile |
Profiles available for each blade in the policy. |
||
|
Threat Hunting Status |
Threat Hunting status on the Endpoint Security Client. The supported statuses are:
|
||
|
Threat Hunting Error Description |
Threat Hunting describes the reason why Threat Hunting is not running on the Endpoint Security Client. The supported values are:
|
||
|
Anti-Malware License Expiration Date |
Shows the expiry date and time of the Anti-Malware license. |
||
|
Browser Status |
Shows the browser and the Browse Security extension status on the endpoint. The supported statuses are:
|
||
|
Anti-Bot Last Update |
Shows the date and time when the signatures of the Anti-Bot blade were last updated. For example, 07 Jun 2023 04:53 PM. The other statuses are:
|
||
|
Posture Last Scan Status |
Shows the status of the latest scan. The statuses are:
|
 indicates that the Chrome browser is not installed.
 indicates that the Edge browser is active and the extension on it was detected.
 indicates that the Brave browser is active but the extension is not detected. Contact
 Working with the Computers Table
-
Hover over the column and click
 .
. -
From the drop-down :
-
To adjust the column position in the table, drag and drop the column to the required position.
-
To copy the value of a cell to the clipboard, hover over a cell and click Copy.
-
To copy the values of a row to the clipboard, hover over a row and click Copy row.
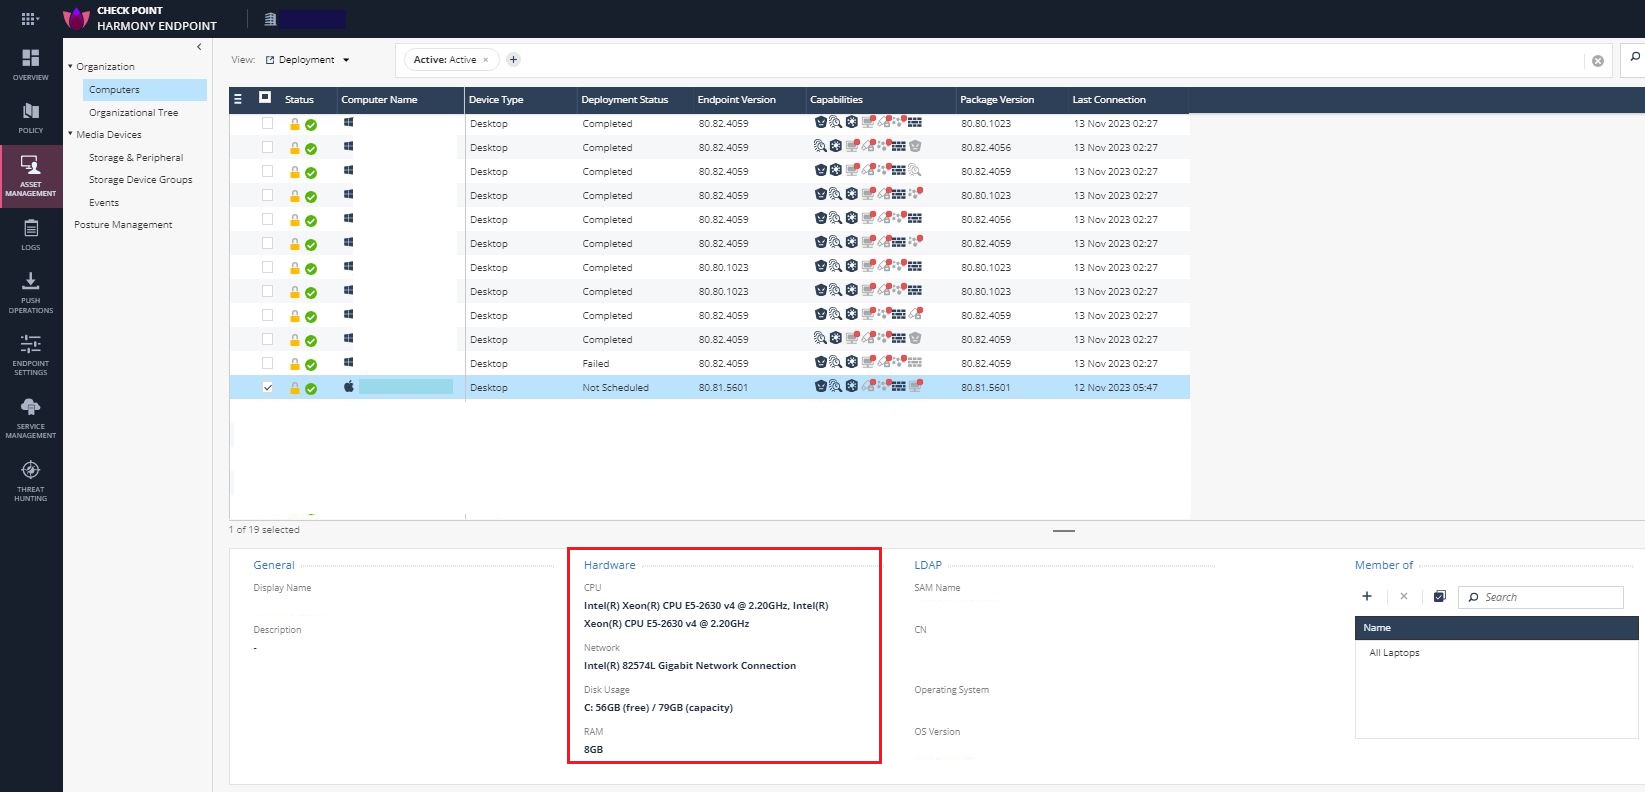
Viewing Device Hardware Information
You can view the hardware information of each device in your organization, such as, CPU configurations, network connection, disk usage and RAM.
|
|
Note -
|
To view the device hardware information:
-
Navigate to Asset Management, expand Organization and select Computers.
-
Click the device.
The device information is displayed in the Hardware section.