Configuring SD-WAN Device
After you create the site at Check Point Harmony Connect, on this site you must configure your branch office to route traffic through Harmony Connect.
Check Point creates the back-end architecture for tunneling the traffic from the branch device to the Internet.
|
|
Notes:
|
To configure your branch device:
-
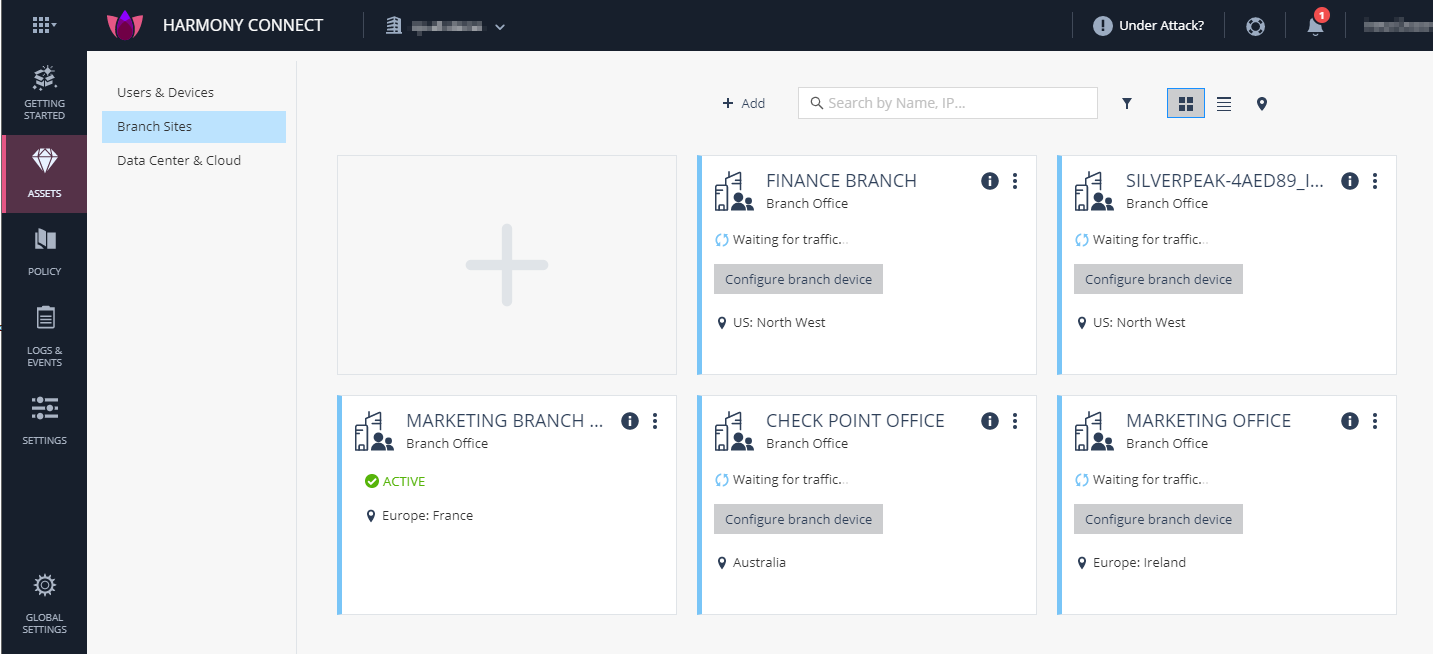
On the site thumbnail, click the Configure branch device button.
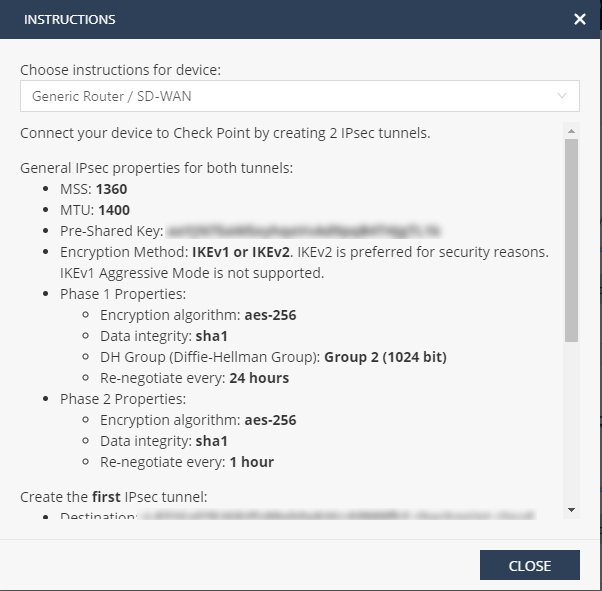
The Instructions window opens.
-
From the top field, select your SD-WAN branch office device.
-
Follow the instructions on the screen to get the IPsec configuration properties, pre-shared key, tunnel addresses, and the traffic routes.
-
Click Close.
Configuring Cradlepoint on the SD-WAN Device
Refer to the Cradlepoint SD-WAN Help for additional information.
To configure Cradlepoint on your SD-WAN Device, perform these steps:
-
Log into your Cradlepoint NetCloud.
-
Create and configure two Check Point IPSec Tunnels and route the traffic through the tunnels. See Creating the First IPSec Tunnel.
-
Test your configuration. See Creating the Second IPSec Tunnel.
Creating the First IPSec Tunnel
To prevent cyberattacks and enforce the Check Point access control, traffic from subnets will be tunneled through Check Point Network Security as a Service. You must create two IPSec tunnels for redundancy. The changes are applied immediately.

|
Note - Tunnel Name must be an alias for this tunnel. In this case, the names are Check-Point-IPSec1 and Check-Point-IPSec2. |
Locate your device and connect to its local management user interface.
-
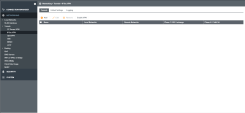
From the Cradlepoint SD-WAN User Interface, go to Networking > Tunnels > IPsec VPN.
Example:
-
Click Add.
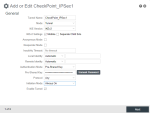
The Add or Edit CheckPoint_IPSec pop-up window opens.
Example:
-
Edit these parameters:
-
Tunnel Name must be an alias for this tunnel. In this case, Check-Point-IPSec1.
-
Mode must be set to Tunnel.
-
IKE Version must be set to IKEv2.
-
IKEv2 Settings must have Mobike checked. Other option must be unchecked.
-
Anonymous Mode must be unchecked.
-
Responder Mode must be unchecked.
-
Local Identity must be Automatic.
-
Remote Identity must be Automatic.
-
Pre-Shared Key must be set to the pre-shared key of the Check Point Site that you defined in the previous step. See Creating a New Site.
-
Protocol must be set to Any.
-
Initiation Mode must be set to one of these options:
-
Always On in case you want an active-active configuration of the two IPsec tunnels, or:
-
On Demand in case you want to use one tunnel at each time and the second tunnel for backup.
-
Enable Tunnel must be checked.
-
-
Click Next.
-
Configure packet settings and internal subnets:
-
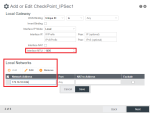
In Local Gateway section, set Interface MTU to 1400.
-
The Local Networks Address section must contain exactly the same subnet addresses that you also defined for the Check Point Site. See Creating a New Site.
Example:
-
-
Click Next.
-
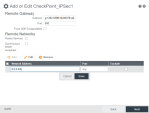
Configure the tunnel destination address.
Example:
-
In Remote Gateway section:
-
Source must be set to the destination FQDN domain of the first Check Point Tunnel as seen at the Site Instructions from the Check Point Infinity Portal. it is
-
Port must be set to IKE encryption port of 500.
-
Force UDP Encapsulation should be unchecked.
-
-
In Remote Networks section:
-
Router Services must be unchecked.
-
Don't forward DHCP broadcast must be unchecked.
-
Network Address must be set to 0.0.0.0/0.

Best Practice - To route specific traffic directly to the Internet, bypassing Check Point, use the Security > Static Routes page later.
-
-
-
Click Next.
-
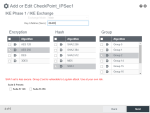
Configure IPsec encryptions.
-
IPsec Phase 1 Encryption
Example:
-
Key Lifetime (Secs) must be set to 86400.
-
Encryption must be set to AES-256.
-
Hash must be set to SHA1.
-
Group must be set to Group 2.
-
Suite B Presets must be all unchecked.
-
-
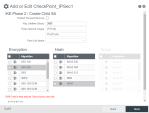
IPsec Phase 2 Encryption
Example:
-
Perfect Forward Secrecy must be unchecked.
-
Key Lifetime (Secs) must be set to 3600.
-
Encryption must be set to AES-256.
-
Hash must be set to SHA1.
-
-
-
Click Next.
-
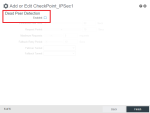
Make sure that Dead Peer Detection is unchecked.
Example:
-
Click Finish.
-
Test the Check-Point-IPSec1 tunnel configuration. See Testing the First Tunnel Configuration.
Testing the First Tunnel Configuration
To test the Harmony Connect first tunnel configuration, you must check its activity on your branch office device. You can do it from the Cradlepoint web management and / or from the Check Point Infinity Portal.
-
 From Check Point Infinity Portal
To ensure that traffic is sent through the Check Point tunnels, receive the Test IP Address on the Check Point Infinity Portal:
-
Log into Check Point Infinity Portal. See Creating an Account on the Check Point Infinity Portal.
-
Go to Harmony Connect > Sites and locate your site.
-
Click Menu > Show Instructions and locate the test IP address.
-
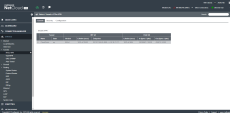
Use
pingfor the test IP address to test this configuration.Example:
-
Creating the Second IPSec Tunnel
Check Point provides 2 IPsec tunnels for the redundancy.
The changes are applied immediately.

|
Note - Tunnel Name must be an alias for this tunnel. In this case, the names are Check-Point-IPSec1 and Check-Point-IPSec2. |
Locate your device and connect to its local management user interface.
-
From the Cradlepoint SD-WAN User Interface, go to Networking > Tunnels > IPsec VPN.
-
Click Add.
-
Repeat the procedure described in the section Creating the First IPSec Tunnel.

Note - Tunnel Name must be an alias for this tunnel. In this case, Check-Point-IPSec2.
-
Click Finish.
-
Test the second tunnel configuration. Perform the steps described in Testing the First Tunnel Configuration for the Check-Point-IPSec2.
Now you can monitor the Cybersecurity Events on the Check Point Infinity Portal. See Monitoring Cybersecurity Events.

