Configuring the Check Point Quantum Security Gateway
To establish a connection between Harmony Connect and your Check Point Quantum Security Gateway, you must configure two IPsec tunnels from the gateway to Harmony Connect.
To configure the Check Point Quantum Security Gateway:
-
Obtain the IP address of the IPsec tunnels to connect the Check Point Security Gateway as a branch device. Check Point's IPsec tunnel addresses are FQDN domains. Use
nslookupon the tunnel destination to get the FQDN domains.
Note - Check Point does not save the IP address behind its tunnel addresses. To use static IP addresses, contact Check Point Support with the current tunnel destination address.
-
Create the first interoperable device for Harmony Connect:
-
Log in to SmartConsole.
-
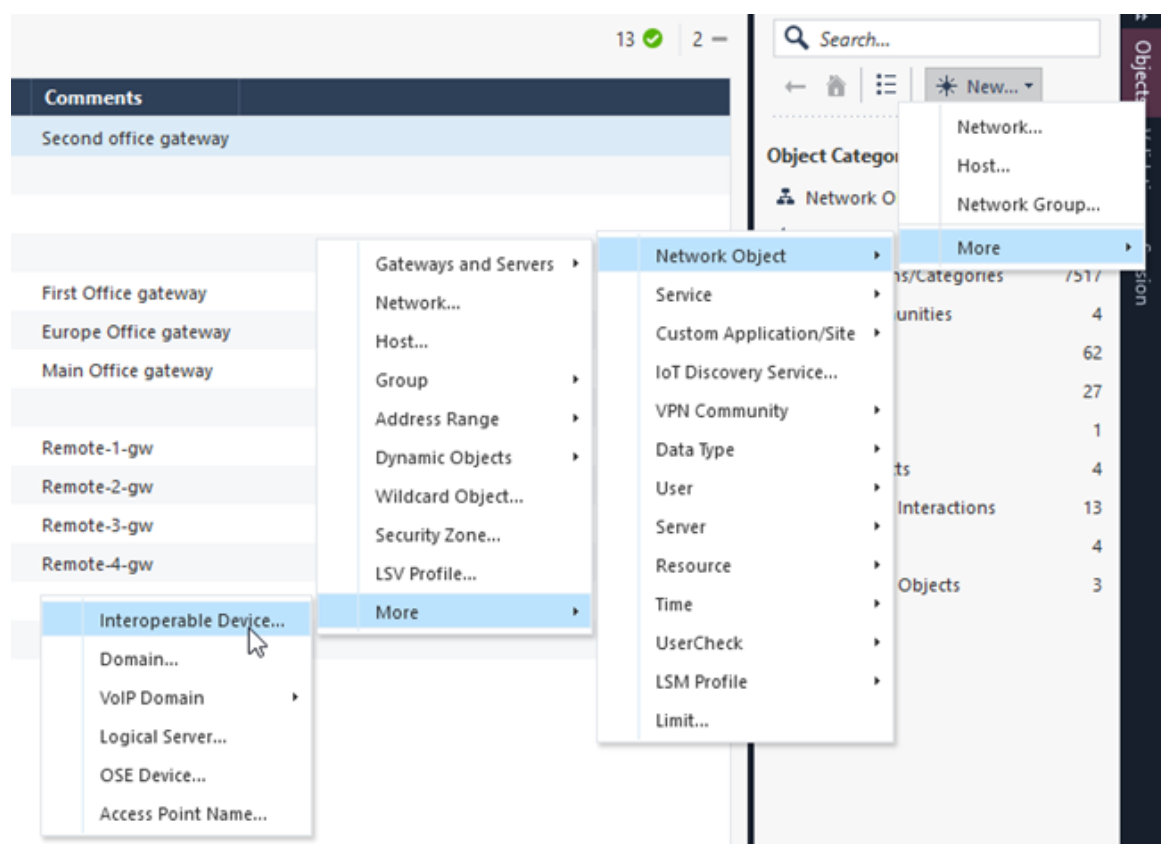
Click New > More > Network Object > More > Interoperable Device.
-
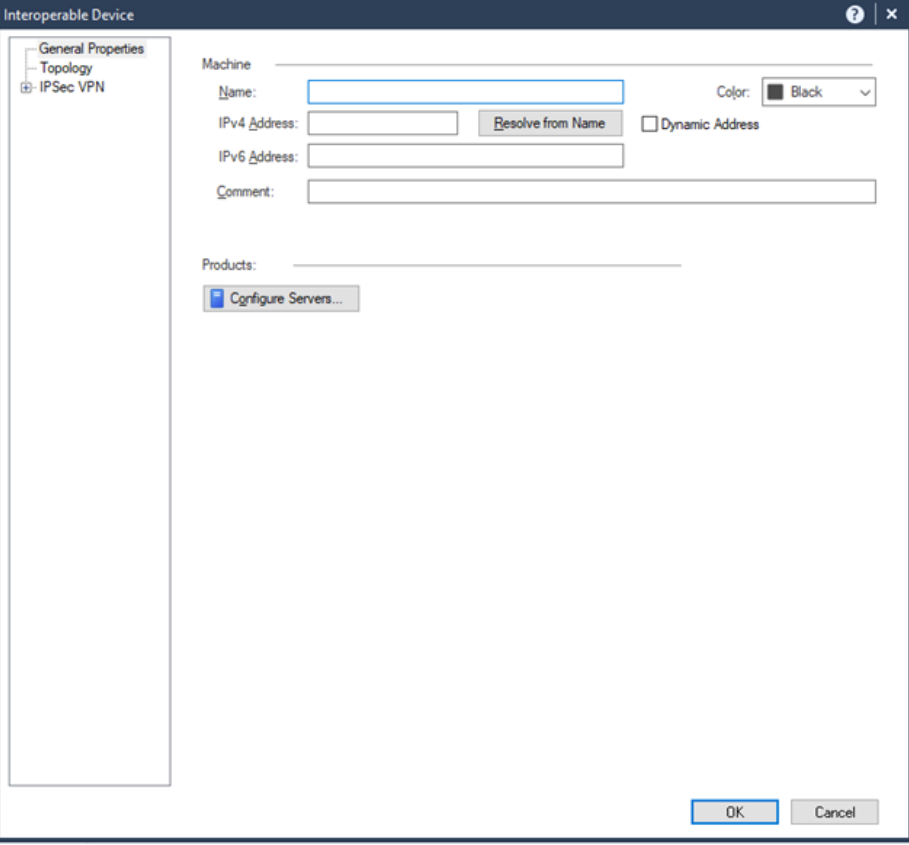
In the Interoperable Device window:
-
In the Name field, enter the device name. The name must begin with Harmony_Connect. For example, Harmony_Connect_Service_1.
-
In the IPv4 Address field, enter the IP address of tunnel 1.
-
-
Click OK.
-
-
Repeat step 2 to create the second interoperable device with the IPv4 Address of tunnel 2. For example, enter the Name as Harmony_Connect_Service_2.
-
Create a VPN Community object:
-
Click New > More > VPN Community > Star Community.

-
Enter the object name. For example, <your_site_name>_to_Harmony_Connect.
-
Click Gateways:
-
In the Center Gateways section, add the two interoperable devices.
-
In the Satellite Gateway section, add your Data Center Security Gateway.

-
-
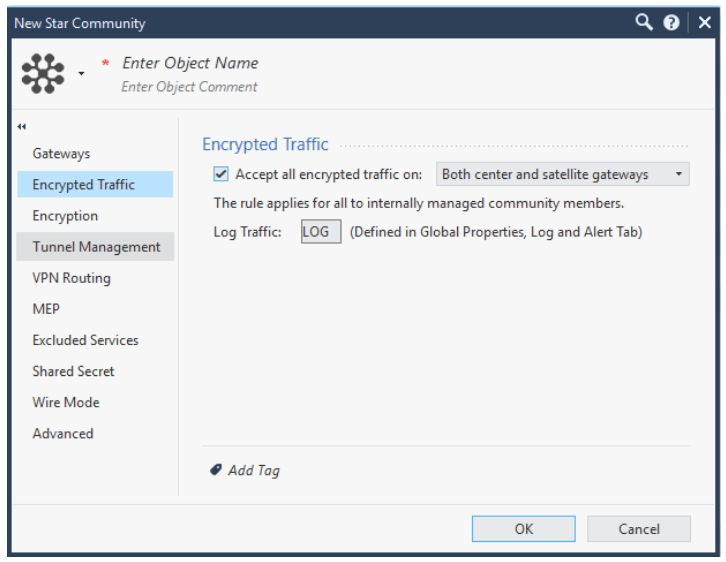
Click Encrypted Traffic and select Accept all encrypted traffic on and Both center and satellite gateways.
-
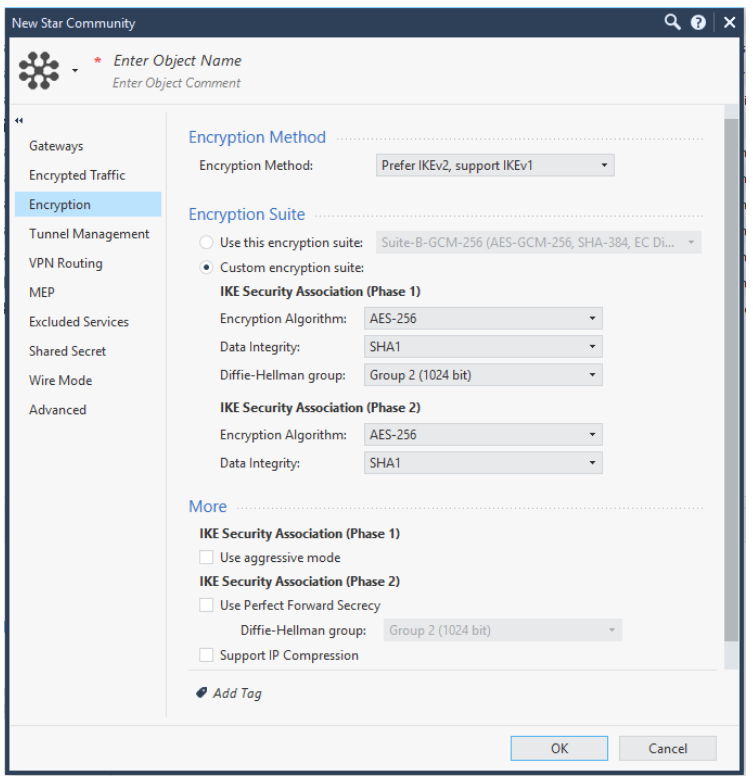
Click Encryption and configure:
-
Encryption Method - Select Prefer IKEv2, support IKEv1.
-
Encryption Suite - Select Custom encryption suite.
-
For IKE Security Association (Phase 1):
-
Encryption Algorithm - Select AES-256.
-
Data Integrity - Select SHA1.
-
Diffie-Hellman group - Select Group 2 (1024 bit).
-
-
For IKE Security Association (Phase 2):
-
Encryption Algorithm - Select AES-256.
-
Data Integrity - Select SHA1.
-
-
-
-
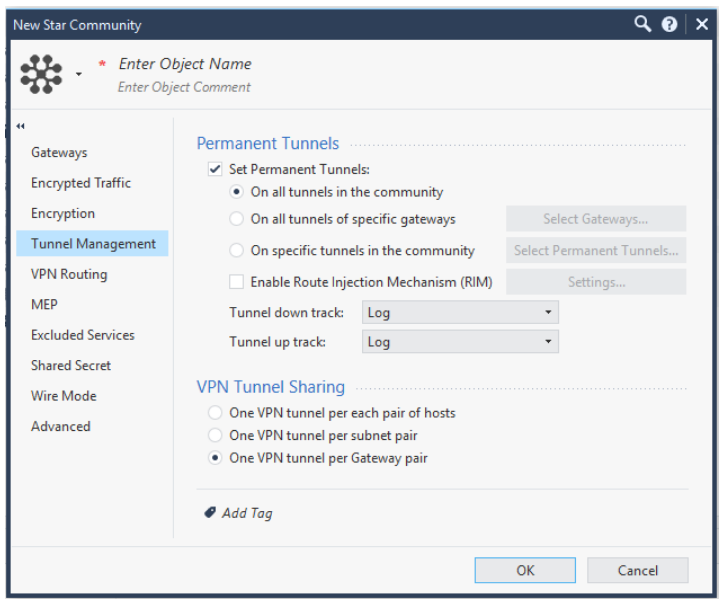
Click Tunnel Management and select Set Permanent Tunnels and On all tunnels in the community.
-
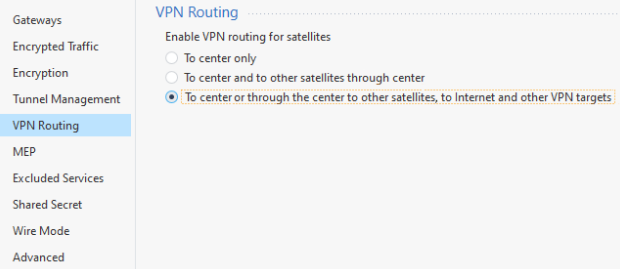
Click VPN Routing and select To center or through the center to other satellites, to Internet and other VPN targets.
-
Click Shared Secret:
-
Select Use only Shared Secret for all external members.
-
Configure the shared secret.
-
-
Click OK.
-
-
Enable DPD on your Data Center Security Gateway to monitor and receive traffic from Harmony Connect on your site:
-
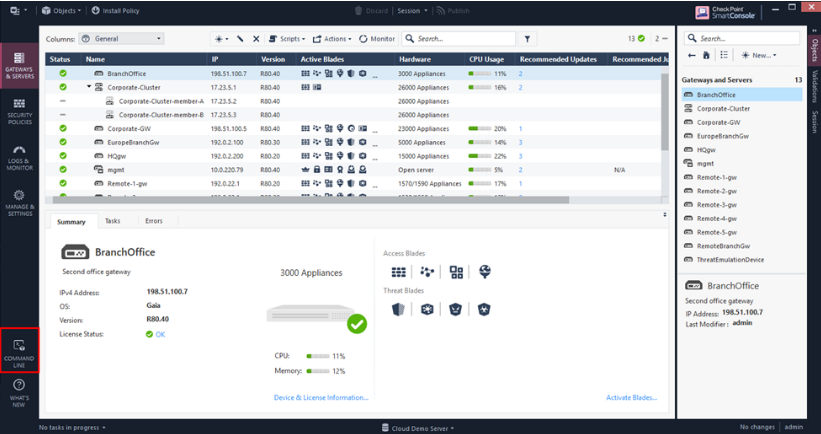
Click Command Line. For a better user experience, connect to the command on the Security Gateway with an SSH client.
-
To find the UID of your Data Center gateway, in the Command Line window, run:
show objects filter <your gateway name>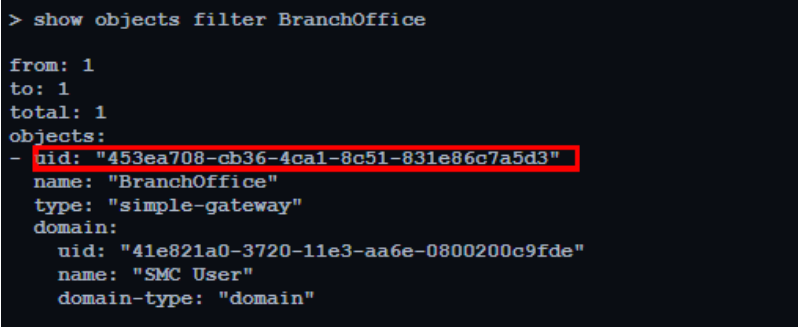
-
Configure your Security Gateway to use DPD as the VPN connection:
set generic-object uid <UID from the previous step> vpn.tunnelKeepaliveMethod DPD
-
Save the changes in Gaia OS database:
save config -
Close the Command Line window.
-
-
Configure these settings in SmartConsole, to allow connectivity:
-
From the left navigation panel, click Security Policies.
-
Open the policy that applies to your Data Center Security Gateway.
-
Go to Access Control.
-
To add a new rule to send traffic from the site to Harmony Connect and then to the Internet:
-
In the Source column, configure {}Any{*} (remove all objects in this cell).
-
In the Destination column, select All_Internet.
-
In the Action column, select Accept.
-
-
-
Deploy the changes:
-
Click Publish. This allows other administrators to view all the changes.

-
(Optional) Add a description for your changes.
-
From the top, click Install Policy:
-
Select the policy that applies to your Data Center Security Gateway.
-
Select your Data Center Security Gateway.
-
Click Install.

-
-
Wait for the installation to complete. You can track progress through the Tasks pane.
-