Configuring the SD-WAN Device
After you create the site at Check Point Harmony Connect, on this site you must configure your branch office to route traffic through Harmony Connect.
Check Point creates the back-end architecture for tunneling the traffic from the branch device to the Internet.
Example:


|
Notes:
|
Configuring the Branch Device Parameters
To configure your branch device:
-
On the site thumbnail, click the Configure branch device button:
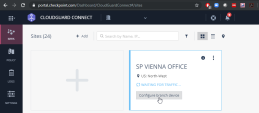
The Instructions window opens.
-
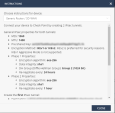
From the top field, select your SD-WAN branch office device.
-
Follow the instructions on the screen to get the IPsec configuration properties, pre-shared key, tunnel addresses, and the traffic routes.
Example:
-
Click Close.


Configuring Aryaka SD-WAN
To secure the traffic through Check Point Harmony Connect, you must log in the MyAryaka Portal and perform these steps:
-
Create Traffic Match Rules between Aryaka and Check Point Harmony Connect.
-
Add Check Point as the Cloud Security Connector for Aryaka devices.
-
Submit the changes for deployment.
|
|
Note - Check Point recommends that all the Internet-facing traffic be secured through Harmony Connect. In this step, you create the rule that selects this traffic. This rule is used later to set the service chaining with the Check Point Harmony Connect. |
-
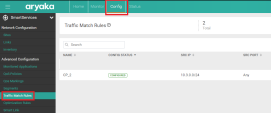
In the MyAryaka portal, go to Config > Traffic Match Rules.
Example:
-
On the Traffic Match Rules tab, click [+].
Example:

-
In the Match Rule window, set these parameters:
-
Name - Enter a free-text description of the traffic match rule (for example, All Internet Traffic).
-
Source IP - Set to Any to secure all the source traffic
-
Source Port - Set to Any
-
Destination IP - Set to Any to secure all the outgoing traffic
-
Destination Port - Set to Any
Example:

-
-
To push the configuration to the Aryaka Support for the configuration approval, click
 to submit the changes.
 -
Example:
-

-
The changes are waiting for approval by the Aryaka Support team. It takes up to 48 hours to deploy the changes.


-
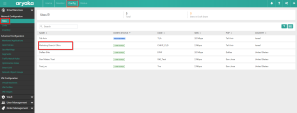
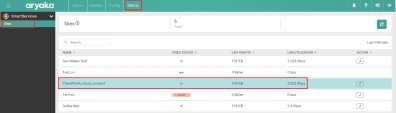
In the MyAryaka portal, go to Config > Sites.
-
On the Sites tab, search for the Site that you want to secure.
Example:
-
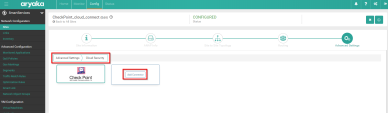
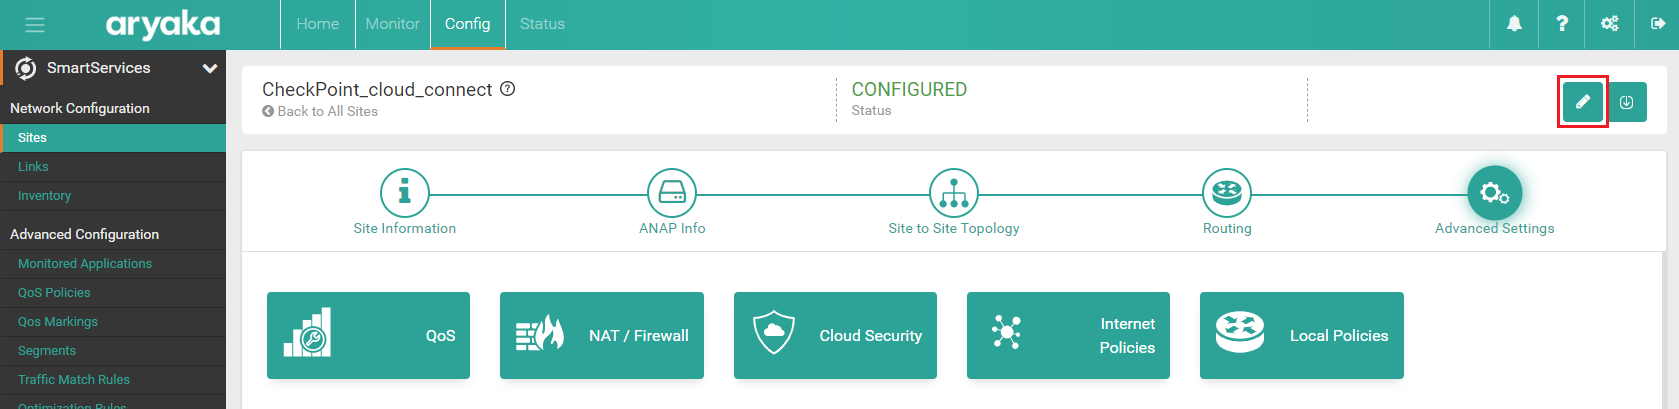
In the Site editor, click Advanced Settings button, then click Cloud Security tab.
Example:

-
Click
 button to add a Security Connector.
Example:
-
On the Cloud Security tab, click Add Connector.
Example:
-
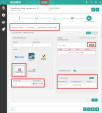
In the Cloud Security Connector (Add) section, set these parameters:
Note - All fields marked with an asterisk (*) are mandatory.
-
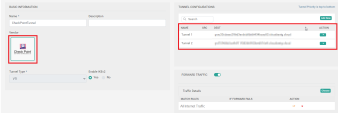
Name - Enter a short free-text description, for example, Check Point Tunnel 1
-
Description - (Optional) Enter a short description of the tunnel
-
Vendor - Select Check Point
-
Tunnel Type - Select VTI
-
Enable IKEv2 - Select Yes
Note - Check Point recommends to use Ikev2 for this integration.
-
Forward Traffic - Set to Enabled
-
In the Traffic Details field, click Choose:
-
Match Rules - Select the newly created Traffic Match Rule for the secured tunnel (for example, All Internet Traffic). See Creating Traffic Match Rules.
-
If Forward Fails - Select Blackhole
Note - If the branch device cannot connect to Check Point Harmony Connect, the customer has no Internet access (fail-close). Harmony Connect maintains 99.999% uptime.
Example:
-
-
-
Configure the first Check Point Harmony Connect IPsec Tunnel.
Procedure:
-
In the Tunnel Configurations section, click Add New.
-
In the Tunnel Configurations (Add) section, set these parameters:
-
Tunnel Source Interface - Select the external network interface that goes to the Internet
Note - If you have multiple external network interfaces, create IPsec tunnels for each of those network interfaces by repeating this step
-
Tunnel Source Type - Select Use Interface IP
-
Tunnel Destination Type - Select FQDN
-
Tunnel Destination FQDN - Paste the FQDN address from the Harmony Connect Site. See Configuring the Branch Device Parameters.
-
Shared Key - Paste the Shared Key from the Harmony Connect Site
ICMP Keepalive - Set to the Test IP from the Check Point Site
Example:

-
-
Click OK.
-
-
Configure the second Check Point Harmony Connect IPsec secured tunnel.
To create the second IPsec tunnel with the Check Point Harmony Connect properties, repeat Step 7 with the parameters for the second tunnel.
Example:
-
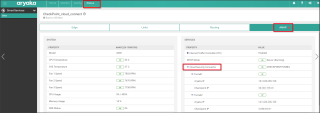
Click the Save
 icon to save the configuration.
Example:


To push the configuration to the Aryaka Support for the configuration approval, click ![]() to submit the changes.
to submit the changes.
Example:
The changes are waiting for approval by the Aryaka Support team. It takes up to 48 hours to deploy the changes.
The approved configuration gets the status Configured. The traffic is now secured by the Check Point Harmony Connect.
For any further help write to support@aryaka.com
Example:

You can cancel a submitted order on your demand.
To cancel a submitted order:
|
|
Note - You can cancel orders in status In Progress.On this stage, Aryaka did not start to push the changes. Orders in status Provisioned are processed and cannot be canceled. |
-
In MyAryaka Portal, go to Config > Order Management > Submitted Orders.
Example:

-
In the Submitted Orders window, click on the order you want to cancel. For example, CP rule.
Example:

-
Click the
 button to cancel the selected order.
Example:


Monitoring Traffic in MyAryaka Portal
-
 Verify that your Site is secured by Check Point.
-
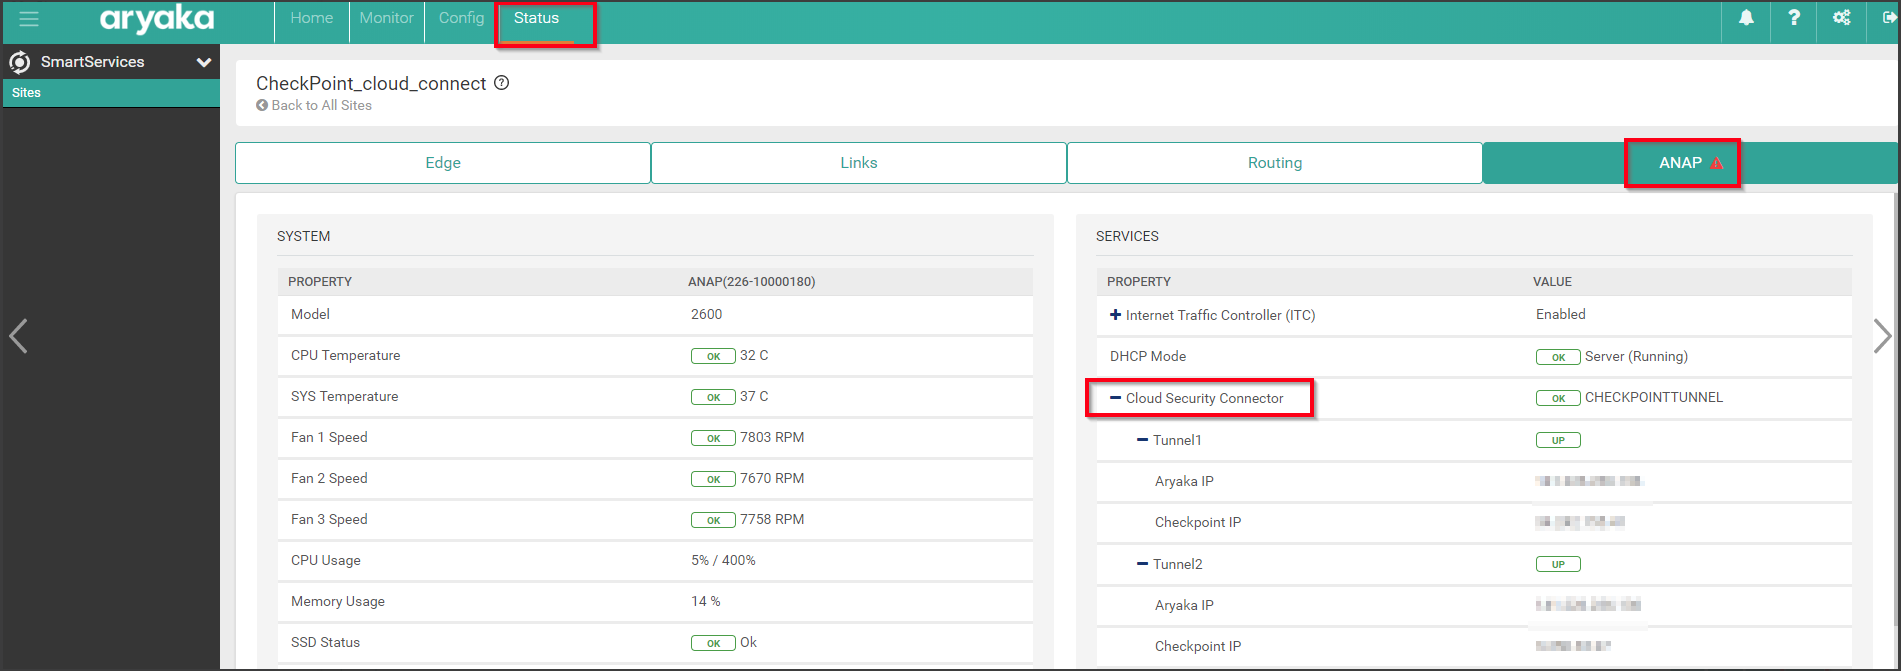
In MyAryaka portal, go to the Status tab.
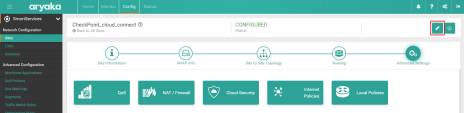
Click on the tunnel you want to view. For example, CheckPoint_cloud_connect.
Example:
-
In the CheckPoint_cloud_connect window, click on the ANAP button.
-
In the Services section, view the Cloud Security Connector with the value CheckPoint Tunnel - OK.
This means that your traffic goes through the Check Point Harmony Connect.
Example:
-
-
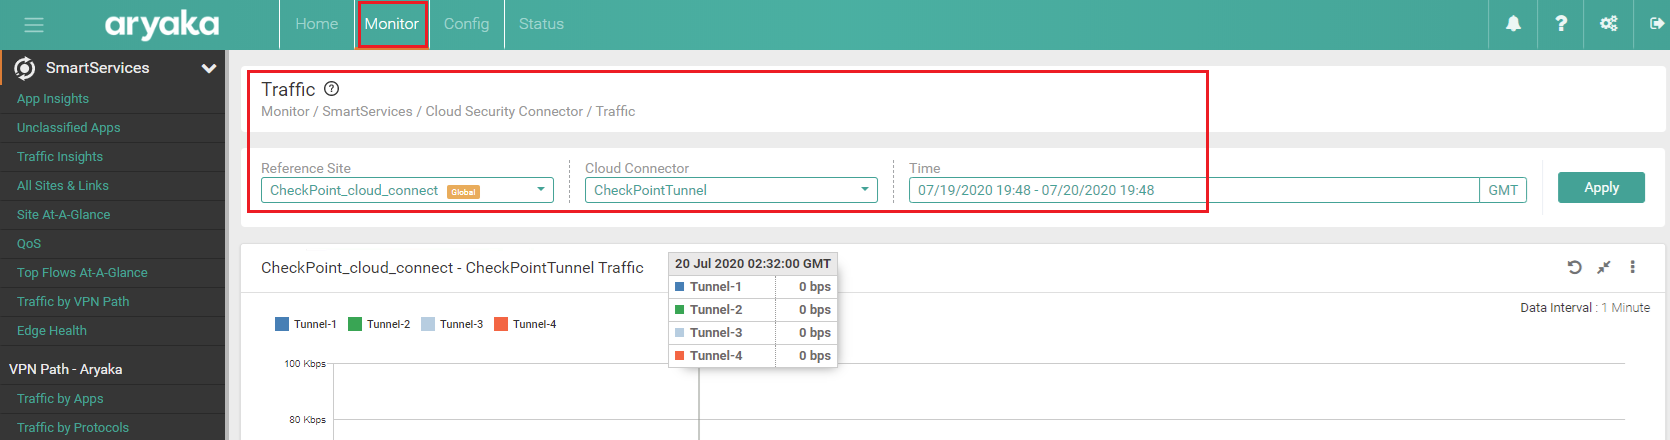
Monitor the Internet traffic through the Check Point IPsec tunnels.
-
In MyAryaka portal, go to the Monitor tab.
-
On the left pane, go to Cloud Security Connector and click Traffic.
Example:

-

You can also monitor the Cybersecurity Events at the Check Point Infinity Portal. See Monitoring Cybersecurity Events.