Web and Files Protection
URL Filtering
URL Filtering![]() Check Point Software Blade on a Security Gateway that allows granular control over which web sites can be accessed by a given group of users, computers or networks. Acronym: URLF. rules define which sites can be accessed from within your organization.
Check Point Software Blade on a Security Gateway that allows granular control over which web sites can be accessed by a given group of users, computers or networks. Acronym: URLF. rules define which sites can be accessed from within your organization.
To set the URL Filtering mode:
-
Go to Policy > Threat Prevention > Policy Capabilities.
-
In the Web & Files Protection tab, under URL Filtering, select a mode:
-
Prevent - The request to enter a site is suspended until a verdict regarding the site is received. Access to the site is blocked if site matches one of the blocked categories or the blacklisting.
-
Allows user to dismiss the URL Filtering alert and access the website.
-
This option is selected by default. It provides the user with access to a blocked site if the end user believes the verdict is unjustified. This option can also be turned off through the Advanced Settings section.
-
-
Detect - Allows an access if a site is determined as malicious, but logs the traffic.
-
Off - URL Filtering is turned off.
-
-
For Advanced Settings, see URL Filtering.
Files Protection
Download Emulation and Extraction
Download Protection rules protects users from malicious content.
To set the Download Emulation & Extraction mode:
-
Go to Policy > Threat Prevention > Policy Capabilities.
-
Select the rule.
-
In the Web & Files Protection tab, under Download Protection, select a mode:
-
Prevent - Prevents the download if the file is either known to be malicious or detected as malicious by the Threat Emulation
 Check Point Software Blade on a Security Gateway that monitors the behavior of files in a sandbox to determine whether or not they are malicious. Acronym: TE..
 -
Detect - Emulates original file without suspending access to the file and logs the incident. The file is blocked if it is malicious or blocked by file extension (Advanced Settings > Download Protection). If not, the file is downloaded before the emulation is complete.
-
Off - Downloads the file without protection.
-
-
For Advanced Settings, see Download Protection.
Upload Emulation
Upload Emulation uses Threat Emulation to analyze the files you upload to protected domains to identify threats and mitigate them.
|
|
Notes:
|
To enable Upload Emulation:
-
Navigate to Policy > Threat Prevention > Policy Capabilities.
-
Select the rule.
-
In the Web & Files Protection tab, under Upload Emulation, select a mode:
-
Prevent - Prevents the upload if the file is either known to be malicious or detected as malicious by the Threat Emulation. To specify additional behaviors for the Prevent mode, see Upload Protection.
-
Detect - Allows the user to upload the files even if it is detected as malicious. The incidents are logged.
-
Off - Uploads the file without protection.
-
-
To specify the protected domains, in the Upload Emulation section, click Edit.
-
Click New.
-
In the Value field, enter the domain name or IP address of the protected domain. For example, my-domain or 1.1.1.1.
-
Select the required action for Upload Emulation:
-
Protected - Enables upload emulation.
-
Not Protected - Upload Emulation is disabled.
-
-
Click Save.
-
To delete the domain, select the domain and click Delete.
-
To add multiple protected domains, click
 :
:-
To add a list of protected domains and set Upload Emulation as Protected, click Import Upload Emulation and select the CSV file with protected domains.
-
To add a list of protected domains and set both Password Reuse and Upload Emulation as Protected, click Import All and select the CSV files with protected domains.
-
-
To export the list of domains to a CSV file, click
 :
:-
To export only the domains with Upload Emulation set as Protected, click Export Upload Emulation.
-
To export all domains, click Export All.
The system exports the data to a CSV file.
-
-
Click OK.
-
For Advanced Settings, see Upload Protection.
Credential Protection
Zero Phishing
Phishing prevention checks different characteristics of a website to make sure that a site does not pretend to be a different site and use personal information maliciously.
To set the Zero Phishing mode:
-
Go to Policy > Threat Prevention > Policy Capabilities.
-
Select the rule.
-
In the Web & Files Protection tab, under Zero Phishing, select a mode:
-
Prevent - If site is scanned and found to be malicious, access to it is blocked and log of the incident is shown in the Harmony Browse web management log section.
-
Detect - An incident log is sent but access to the site is not be blocked. Also, the site scan is silent (invisible to the user).
-
OFF – Turns off the feature.
-
-
For Advanced Settings, see Credential Protection.
Password Reuse Protection
Alerts users not to use their corporate password in non-corporate domains.
|
|
Notes:
|
To set the Password Reuse mode:
-
Go to Policy > Threat Prevention > Policy Capabilities.
-
Select the rule.
-
In the Web & Files Protection tab, under Password Reuse, select a mode:
-
Prevent mode - Blocks the user from entering the corporate password and opens the blocking page in a new tab. If you enable Allow users to dismiss the password reuse alert and access the website, then it allows the user to dismiss the blocking page and continue to enter the corporate password.
-
Detect mode - The system does not block the user from entering the corporate password. If a user enters the corporate password, it is captured in the Harmony Browse logs.
-
Off - Turns off password reuse protection.
-
-
To add domains to Password Reuse, click New.
-
In the Value field, enter the domain name or IP address of the protected domain. For example, my-domain or 1.1.1.1
-
Select the required action for Password Reuse:
-
Protected - Blocks users from reusing the password of protected domain in other domains.
-
Not Protected - Allows users to reuse the password of the protected domain in other domains.
-
-
Click Save.
-
To delete the domain, select the domain and click Delete.
-
To add multiple protected domains, click
:-
To add a list of protected domains and set Password Reuse as Protected, click Import Password Reuse, and select the CSV file with protected domains.
-
To add a list of protected domains and set both Password Reuse and Upload Emulation as Protected, click Import All and select the CSV file with protected domain.
-
-
To export the list of domains to a CSV file, click
:-
To export only the domains with Password Reuse set as Protected, click Enable Password Reuse.
-
To export all domains, click Export All.
The system exports the data to a CSV file.
-
-
For Advanced Settings, see Credential Protection.
Safe Search
Search Reputation
Search Reputation is a feature added to search engines that classifies search results based on URL's reputation.
|
|
Notes:
|
To set the Search Reputation mode:
-
Go to Policy > Threat Prevention > Policy Capabilities.
-
Select the rule.
-
In the Web & Files Protection tab, under Search Reputation, select a mode:
-
On - Turns on the feature.
-
Off -Turns off the feature.
-
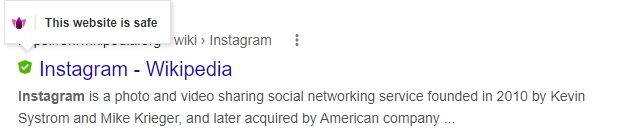
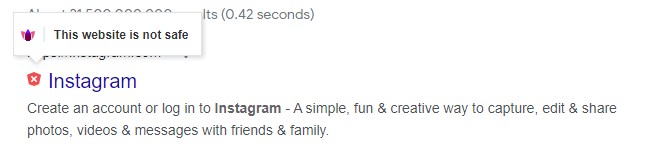
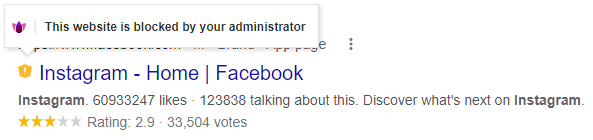
When you enable this feature, the icon across the URL in the search results indicate the classification:
|
Icon |
Classification |
|---|---|
|
|
The website is safe. Example:
|
|
|
The website is not safe. Example:
|
|
|
The website is blocked by the Administrator. Example:
|
|
|
Note - If the Search Reputation cannot classify a URL, then it does not display an icon across the URL. If you want such URLs to be classified and blocked, then enable the Uncategorized checkbox in URL Filtering > Categories > General Use. The Search Reputation classifies Uncategorized URLs as The website is blocked by the Administrator. |
Force Safe Search
Force Safe Search is a feature in search engines that acts as an automated filter for potentially offensive and inappropriate content.
To set the Force Search Reputation mode:
-
Go to Policy > Threat Prevention > Policy Capabilities.
-
Select the rule.
-
In the Web & Files Protection tab, under Force Safe Search, select a mode:
-
On - Hides explicit content from the search results.
-
Off - User sees the most relevant results for their search, which may include explicit content like images consisting of violence.
-
Main features:
-
When ‘Force Safe Search’ is on, Harmony Browse turns on Safe Search on the supported search engines.
-
It is supported with Google, Bing, and Yahoo search engines.
-
Force Safe Search is off by default.
-
Force Safe Search is supported with Google Chrome, and Microsoft Edge browsers.
Advanced Settings
URL Filtering
|
|
Note - You must set the URL Filtering Mode to Prevent or Detect to set the Advanced Settings. |
Allow user to dismiss the URL Filtering alert and access the website – Allows user to bypass URL filtering and access the website.
Categories
Harmony Browse categorizes websites and you can specify the categories that must be blocked for the user. When you select a category, the URL Filtering rule applies to all sites in the selected category.
To specify the categories to block:
-
Under Categories, select the category. For example, Bandwidth Consumption.
-
Click Show and then select the sub-category.
Black List
You can specify specific URLs, domains or IP addresses you want to block.
To black list a domain or IP address, click Show and add the URL, domain or IP address.
|
|
Notes:
|
Malicious Script Protection
Malicious Script Protection scans Uncategorized websites for embedded malicious JavaScripts. If the domain that hosts the script belongs to any one of these categories, then the page is blocked and the event is logged.
-
Anonymizer
-
Botnets
-
Critical Risk
-
High Risk
-
Medium Risk
-
Phishing
-
Spam
-
Spyware
-
Malicious Sites
-
Suspicious Content
|
|
Note - Ensure that you set URL Filtering Mode to either Prevent or Detect.If it is set to Prevent, the page is blocked and the event is logged. If it is set to Detect, the page is not blocked and the event is logged. |
To specify malicious script protection:
-
To enable malicious script protection, select Block websites where Malicious Scripts are found embedded in the HTML.
-
To allow users to dismiss the malicious script security alert and access the website, select Allow user to dismiss the Malicious Scripts alert and access the website.
Files Protection
General Settings
Emulation Environments
You can specify the size limit for files that must be sent for Threat Emulation. Files larger than the specified limit are not sent to Threat Emulation.
Upload and emulate files under – Specify the file size limit for Threat Emulation. The default file size limit is 15 MB. The maximum file size limit supported is 50 MB.
Override Default File Actions
Harmony Browse allows you to override the default file action for the supported and unsupported files.
To override the file action for supported files:
-
In the Supported Files section, click Edit.
-
Select the File action and Extraction Mode.
-
Click OK.
To override the file action for unsupported files:
-
In the Unsupported Files section, click Edit.
-
To add a file type, click
 and enter the File type.
 -
To edit a file type, select the file type and click
 .
. -
To delete a file type, select the file type and click
 .
.
-
-
Select the Download action for the file:
-
Default - The action specified in Unsupported Files.
-
Allow
-
Block
-
-
Select the Upload action for the file:
-
Default - The action specified in Unsupported Files.
-
Allow
-
Block
-
-
(Optional) In the Comments field, enter a comment.
-
Click OK.
Download Protection
|
|
Note - You must set the Download Emulation & Extraction to Prevent or Detect to set the Advanced Settings. |
Harmony Browse protects against malicious files that you download to your Endpoint. By default, it sends the files for extraction and emulation to Check Point's Threat Emulation on the cloud before they are downloaded to the Endpoint disk. You can also configure Harmony Browse with Threat Emulation on-premise. For more information, see sk113599.
-
Threat Emulation: Detects zero-day and unknown attacks. Files are sent to sandbox for emulation to detect evasive zero-day attacks.
-
Threat Extraction
Check Point Software Blade on a Security Gateway that removes malicious content from files. Acronym: TEX.: Proactively protects users from malicious content. It quickly delivers safe files while the original files are inspected for potential threats.
Supported Files
The supported file types for Threat Emulation are:
|
Threat Emulation Supported File Types |
|||||||||||||||||||||||||||||||||||||||||||||||||||||||||||||||||||||||||||||||
|---|---|---|---|---|---|---|---|---|---|---|---|---|---|---|---|---|---|---|---|---|---|---|---|---|---|---|---|---|---|---|---|---|---|---|---|---|---|---|---|---|---|---|---|---|---|---|---|---|---|---|---|---|---|---|---|---|---|---|---|---|---|---|---|---|---|---|---|---|---|---|---|---|---|---|---|---|---|---|---|
|
|
|
|||||||||||||||||||||||||||||||||||||||||||||||||||||||||||||||||||||||||||||
The supported file types for Threat Extraction are:
|
Threat Extraction Supported File Types |
||
|---|---|---|
|
doc |
potm |
pptx |
|
docm |
potx |
xls |
|
docx |
ppa |
xlsb |
|
dot |
ppam |
xlsm |
|
dotm |
pps |
xlsx |
|
dotx |
ppsm |
xlt |
|
fdf |
ppsx |
xltm |
|
|
ppt |
xltx |
|
pot |
pptm |
xlam |
|
one |
|
|
|
|
Note - Ignore the files types listed in the Harmony Browse Administrator Portal. |
Download Emulation Actions
The options available for supported file types of Threat Extraction are:
-
Get extracted copy before emulation completes
-
Extract potential malicious elements - While a file is tested, receive a copy of the file with all suspicious parts removed. Files that support extraction are available for download after the extraction. Files that do not support extraction are available for download only after the emulation and if it is benign.
-
To specify the elements for Threat Extraction in the downloaded file, click Elements to extract and click
 to add and click
  to remove.
-
-
Covert to PDF - For receive the file in a PDF format. If the file is not malicious, users receive the original file when the emulation is finished. Emulation can take up to two minutes.
-
-
Suspend download until emulation completes – The original file is downloaded if found to be clean.
-
Emulate original file without suspending access - Emulates original file without suspending access to the file and logs the incident. If the file is malicious, it is blocked.
-
Allow – Threat Emulation and Threat Extraction is turned off.
Unsupported Files
The options available for unsupported files types are:
-
Allow Download - Allows user to access the file.
-
Block Download - Blocks user from accessing the file.
Custom Settings
Download Emulation and Extraction
Block downloads when emulation fails - Select the checkbox to block download of a file if the Threat Emulation of the file fails due to technical reasons, such as file size limit, no internet connectivity and invalid licenses.
Upload Protection
Harmony Browse protects against malicious files that you upload to the protected domains. By default, it sends the files to Check Point's Threat Emulation on the cloud before they are uploaded to the domains. You can specify the advanced settings for uploading files that are supported and unsupported by Threat Emulation.
|
|
Note - This feature is not supported for Harmony Browse clients managed through the Harmony Endpoint Administrator Portal. |
Upload Emulation Actions
-
For supported files:
-
Suspend Upload Until Emulation Completes – File uploads to the protected domains are suspended until the Threat Emulation analysis of the files is complete and the verdict is benign.
-
Emulate the file without suspending access and block known malicious files - Malicious files are blocked and not uploaded to protected domains. Rest of the files are sent to Threat Emulation for analysis without suspending the file upload.
-
Emulate the file without suspending access - Files uploaded to the protected domains are logged but not prevented. End user does not receive any notification.
-
Allow - Disables the Upload Emulation feature. That is, allows users to upload files to protected domains without Threat Emulation.
-
-
For unsupported files:
-
Allow – Allows the upload of file types that are not supported by Threat Emulation to the protected domain.

Warning - Uploading files without Threat Emulation analysis may pose potential security risks.
-
Block – Blocks the upload of file types that are not supported by Threat Emulation to the protected domain.

Note - File type policy overrides the default file action selected here. For more information, see Override Default File Actions.
-
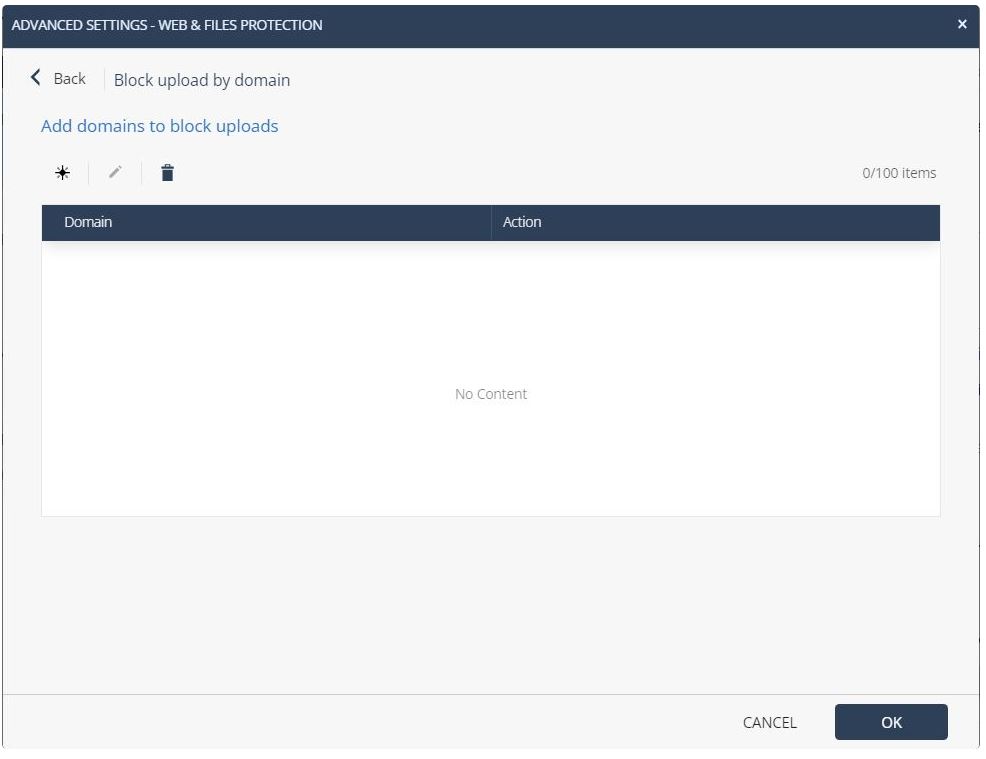
Block Upload by Domain
Allows you to specify domains to which you want to either allow or block upload files, regardless of the Upload Emulation setting.
To block or allow files upload to a domain:
-
Navigate to Upload Protection.
-
In the Block upload by domain section, click Edit.
The Advanced Settings - Web & Files Protection window appears.

-
Click
-
In the Value field, enter the domain name or IP address. For example, my-domain.com or 1.1.1.1.
-
From the Action list, select the required action:
-
Block
-
Allow
-
-
Click OK.
-
To edit a domain, select the domain and click
. -
To delete a domain, select the domain and click
. -
Click OK.
Credential Protection
|
|
Note - You must set the Zero Phishing and Password Reuse to Prevent or Detect to set the Advanced Settings. |
User can select any of these settings under Zero Phishing:
-
Allow user to dismiss the phishing alert and access the website - It allows the user to dismiss the blocking page and continue to enter the corporate password.
-
Send log on each scanned site
-
Allow user to abort phishing scans
-
Scan local HTML files - By default, the Harmony Browse extension in Chromium-based browsers (Chrome, Microsoft Edge, and Brave) cannot access the local HTML files opened by the browser to scan them for phishing attacks. This setting prompts users to grant permission to Chromium-based browsers to access and scan local HTML files on your PC.
Notes:
-
You can customize the prompt page. For more information, see Configuring Client Settings Policy
-
This feature is not supported with Safari and Internet Explorer browser extensions.
To grant permission to access and scan the local HTML files:
-
When a user opens a local HTML file, the Harmony Browse request access to file URLs prompt appears. Click Click to copy.
-
Paste the copied path in the address bar of the Chrome browser and press Enter.
-
Scroll down and turn on Allow access to file URLs.
-
If the HTML file has an input field, Harmony Browse scans the file and blocks it, if identified as phishing.
-
-
Disable notifications - Allows you to disable the browser zero-phishing scan notification that appears when users try to enter in an input field.
Note - Only the notification is disabled but the browser zero-phishing scan is performed in the background indicated by the yellow highlight around the input field.
User can select any of these settings under Password Reuse Protection:
-
To protect a domain, click Edit and enter the domain name or IP address.
-
You can also select Allow users to dismiss the password reuse alert and access the website setting.
By default, Harmony Browse extension is pinned to the browser for all users with the Harmony Browse Client version BROWSE_90.09.0001 and higher (Windows) and latest mac clients.
|
|
Note - You can unpin the extension only on Chromium browsers, such as Chrome, Edge and Brave. You cannot unpin an extension in Firefox. |
Windows
To allow users to unpin the browser extension, clear Always pin the browser extension to the tool bar under Pin Extension.
macOS
You cannot disable Extension Pinning through a policy in Harmony Browse.
To manually disable Extension Pinning:
-
On the endpoint, navigate to /Library/Application Support/Checkpoint/Threat Emulation/.
-
Remove these lines from the browser specific script. For example, for Chrome, the script file name is install_chrome_ext.sh.
<key>$PIN_KEY</key><string>$PIN_VALUE</string> -
Save the run the script.
-
Reload the policy on the browser. For example for Chrome, go to chrome://policy and click Reload policies.