Configure Cloud Firewall for GCP MIG
Prerequisites
Make sure these components are configured before proceeding:
-
An external VPC with at minimum one public subnet. You can also create the external VPC during deployment.
-
An internal VPC with at minimum one private subnet. You can also create the internal VPC during deployment.
-
A Check Point Security Management Server
 Dedicated Check Point server that runs Check Point software to manage the objects and policies in a Check Point environment within a single management Domain. Synonym: Single-Domain Security Management Server. running R81 or higher.
 -
A group of applications or web servers deployed in the private subnet or in a subnet peered with the MIG backend subnet.
-
For Marketplace deployments - a Google Cloud Platform
A suite of products and services that includes hosting, cloud computing, database services and more. Acronym: GCP. Service Account with the following permissions:-
Compute Admin
-
Cloud Infrastructure Manager Agent
-
Service Account User
-
Infrastructure Manager Service Agent
-
Service Usage Admin
-
Service Usage Consumer
You can also create the service account during the deployment.

Note - Cloud Firewall Gateways can be deployed as IPv4-only or as dual-stack (IPv4/IPv6).
Dual-stack deployment requires:
-
CME Take 320 and higher.
-
IPv6-enabled VPC/subnets and appropriate IPv6 firewall rules (these can also be created during deployment).
-
Step 1: Install the Check Point Security Management Server
We recommend you to use Smart-1 Cloud (Check Point's Security Management Server![]() Check Point Single-Domain Security Management Server or a Multi-Domain Security Management Server. as a Service) to manage Cloud Firewall Autoscaling Managed Instance Group (MIG).
Check Point Single-Domain Security Management Server or a Multi-Domain Security Management Server. as a Service) to manage Cloud Firewall Autoscaling Managed Instance Group (MIG).
Refer to Smart-1 Cloud Administration Guide > Using the settings > Cloud Management Extension (CME) Configuration for step-by-step instructions for enabling CME in Smart-1 Cloud.
Alternative deployment options for the Security Management Server include Google Cloud Platform, other cloud platforms, or on-premises.
To control the Cloud Firewall Gateways, make sure:
-
The Security Management Server can open connections to the Cloud Firewall Gateways.
-
The Cloud Firewall Gateways can open connections to the Security Management Server (for example, for sending logs).
The autoscaling Cloud Firewall Gateway![]() Check Point Virtual Security Gateway that protects dynamic virtual environments with policy enforcement. Cloud Firewall Gateway inspects traffic between Virtual Machines to enforce security, without changing the Virtual Network topology. can be deployed with or without a public IP address.
Check Point Virtual Security Gateway that protects dynamic virtual environments with policy enforcement. Cloud Firewall Gateway inspects traffic between Virtual Machines to enforce security, without changing the Virtual Network topology. can be deployed with or without a public IP address.
Deployments without a public IP address must have one of these topologies:
-
Install the Security Management Server in the same internal VPC.
-
Install the Security Management Server in a VPC peered with the internal VPC.
-
Install the Security Management Server on-premises and connect it to the internal VPC over Cloud Interconnect.
-
Install the Security Management Server on-premises and connect it to the internal VPC over a Cloud VPN.
To deploy the Security Management Server in GCP![]() See "Google Cloud Platform"., go to the Check Point Cloud Firewall NGFW and Threat Prevention (BYOL).
See "Google Cloud Platform"., go to the Check Point Cloud Firewall NGFW and Threat Prevention (BYOL).
|
|
Notes:
|
Step 2: Configure the Check Point Security Management Server
Do these steps to manage MIG with the Security Management Server:
-
Configure the Security Policy
Collection of rules that control network traffic and enforce organization guidelines for data protection and access to resources with packet inspection. in SmartConsole Check Point GUI application used to manage a Check Point environment - configure Security Policies, configure devices, monitor products and events, install updates, and so on..
Important - The policy name must be the same as the name you used when configured a GCP template in CME.
Step 3: Create a Google Cloud Platform (GCP) Service Account
The Check Point Management Server uses the GCP Service account to monitor the creation and status of the autoscaling Managed Instance Group. This lets the Security Management Server complete provisioning of these Cloud Firewall Gateways.
To create a GCP service account:
-
Go to https://cloud.google.com/iam/docs/creating-managing-service-accounts.
Use these parameters:
Name:
check-point-autoprovisionRole:
Compute Engine \ Compute Viewer -
Click Create Key > JSON (as the key type). A JSON file is downloaded to your computer.
Note - This JSON file is later used as the credentials file in Step 2: Configure the Check Point Security Management Server.
Step 4: Deploy the Check Point Autoscaling Managed Instance Group
Deploy one of these Google Cloud Marketplace solutions:
- The Check Point Cloud Firewall autoscaling with the Bring Your Own License (BYOL) licensing model,
or
-
The Check Point Cloud Firewall autoscaling with the Pay as You Go (PAYG) licensing model.
|
Parameter |
Description |
||
|---|---|---|---|
|
|
The name of the deployment. Deployment name must contain only lowercase characters, numbers, or dashes. It must start with a lowercase letter and cannot end with a dash. |
||
|
|
Select an existing service account with the required permissions (as explained in the prerequisites section) or create a new one. |
||
|
|
The zone for deploying instances. The zone determines available computing resources and where your data is stored and used. See GCP Regions and Zones documentation for more information. |
||
|
|
Select the desired machine series. |
||
|
|
Select the desired machine configuration. |
||
|
|
The GCP Autoscaler automatically scales out if the average CPU use exceeds this target. |
||
|
|
The minimum number of Cloud Firewall Gateways in the autoscaling MIG. |
||
|
|
The maximum number of Cloud Firewall Gateways in the autoscaling MIG. |
||
|
|
The type of disk used for deploying the instances (see Choose a disk type for more information). |
||
|
|
The size of the disk used for deploying the instances. (see Choose a disk type for more information). |
||
|
|
Select the IP mode for the Cloud Firewall Gateways: IPv4-only or Dual-stack (IPv4/IPv6). |
||
|
|
The MIG's Public IP address will be translated to a private address assigned to the Cloud Firewall Gateway in this external network. Provide an RFC 1918 CIDR block in the Cluster |
||
|
|
These GCP rules determine if ICMP / TCP / UDP / SCTP / ESP traffic is enabled by default for the provided IP CIDR sources. |
||
|
|
These GCP rules determine if ICMPv6 / TCP / UDP / SCTP / ESP traffic is enabled by default for the provided IPv6 sources. |
||
|
|
Optional IPv6 Unique Local Address (ULA) range used for internal IPv6 addressing in the VPC. |
||
|
|
Provide an RFC 1918 CIDR block in the Cluster external subnet CIDR field or select a Network and a Subnetwork below the CIDR field. If a range is specified, a new VPC will be created and the deployment will ignore the selected network above. |
||
|
|
The Cloud Firewall Gateway version to be deployed. |
||
|
|
The MIG instance's network interface used to communicate with the Security Management Server.
When |
||
|
|
The name of the Security Management Server as it appears in the CME configuration file. Use the same name in the autoprovision configuration section Step 2: Configure the Check Point Security Management Server. For example,
|
||
|
|
The configuration template name as it appears in the CME configuration file. Use the same name in the autoprovision configuration section Step 2: Configure the Check Point Security Management Server. For example, |
||
|
|
The SSH public key used for SSH authentication to the MIG instances. Leave it blank to use all project-wide pre-configured SSH keys. |
||
|
|
The Secure Internal Communication key that creates trusted connections between Check Point components. Trust is required to install policies on Cloud Firewall Gateways and to send logs between Cloud Firewall Gateways and Security Management Server. |
||
|
|
Change the admin shell to enable advanced command line configuration. |
||
|
|
Do not select this checkbox if you do not want to automatically download Software Blade |
||
|
|
To manage the environment's security, administrators can connect to the Security Management Server with SmartConsole clients and via the Gaia WebUI using this password. For additional security, it is recommended to change the password after deployment. |
||
|
|
Maintenance mode password hash (relevant only for R81.20 and higher versions). Generate a password hash with the command |
||
|
|
Select this checkbox to enable Stackdriver Monitoring. |
||
|
|
To manage the environment's security, administrators can connect to the Security Management Server with SmartConsole clients and via the Gaia WebUI using this password. For additional security, it is recommended to change the password after deployment. |
|
|
Notes:
|
Step 5: Configure Load Balancers
Load Balancers are automatically deployed and configured as part of the Cloud Firewall for GCP MIG solution deployment with Terraform templates.
When the Managed Instance Group (MIG) is deployed in dual-stack (IPv4/IPv6) mode, the required Load Balancer components are automatically created and configured to support IPv4 and IPv6 traffic.
If you deploy the Cloud Firewall for GCP MIG solution from GCP Marketplace, you must create and configure Load Balancers manually as described below.
We recommend you to go through Google's Load Balancing documentation at: https://cloud.google.com/load-balancing/docs/network/.
The steps below are for TCP load balancers. HTTP(S) load balancers are also supported and can be used alternatively.
This section describes how to configure Load Balancer health probes for dual-stack (IPv4/IPv6) deployments.
In dual-stack deployments, Google Cloud Load Balancers use HTTPS health checks on port 443. For health checks to function correctly, Firewall rules, Security Policy rules, and NAT rules must allow traffic from Google Cloud health probe IP ranges.
Firewall and Security Policy Requirements
To allow health probe traffic, create ingress allow rules in the relevant VPC networks and configure the required objects and rules in SmartConsole.
Create a Network Group for Health Probes
-
In SmartConsole, create a Network Group named:
GCP_Health_Check_Probes. -
Add the following IP ranges to the group.
IPv4 Probe Ranges:
CIDR
Netmask
35.191.0.0
255.255.0.0
130.211.0.0
255.255.252.0
209.85.152.0
255.255.252.0
209.85.204.0
255.255.252.0
IPv6 Probe Ranges:
-
2600:2d00:1:b029::/64
-
2600:2d00:1:1::/64
-
2600:1901:8001::/48
-
-
Create Host objects for the External LB and Internal LB in SmartConsole.
-
Create a Host object that represents the External Load Balancer frontend and configure the IPv4 address and the IPv6 address.
-
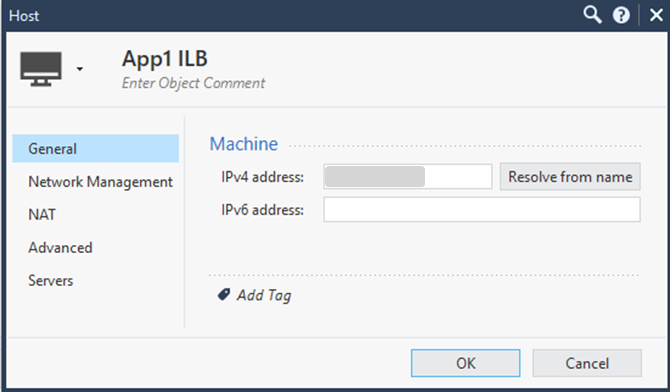
Create a Host object that represents the Internal Load Balancer frontend and configure the IPv4 address and the IPv6 address.
-
Add Access Control Rules
Add the following Access Control rule on the Cloud Firewall Gateways:
|
Source |
Destination |
Services |
Action |
|---|---|---|---|
|
GCP_Health_Check_Probes |
External LB Internal LB |
HTTPS |
Accept |
Configure NAT Rules for Health Probes
Configure NAT rules to ensure health probe traffic is forwarded correctly to the Cloud Firewall Gateway interfaces.
|
Original Source |
Original Destination |
Original Services |
Translated Source |
Translated Destination |
Translated Service |
|---|---|---|---|---|---|
|
GCP_Health_Check_Probes |
External LB |
HTTPS |
Original |
LocalGatewayExternal |
Original |
|
GCP_Health_Check_Probes |
Internal LB |
HTTPS |
Original |
LocalGatewayInternal |
Original |
External Load Balancer
You must set up the External (Internet-facing) Load Balancer to receive TCP traffic and distribute it to the pool of Cloud Firewall Gateways.
To create the External Load Balancer, do these steps:
-
Open the Load Balancing section in Google Cloud Console.
-
To create a new Load Balancer, click Create.
-
Select Type > Network Load Balancing. Click Next.
-
Select Passthrough load balancer. Click Next.
-
Select Public facing ("From Internet to my VMs"). Click Configure.
-
For the Backend type, select Backend Service.
-
Enter a name for the new External Load Balancer
Example:
"prod-ext-lb"
In the Backend configuration section:
-
Select the region where you deployed the Cloud Firewall Gateways autoscaling MIG.
-
Select the deployed Cloud Firewall Gateway's autoscaling Managed Instance Group (MIG) from the Instance group drop-down list.
-
In Health check, click Create a new health check.
-
Enter a name for the health check. For example, "
cloudguard-gateways-healthcheck" -
For the Port number, enter 8117 (for dual-stack deployments, use port 443).
Note - Other ports are not supported.
-
In the Request path, enter a correct path. The application server listens for HTTP health check requests from this path.
-
Click Save and continue.
-
From Session affinity, select Client IP and protocol.
-
In the Frontend configuration section:
-
Enter a name for the frontend.
Example: "
app1-ext-frontend" -
In IP, select a static public IP address or create a new one.
-
In Port, select the port on which this frontend must listen.
-
Click Review and finalize to review the Load Balancer configuration.
-
To create the Load Balancer, click Ready.
Internal Load Balancer
The Internal Load Balancer (ILB![]() Internal Load Balancer, used to load balance traffic in a virtual network) lets you use a next hop that redirects packets to the Load Balancer's targets and then to the instances in the MIG. You can find the route configuration instructions below.
Internal Load Balancer, used to load balance traffic in a virtual network) lets you use a next hop that redirects packets to the Load Balancer's targets and then to the instances in the MIG. You can find the route configuration instructions below.
When Virtual Machine (VM) instances in your Virtual Private Cloud (VPC) network send traffic to the Internet, the traffic is routed through the load-balanced Cloud Firewall Gateway virtual appliances.
|
|
Note - Using an internal load balancer with a MIG as the backend is supported starting from R81.10. |
To create the Internal Load Balancer, do these steps:
-
Open the Load Balancing section in Google Cloud Console.
-
To create a new Load Balancer, click Create.
-
Select Type > Network Load Balancing. Click Next.
-
Select Passthrough load balancer. Click Next.
-
Select Internal ("Only between my VMs"). Click Configure.
-
Enter a name for the new Internal Load Balancer.
Example:
"prod-int-lb"
In the Backend configuration section:
- Select the region where you deployed the Cloud Firewall Gateway's Auto Scaling MIG.
-
From the Instance group list, select the deployed Cloud Firewall Gateway's Auto Scaling Managed Instance Group (MIG) and select the TCP/UDP protocol.
-
In the Health check, click Create a new health check.
-
Enter a name for the health check. For example,
cloudguard-gateways-healthcheck. -
For the Port number, enter 8117 (for dual-stack deployments, use port 443).
Note - Other ports are not supported.
-
Click Save and continue.
-
In the Frontend configuration section:
-
Enter a name for the frontend.
Example:
"app1-int-frontend" -
Select the MIG internal sub-network.
-
Select the TCP/UDP protocol.
Note - L3 protocols are not supported.
-
In Internal IP, select an existing internal IP address or create a new one.
-
Set the Port to All to make the ILB the internal network's next hop.
-
Click Review to review the Load Balancer configuration.
-
To create the Load Balancer, click Ready.
Step 6: Implement the Firewall and NAT Rules for inbound traffic
You must create Firewall and NAT rules to allow traffic to the published service or application. This traffic is then redirected to the Internal Load Balancer.
-
The autoscaling MIG deployed by the Google Cloud Marketplace template creates a network interface in the external and internal networks. Each Cloud Firewall Gateway in the autoscaling Managed Instance Group (MIG) has a dynamic object for each network interface. This allows for easier and clearer configuration of Firewall and NAT rules.
-
A dynamic object is a "logical" object where the IP address is resolved differently for each Cloud Firewall Gateway.
- With a dynamic object for each network interface, you can describe Firewall and NAT rules. This dynamic object uses the network interface on which the Cloud Firewall Gateway sends or receives traffic without explicitly stating its IP address.
These dynamic objects are created automatically on each Cloud Firewall Gateway in the autoscaling fleet:
Network
Interface
Dynamic Object
External
eth0LocalGatewayExternalInternal
eth1LocalGatewayInternal
How to create dynamic objects
|
|
Note - Dynamic objects on the Cloud Firewall Gateway are created automatically. |
To create dynamic objects on the Security Management Server, do these steps:
-
In SmartConsole, connect to the Security Management Server (also referred to as the Domain Management Server).
-
Create a Dynamic Object named
LocalGatewayExternal. For this, in the Object Browser, click New > More >Network Object > Dynamic object. A Dynamic Object window opens.
Note - Skip this step if this Dynamic Object
Special object type, whose IP address is not known in advance. The Security Gateway resolves the IP address of this object in real time. already exists. -
Enter the name of the object. For example,
LocalGatewayExternal. -
Click OK,
-
Repeat Step 2 for
LocalGatewayInternal.
How to create the External Load Balancer Host object
|
|
Note - Create a Host object for each Public IP address published on the External Load Balancer. |
-
In the Object Browser, click New > More > Network Object > Host. The Host window opens.
-
Enter a descriptive name (for example,
App1-ELB). -
Enter the External Load Balancer's public IP address.
Example:

How to create the Internal Load Balancer Host object
|
|
Note - Create a Host object for each Internal Load Balancer. |
-
In the Object Browser, click New > More > Network Object > Host. The Host window opens.
-
Enter a descriptive name (for example,
App1-ILB). -
Enter the Internal Load Balancer's private IP address.
Example:
How to create a new TCP service
|
|
Note - Create a new TCP service for each service port on which the External Load Balancer listens. Skip this step if you use a standard port (such as HTTP 80 or HTTPS 443) that already exists in the services list. |
|
|
Note - The For dual-stack deployments, modify the |
-
In the Object Browser, click New > More > Service > TCP.
-
Enter a descriptive name (for example,
acme-54321). -
From the General > Protocol list, select the protocol.
-
In the Match By > Port menu , select Customize.
-
Enter the port number (for example,
54321).
Step 1: For each GCP forwarding rule, create a corresponding Firewall rule with these values:
|
Source: |
|
|
Destination |
The Public IP address on the External Load Balancer that will accept this traffic. For example, |
|
Services: |
The service on which the External Load Balancer is listening, for example, |
Example:
|
Name |
Source |
Destination |
Services & Applications |
Data |
Action |
Track |
|---|---|---|---|---|---|---|
|
|
|
|
|
|
|
|
Step 2: For each Load Balancer rule, create an applicable NAT rule with these values:
|
Rule |
Value |
|---|---|
|
Original Source |
|
|
Original Destination |
|
|
Original Services |
The service on which the ELB is listening on (HTTP). |
|
Translated Source |
|
|
Host |
The Host object representing the Internal Load Balancer. |
|
Translated Service |
|
Example:
|
Original |
Original |
Original |
Translated |
Translate |
Translated |
|---|---|---|---|---|---|
|
|
|
|
H |
S |
|
|
|
Notes:
|
|
|
Important - You must have an Outbound CA certificate for an inbound SSL inspection use case. |
How to set the HTTPS Inspection
-
In SmartConsole, go to each Cloud Firewall Gateway object and click the HTTPS Inspection tab.
-
Click Server Certificates > Create Certificate.
-
Enter the required information and click OK.
-
Create an HTTPS service similar to the HTTP service created in Step 6: Implement the Firewall and NAT Rules for inbound traffic (select port number 8443).
-
In the Security policy, go to the HTTPS inspection table and add this rule:
-
Source: Any
-
Destination: Any (do not use the Internet object)
-
Service: Select the HTTPS service created in External Load Balancer
-
Action: Inspect
-
Certificate: The certificate you created in step 2.
-
-
Save the changes. Click the diskette icon at the top or press CTRL+S.
To enable HTTPS Inspection (as explained in Enabling and Disabling Software Blades):
-
Publish the changes in SmartConsole.
-
Install the Security Policy on any existing Cloud Firewall Gateway.
Updating Auto Provisioning
To download and install the latest Auto Provisioning![]() Check Point Software Blade on a Management Server that manages large-scale deployments of Check Point Security Gateways using configuration profiles. Synonyms: SmartProvisioning, SmartLSM, Large-Scale Management, LSM. version, follow the instructions in sk157492 for the latest Cloud Management Extension (CME) update.
Check Point Software Blade on a Management Server that manages large-scale deployments of Check Point Security Gateways using configuration profiles. Synonyms: SmartProvisioning, SmartLSM, Large-Scale Management, LSM. version, follow the instructions in sk157492 for the latest Cloud Management Extension (CME) update.