Easy Deployment
Harmony Endpoint service integrates with Microsoft Intune through the Azure Portal.
Prerequisites
Check Point Harmony Endpoint requires these Azure credentials for integration with Microsoft Intune.
-
Directory (tenant) ID
-
Application (client) ID
-
Client Secret
Configuring the Settings in the Microsoft Azure Portal
Before you can add Microsoft Intune to Harmony Endpoint, it is necessary to create the Azure credentials.
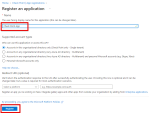
Step 1: Register the Application
-
Log in to the Azure Portal > and from the toolbar select Azure Active Directory.
-
Select App registrations > click New Registration.
-
Below the Owned applications tab, enter the application's Name > select an Account type > click Register.

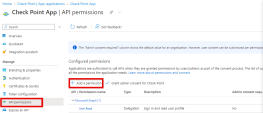
Step 2: Add Permissions to the Application
-
Add the necessary permissions to the application.
-
Go to the API permissions section and click Add a permission.
-
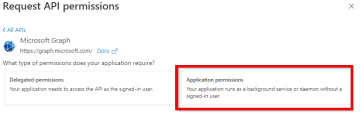
In the window that opens, select Microsoft Graph > Application permissions.
-
-
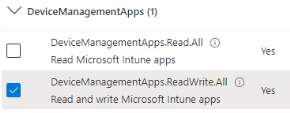
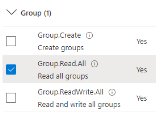
Select these permissions:
-
DeviceManagementApps.ReadWrite.All
-
Groups.Read.All
-
DeviceManagementConfiguration.ReadWrite.All

-
-
Give admin consent to the selected permissions.


Step 3: Finish Configuration in Microsoft Azure
-
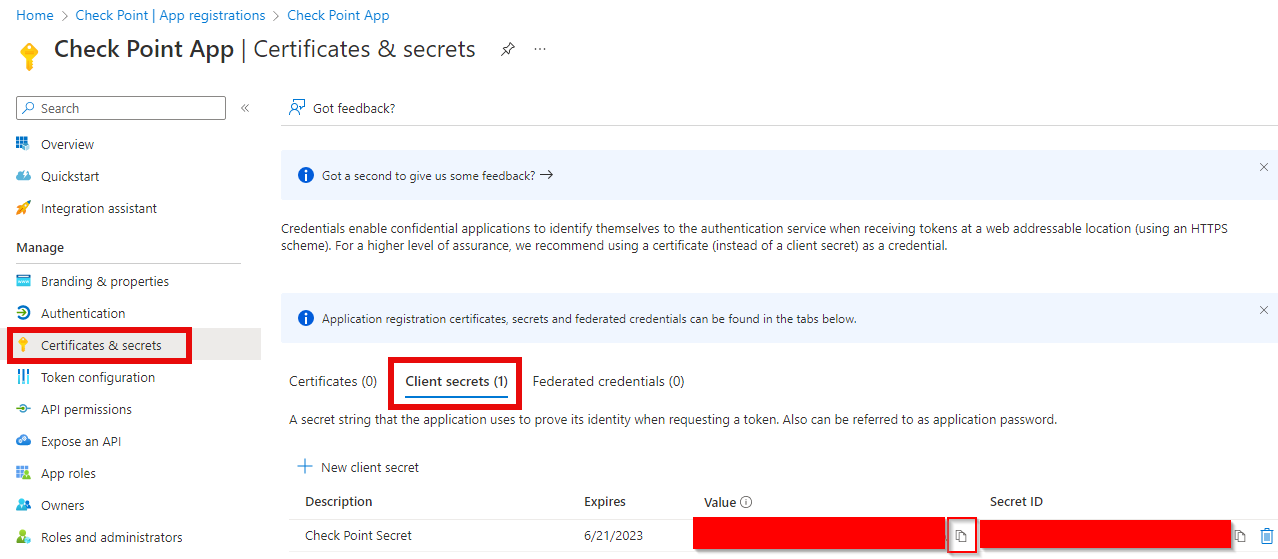
Create a secret key for the application.
-
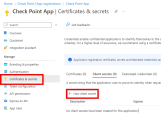
Go to the section Certificates & secrets > click New client secret.
-
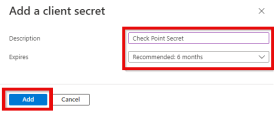
In the Add a client secret window, enter a Description and the date it Expires > click Add.
-
-
Copy the value of the secret key and keep it in a secure place. This key is necessary for the Harmony Endpoint portal integration with Microsoft Intune.

-
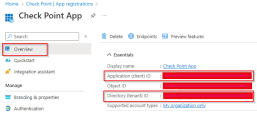
Go to the Overview section, copy these two values, and keep them in a secure place.
-
Application (client) ID
-
Directory (tenant) ID
-


Watch the configuration demo:
Creating Integration with Microsoft Intune in Harmony Endpoint
Now that you have created the necessary credentials in Azure, go to the Harmony Endpoint portal and create the integration with Microsoft Intune.
Step 1: Connect to Microsoft Intune:
-
From the Harmony Endpoint main menu, select Endpoint Settings > UEM Integration > click the plus icon.
-
Enter these Azure credentials to connect to Microsoft Intune.
-
Directory (tenant) ID
-
Application (client) ID
-
Client Secret
-
-
Click Verify.
-
Click Next.
-
In the Application Name, enter a name.
-
For Add Intune Distribution Groups, select the applicable Microsoft Intune groups for the distribution of the Endpoint installer.
Step 2: Distribute Installer
-
Below the Installer version, select an Endpoint version.
-
Click Create.
The integration of the Microsoft Intune application to Check Point takes one to three minutes.
Overview of the Check Point Installer Integration Card

-
Application Name - Name of the Microsoft Intune application.
-
Status - Status of the created Microsoft Intune integration, such as Connected.
-
Installer version - The Endpoint installer version.
-
Last Sync - The last time the application was fetched from Microsoft Intune.
-
Intune Groups - List of Microsoft Intune groups assigned to a given application.
More options:
When you click the menu icon ![]() , these options show:
, these options show:
-
Edit - Edit the Azure application (client) ID, client secret, application name, and assigned groups.
-
Sync - Fetch the given integration settings (application name, assigned groups) from Intune.
If the status changed after the sync to Removed from Intune, the administrator removed the application from Intune. In this case, it is necessary to also remove the integration from Harmony Endpoint.
-
Delete - Delete only removes the Microsoft Intune application. Delete does not uninstall the Endpoint Agent from devices that already have it installed.