Helping Users Create a Site
Each client must have a minimum of one site defined. The site is the VPN gateway. Make sure your users have:
-
The gateway fingerprint.
-
The gateway IP address or domain name.
-
The authentication procedure to use.
-
Authentication materials (username, password, certificate file, RSA SecurID, or access to Help Desk for challenge/response authentication).
Preparing the Gateway Fingerprint
Before users configure a site that leads to the gateway, prepare the fingerprint of the gateway. Users can receive a warning that the client cannot identify the gateway and that they must verify the fingerprint.
Give the users the fingerprint to compare with their client installation and site definition.
To prepare the gateway fingerprint:
-
In SmartConsole, click Manage > Servers and OPSEC Applications.
-
Select the Certificate Authority and click Edit.
-
Open the Local Security Management Server or OPSEC PKI tab and click View.
-
In the Certificate Authority Certificate View window, copy the
SHAFingerprint. -
Send the fingerprint to users before they install the client.
For R80.10 and higher gateways, follow the procedure above from the legacy SmartDashboard.
To open the legacy SmartDashboard from R80.x :
-
In SmartConsole go to the Security Policies view.
-
Below Shared Policies, click Mobile Access or DLP.
-
In SmartConsole, click Open Policy.
Using the Site Wizard
When the user first double-clicks the Endpoint Security VPN icon, a message opens:
No site is configured. Would you like to configure a new site?
-
If the user clicks No, the message closes. The user cannot connect to a VPN until a site is configured.
-
If the user clicks Yes, the Site Wizard opens.
To configure the first site of a client:
-
The user clicks Next.
-
The user enters the IP address or the name of the VPN gateway.

The wizard shows the progress while the Client resolves the site name or address to the actual gateway. This step in the wizard notifies the user that:
This may take two to three minutes, it depends on the speed of your network connection.
If the users see the certificate warning, make sure they check the fingerprint of the gateway:
-
Compare the site fingerprint with the SIC fingerprint on the gateway.
-
To see more warnings, click Details.
-
If site details are correct, click Trust and Continue. The fingerprint is stored internally and the security warning is not opened again for the site, even if the client is upgraded.
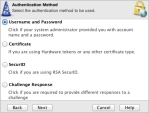
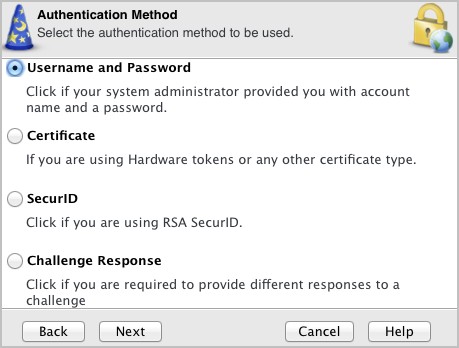
The wizard displays the authentication step.
-
-
Give your users the authentication materials as necessary.
-
Select the correct procedure and click Next.
-
For Certificate, select PKCS#12 or Keychain (make sure the user knows which to select), and click Next.
-
For SecurID, select the type, and click Next.
-
-
Click Finish and this message shows, Would you like to connect?
If you click Yes, the client connects to the gateway, and a VPN tunnel is created.

Opening the Site Wizard Again
The Site wizard opens automatically the first time a client is opened.
To create a new site on the client:
-
Click the client icon and select VPN Options.
-
Select Sites > New.
OR
-
Click the client icon and select Connect to.
-
From the Site menu, select New Site.
