Installing an Endpoint Security Clients Package that is not Preconfigured for ATM
There are two ways to configure ATMs before installing an Endpoint Security Client package that isn’t preconfigured for them.
-
Setting a Registry key (for 64-bit Windows only)
-
Running a command
Both ways give the same result. By using software deployment tools, you can avoid configuring the ATM locally. Choose the option that best suits your organization’s convenience.
To download the package:
-
Go to Endpoint Security Homepage.
-
From the Client Releases Downloads section, download the Complete Endpoint Security Client package for your system (32/64 bit).
To install by setting a registry key on the ATM machines
-
On ATM machines with 64-bit Windows, add this registry key before deploying theEndpoint Security Client:
HKEY_LOCAL_MACHINE\SOFTWARE\Wow6432Node\CheckPoint\Endpoint Security\isATM=1 (REG_DWORD) -
Install the complete Endpoint Security Client from Harmony Endpoint.
-
For R82, see R82 Harmony Endpoint Server Administration Guide.
-
For R81.20, see R81.20 Harmony Endpoint Server Administration Guide.
-
For R81.10, see R81.10 Harmony Endpoint Server Administration Guide.
-
To install by running a command on the ATM machines:
-
Export the package from SmartEndpoint.
-
Use a software deployment tool such as Microsoft SCCM or GPO to distribute the package and install the client from the command line.
Run this command with administrator privileges:EPS.msi /qb ISATM=1
Adding an FDE Configuration Page - Infinity Portal
-
Log in to the Harmony Endpoint Infinity Portal using your administrator credentials.
-
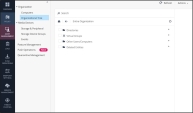
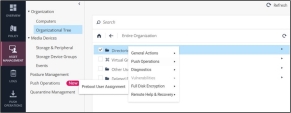
From the left navigation panel, navigate to Asset Management > Organization > Organizational Tree.
-
Right-click on the selected machine or group, select Full Disk Encryption > Preboot User Assignment.
-
In the Authorize preboot users pop-up that appears, use the Search for entity field to find the device or user you want to assign a preboot user to (for example, Computers(alpha.cp/Computers)).
-
Click the * icon.
-
In the Create New Preboot User pop-up that appears, enter the following details:
-
Username: A unique identifier for the user
-
Password: A secure password for preboot authentication
-
Confirm Password: Re-enter the password to confirm
-
-
(Optional) Configure additional settings as needed:
-
Lock user for preboot
-
Require password change after first logon
-
Enable expiration settings
-
-
Click OK.
The new preboot user will now be added and associated with the selected machines or groups.
Adding an FDE Configuration Page – SmartConsole
-
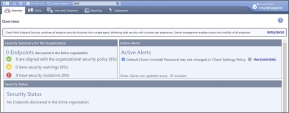
Open SmartConsole and navigate to Menu > Endpoint > SmartEndpoint.
The Check Point SmartEndpoint window appears.
-
Click Users and Computers.
-
Under All Organizations Folders, select the folder that contains the target machine or group.
-
From the Blades list, select Full Disk Encryption.
-
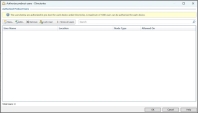
In the tab that appears, click Authorize preboot users.
The Authorize preboot users page appears.
-
Click New to add a new preboot user.
-
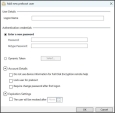
In the Add New Preboot User pop-up that appears, fill in the following details:
-
User Details
-
Authentication Credentials:
-
Set a secure password
-
(Optional) Enable Dynamic Token, Account Details, and Expiration Settings options.
-
-
-
Click OK.
The new preboot user will be added and associated with the selected machines or groups.

