SAML Configuration for JumpCloud
-
Log in to the Avanan Administrator Portal:
-
Go to System Settings > Settings and click Configure SAML.
The Configure SAML window appears.
-
In the SAML SSO URL field, click
 to copy the SAML SSO URL.
-
-
Log in to the JumpCloud Administrator Portal:
-
Go to Applications and click
 .
.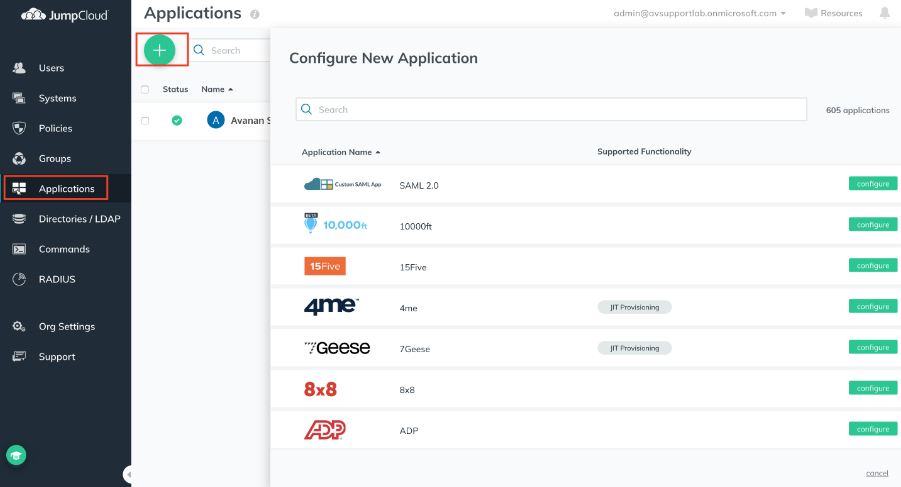
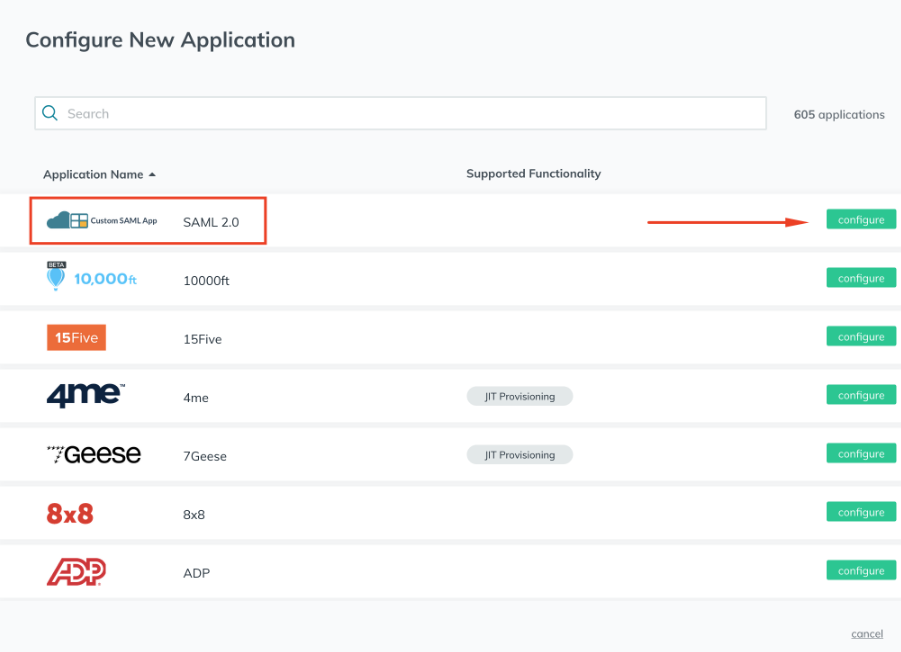
The Configure New Application window appears.
-
For the SAML 2.0, click Configure.
-
Expand General Info.
-
In the Display Label field, enter a name.
-
(Optional) In the Description field, enter a description.
-
Expand Single Sign-On Configuration.
-
Specify these:
-
IdP Entity ID
-
SP Entity ID - Paste the url copied in step 1.b.

-
-
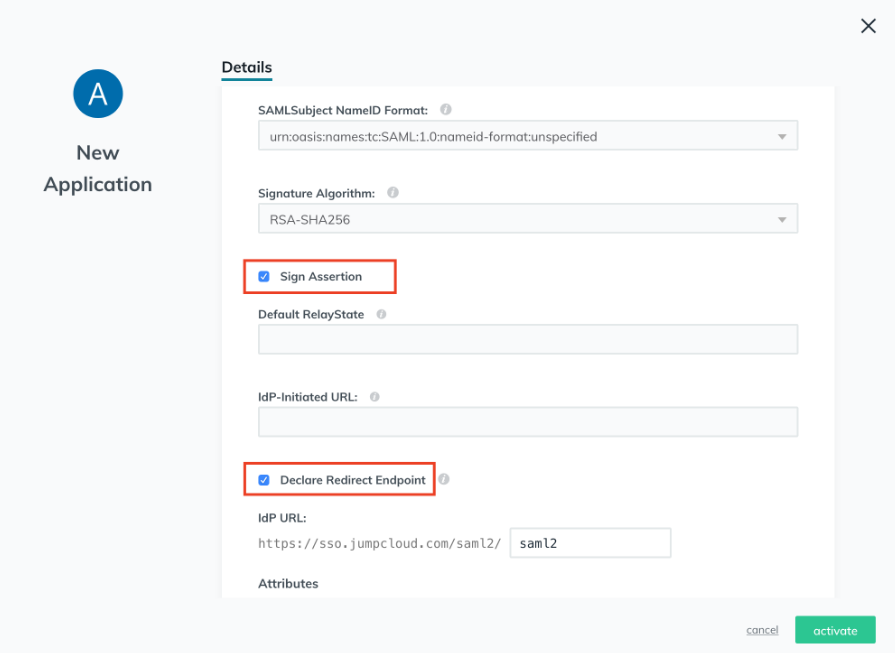
Select these checkboxes:
-
Sign Assertion
-
Declare Redirect Endpoint
-
-
Click activate.
-
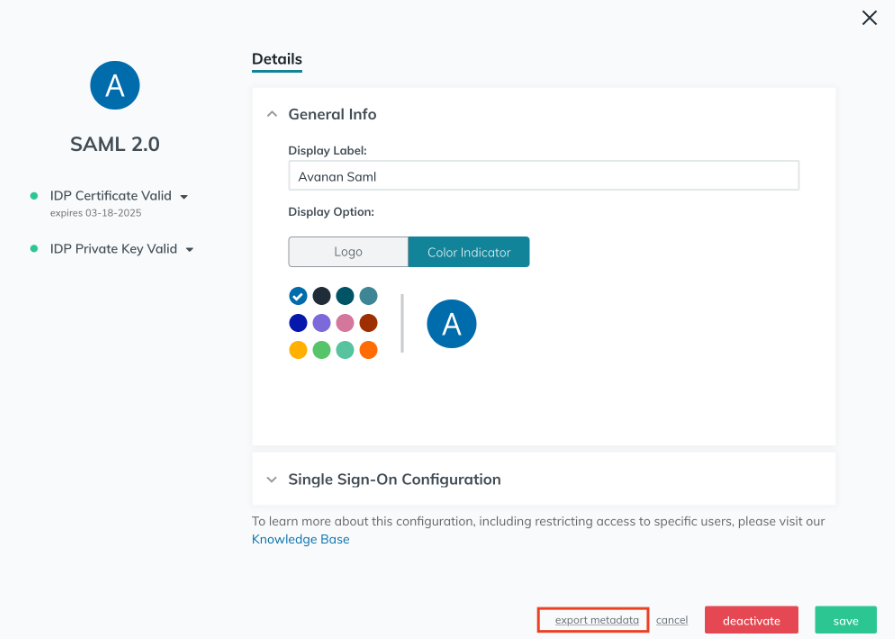
To export Metadata, go to Applications and select the newly created application.
-
Click export metadata.
-
-
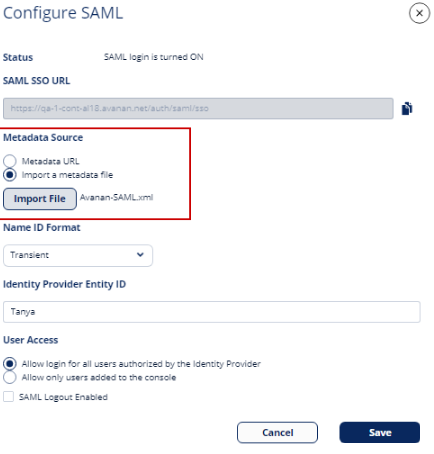
Log in to the Avanan Administrator Portal:
-
Go to System Settings > Settings and click Configure SAML.

The Configure SAML window appears.

-
In the Metadata Source field, select Import a metadata file and upload the XML file downloaded in step 2.k.
-
Clear the Are you running Azure AD checkbox.
-
Click Save.
-
-
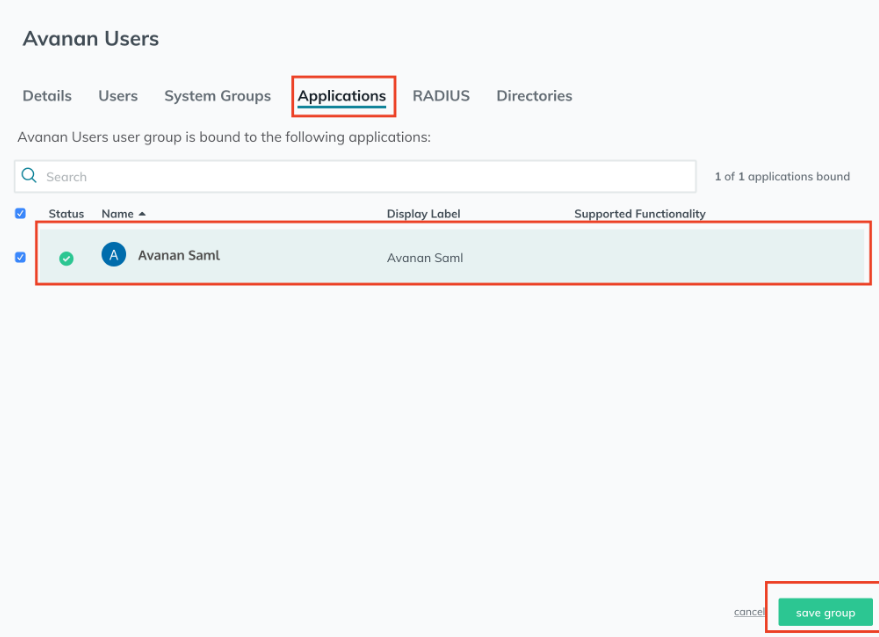
To assign users to the newly created JumpCloud application, log in to the JumpCloud Administrator Portal:
-
Go to Groups and select a user group.
-
From the edit group window, click Applications and select the newly created application.
-
Click save group.
You are now able to login to the Avanan Administrator Portal with SAML.
-
For more information, see https://jumpcloud.com/support.