Smart-1 700-S Fixed Rails
General Requirements for Racks
Check PointSmart-1 700-S Appliances come equipped with fixed rails by default. You can install them with telescopic rails (as an optional accessory) instead of the fixed rails.
This chapter describes the fixed rails installation.
Check Point appliances are designed for a standard 19-inch (48.26 cm) rack. For more information, see the specification EIA-310-D.The telescopic rails are designed for racks with these specifications:
|
Minimum Depth |
Maximum Depth |
|---|---|
|
22 inches (55.9 cm) |
32 inches (81.3 cm) |
|
24 inches (61 cm) |
36 inches (91.4 cm) |
Front and rear rack doors must have equally distributed holes on at least 65% of the surface area to give sufficient airflow. Make sure that the racks have sufficient clearance to service the Check Point appliances that are mounted on telescopic rails.
These are the physical specifications of the appliance:
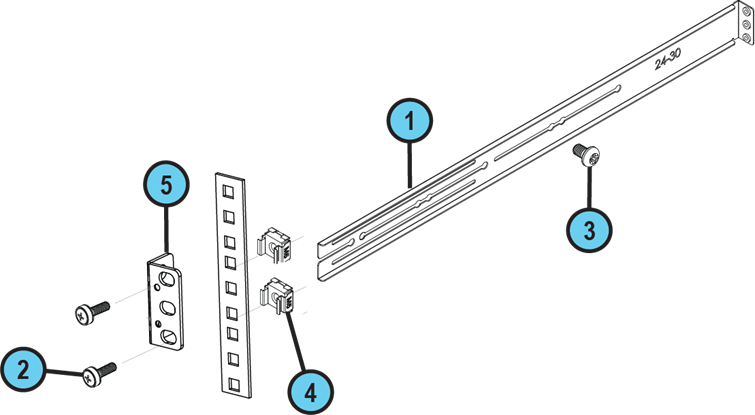
Fixed Rails Hardware
|
|
Important - To prevent injury or damage, at least two people are required to install the appliance in a rack. |

Rack Mounting Tools
We recommend that you use a Phillips PH2 screwdriver with a magnetic head to hold and retrieve screws. A powered screwdriver is also useful.
Installation Overview
Fixed rails installation consists of these procedures:
-
Attaching the ear mount brackets to the appliance
-
Attaching the fixed rails to the appliance
-
Installing the appliance in the rack
Step 1 - Attaching the Ear Mount Brackets
|
|
Important - The main appliance accessory box contains the ear mount brackets and the screws. |
To attach the ear mount brackets to the appliance:
-
Place the ear mount brackets on the side of the appliance near the front panel.
-
Attach the ear mount bracket to the appliance with two ear mount bracket screws.

-
Repeat steps 1 - 2 for the other side of the appliance.
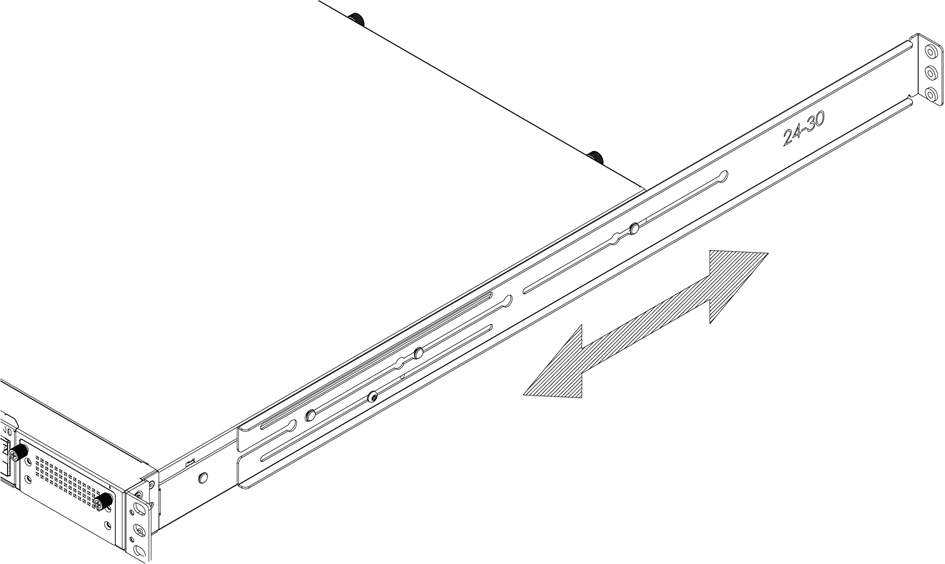
Step 2 - Attaching the Fixed Rails to the Appliance
To install the fixed appliance rails to the appliance:
-
Place the fixed rail on the side of the appliance and make sure that protruding parts face away from the appliance.
-
Align the mounting post on the side of the appliance (1) with the nodule on the fixed rail (2).
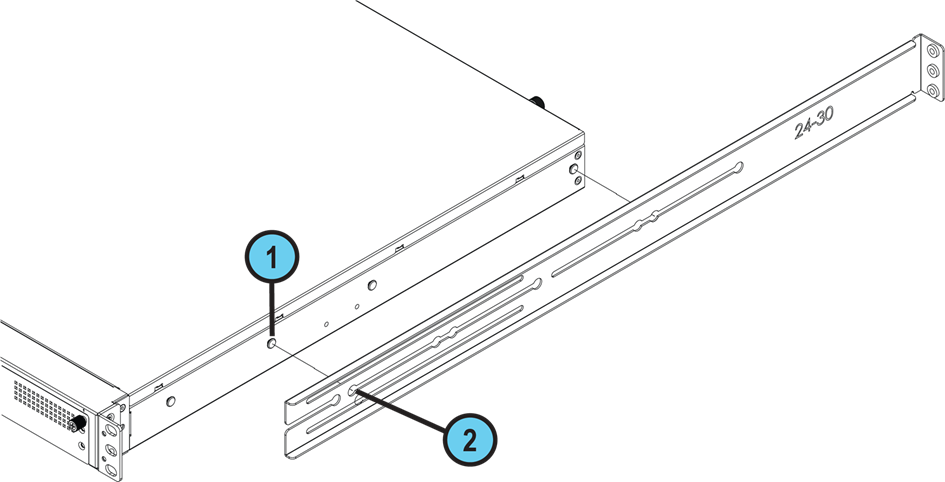
-
Press firmly on the rail and slide it to the suitable distance for mounting on the rack.
-
Use the M4x6 screw to attach the rail to the appliance firmly.
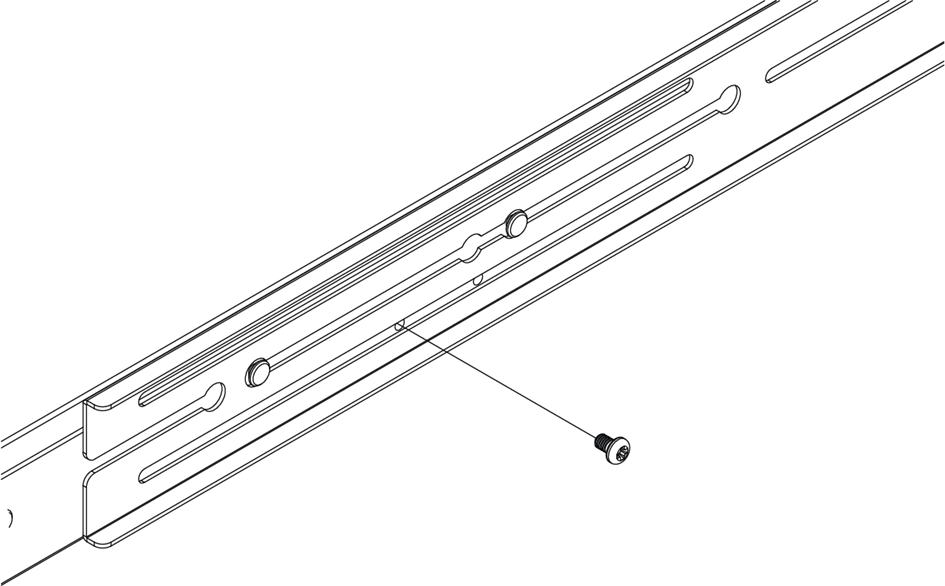
-
Repeat steps 1 - 4 to install the second appliance rail on the opposite side of the appliance.
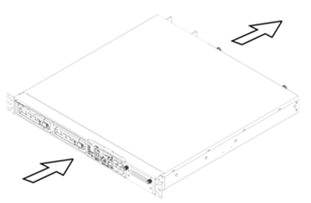
Step 3 - Installing the Appliance in the Rack
|
|
Important - To prevent injury or damage, at least two people are required to install the appliance in a rack. |
|
|
Important - Do not attempt to lift, drag, or otherwise move the appliance using the handles on the power supply units. |
-
Insert 2 M5 cage nuts on the front rack post.
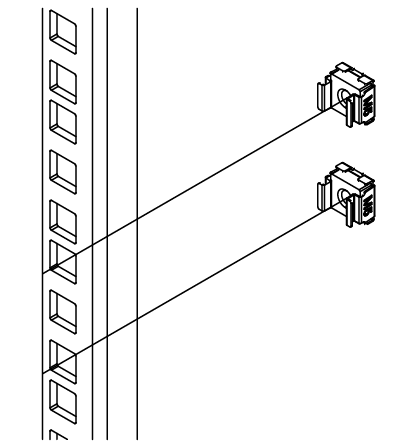
-
Align the fixed rail and the front ear mount bracket with the rack post holes where the cage nuts were inserted.
-
Fasten the fixed rail to the rack posts:
-
Fasten the front side of the fixed rail and the ear mount bracket to the front rack post with 2 M5x14 screws .
-
Fasten the rear side of the fixed rail to the rear rack post with 2 M5x14 screws.
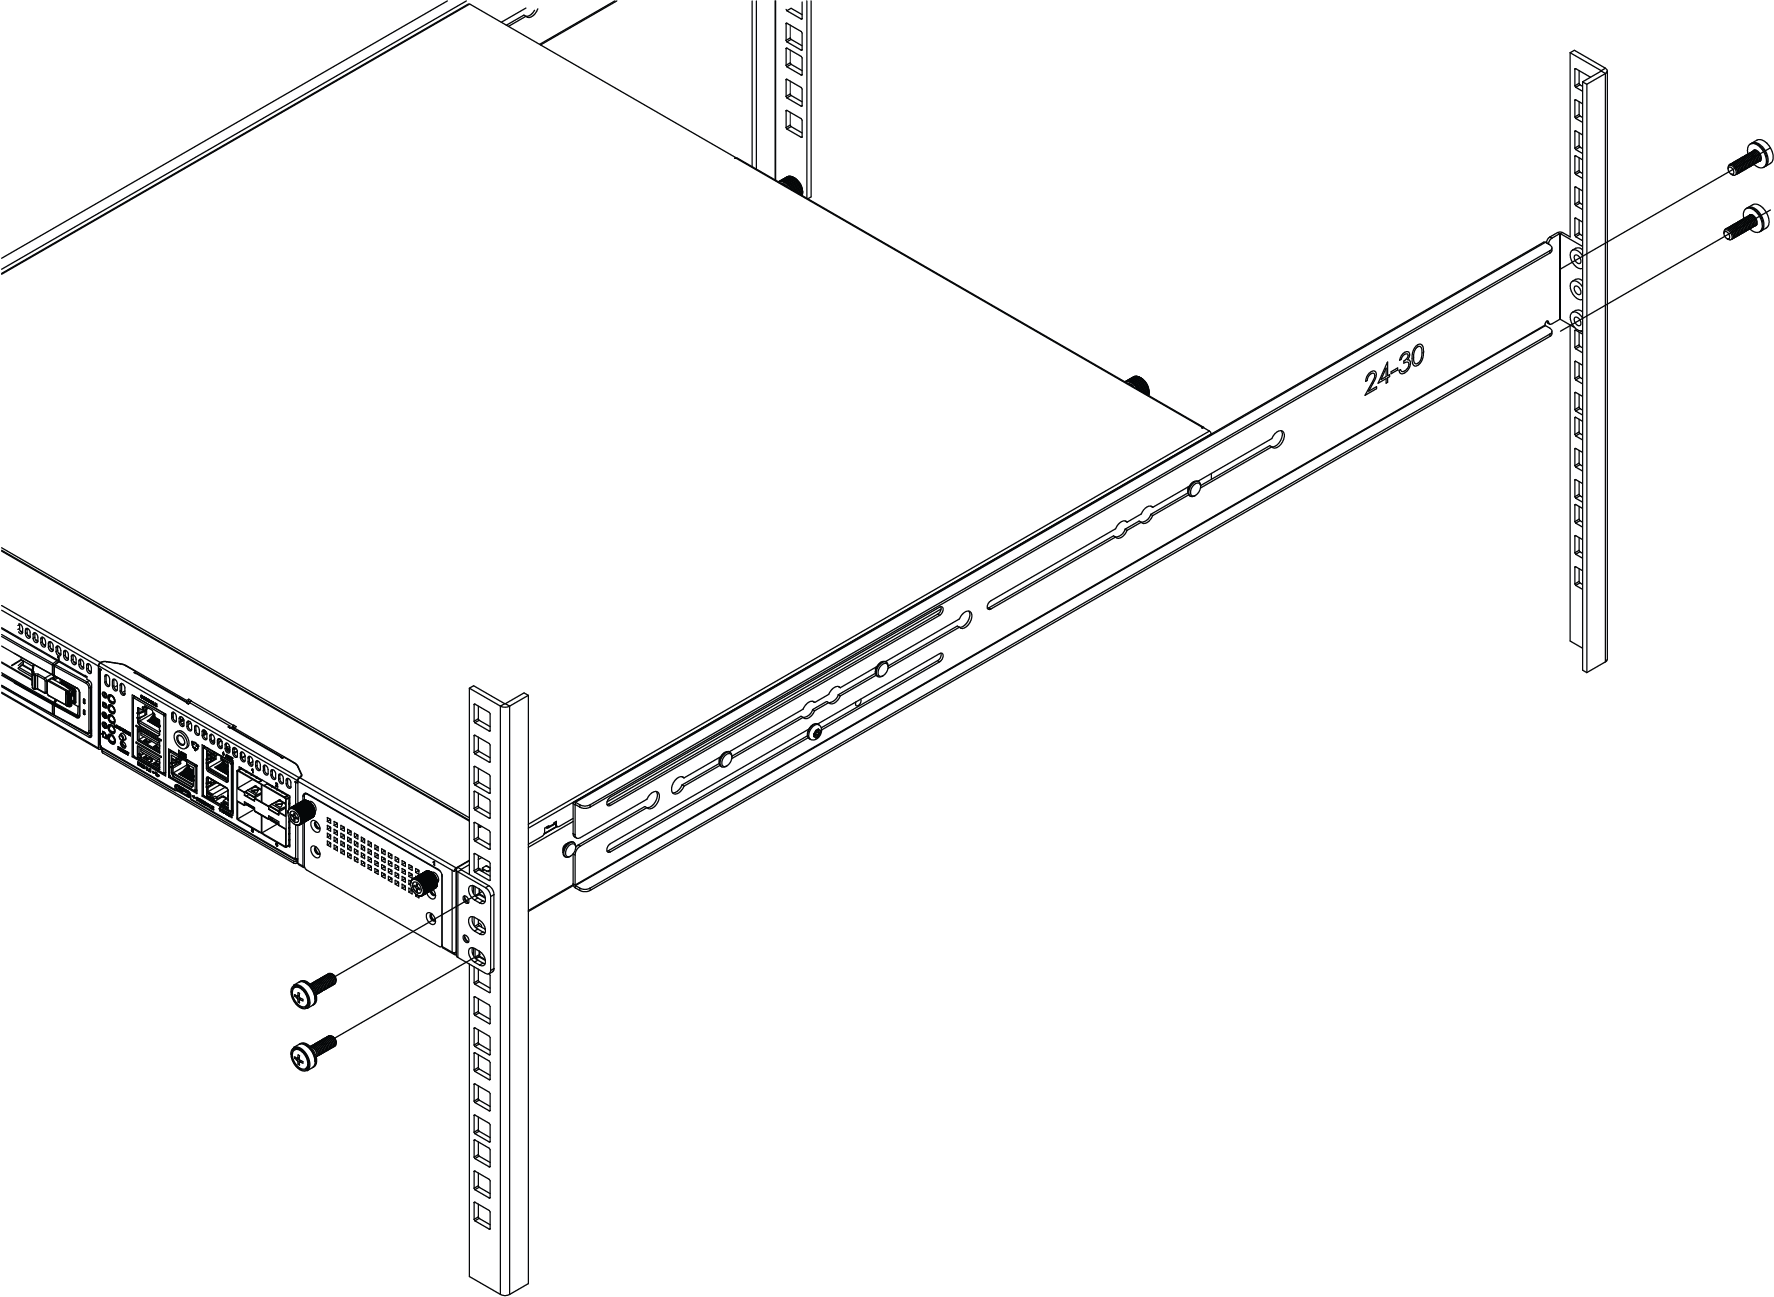
-
Make sure that the appliance is secured and cannot move.
-
-
Repeat steps 1 - 3 for the other fixed rail on the opposite side of the appliance.
Appliance Air Vents
Make sure that the appliance air vents have sufficient airflow from front to rear when the appliance is mounted in a rack.
|
|
Important - If the appliance vents are blocked, the appliance can become too hot and it can be damaged. |
The appliance and rack rails have been tested in extreme conditions and do not block air flow to the appliance.
These appliances are specifically designed to install with these rails.
The air flow in Smart-1 700-S Appliances: