Creating a Virtual Disk and RAID Array
To configure RAID on the Smart-1 6000-L/6000-XL, you must connect to the RAID Configuration Utility and delete the existing RAID array. Then you must create a new virtual disk with a new RAID array.
Important - Configuring RAID erases all the data on the disks.
-
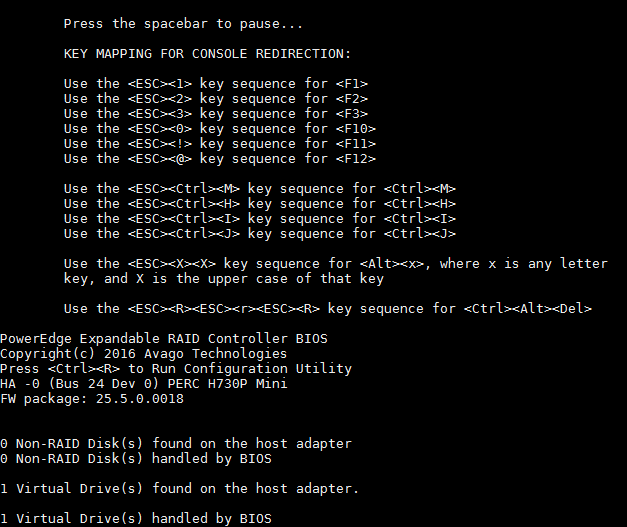
Press CTRL R to run the Configuration Utility when the appliance starts.
If you miss this screen, start the appliance again.
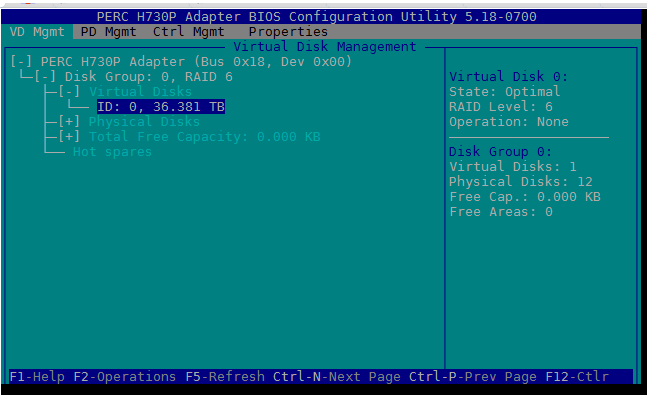
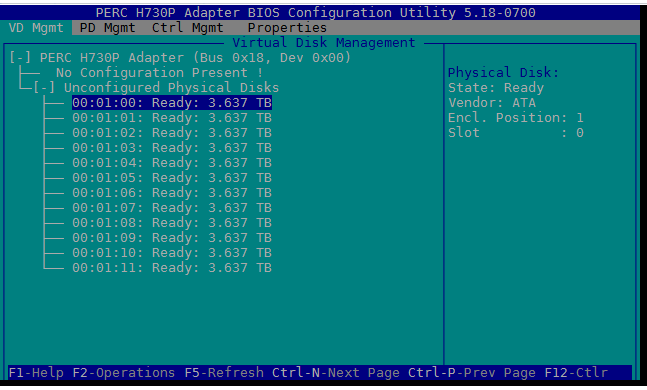
Virtual Disk Management shows information about your current virtual disk and RAID array.
-
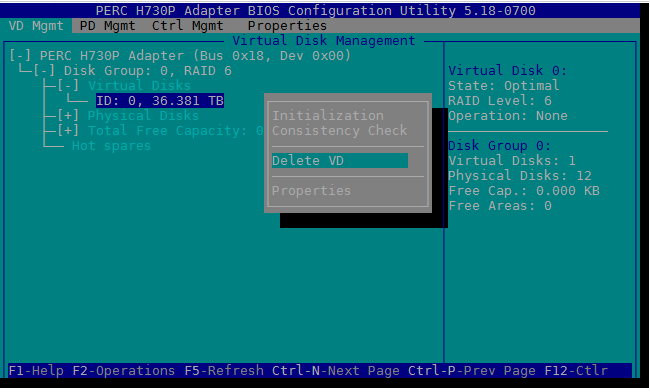
Use the up or down arrows to highlight your virtual disk. Press F2 to see a list of options.
-
Use the down arrow to highlight Delete VD and press Enter.
-
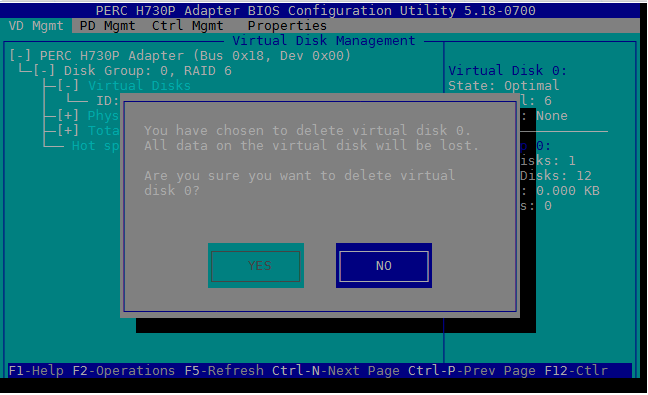
To create a new virtual disk, Tab to YES and then press Enter.
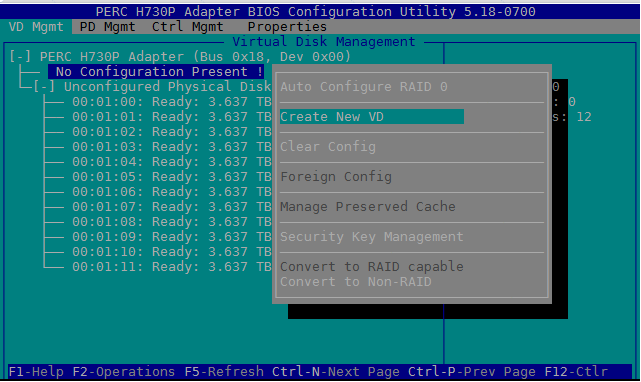
Virtual Disk Management shows No Configuration Present.
-
Use the up or down arrows to highlight No Configuration Present. Press F2 to show the available actions.
-
Use the arrows to highlight Create New VD and press Enter.
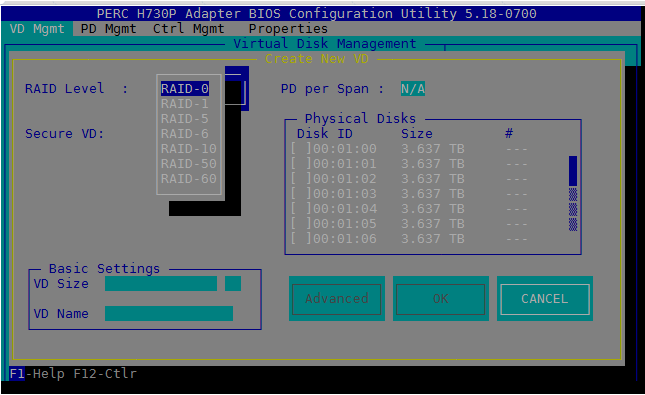
The Create New VD window shows the RAID options.

-
Use the down arrow to highlight a RAID level and press Enter.
-
Tab to the PD per Span field if your new RAID array is a nested RAID 50 or 60.
If you create nested RAID levels 50 or 60, you must enter the physical disks per span. Enter the number that is half the total of the physical disks in the array. This sets an equal number of disks in two spans.
If you create a RAID 10 array , the PD per Span field is N/A. This is the default for RAID 10 (mirrored pairs).
-
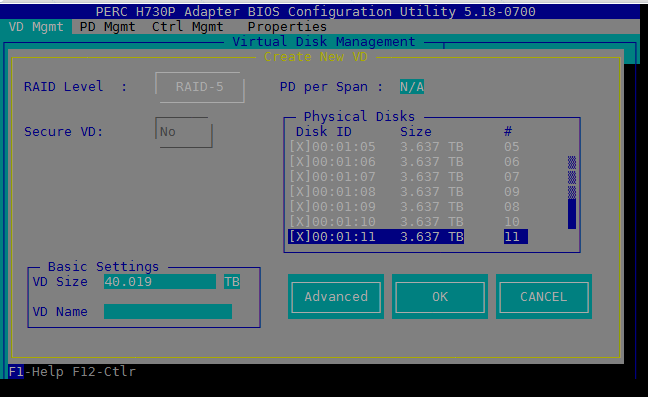
Tab to the physical disk list and use the down arrow to highlight a physical disk. Press Spacebar or Enter to select the disk.
-
Use the down arrow to select each physical disk. You must select all the disks.
-
Tab to the Basic Settings fields. Optional - The virtual disk size is set automatically but you can create a VD Name.
-
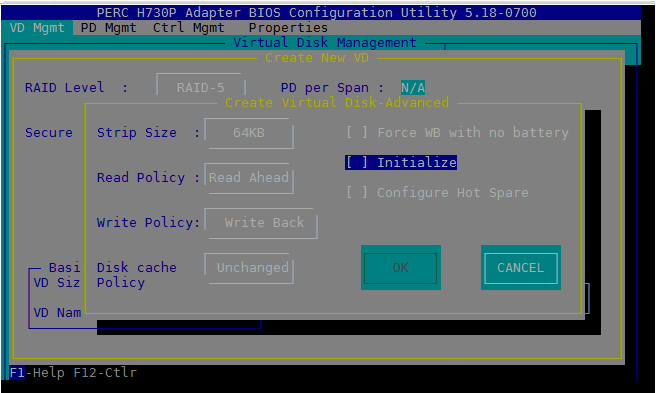
Tab to Advanced and press Enter to see the Create Virtual Disk - Advanced screen.
-
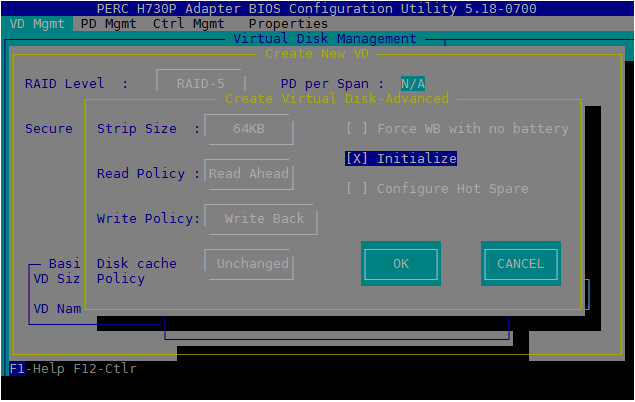
Tab to select Initialize and press Enter.
-
Tab to OK and press Enter.
-
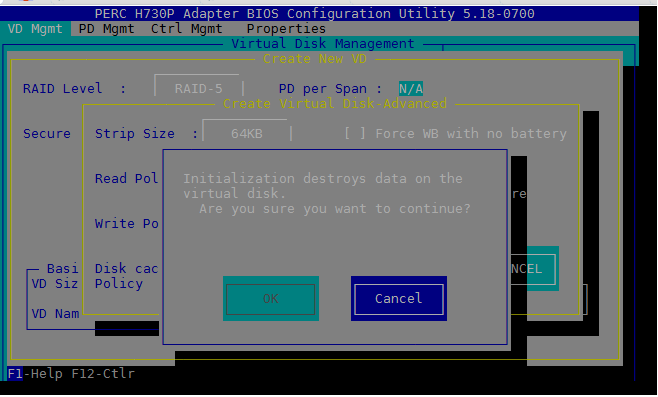
To start the initialization, Tab to OK and press Enter.
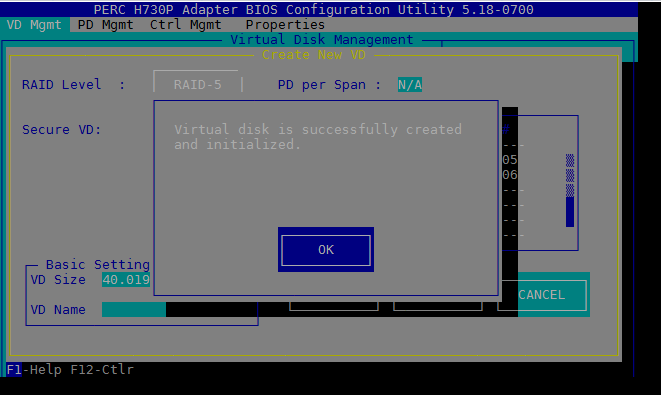
The "Virtual disk is successfully created and initialized" message shows.
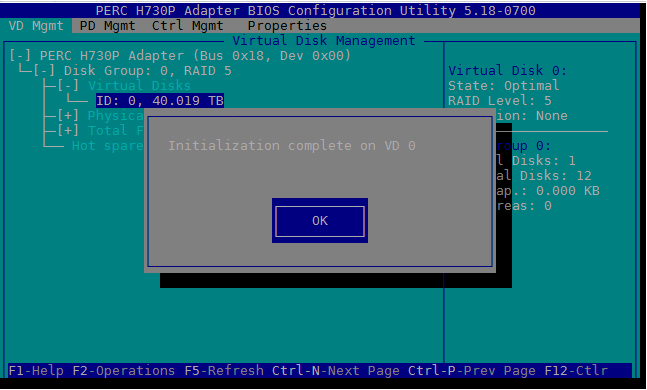
The "Initialization complete" message shows.
The "Initialization destroys data on the virtual disk" message shows.
Virtual Disk Management shows your new virtual disk.