Step 5: Dual Chassis System Validation
When you install and configure a Dual Chassis deployment in high availability, make sure that all CMMs on each Chassis have the same Chassis ID.
The CMMs on Chassis 1 must include chassis_id 1 (SHMM_CHASSID='1').
The CMMs on Chassis 2 must include chassis_id 2 (SHMM_CHASSID='2').

|
Important - When you add a new CMM to a Chassis, you must validate the Chassis ID. Make sure that the Chassis is in the Standby mode when you do this. |
Validating the Chassis ID
|
Step |
Instructions |
||
|---|---|---|---|
|
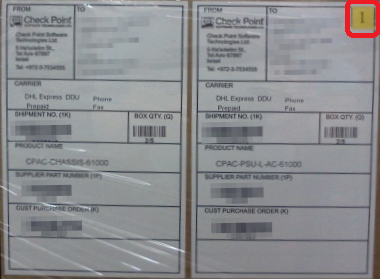
1 |
Make sure that the sticker on the outer box of one Chassis identifies it as Chassis 1 and the other as Chassis 2. If the numbers are the same, contact Check Point Support. Example:
|
||
|
2 |
Open the outer box, and confirm that the stickers on the Chassis and the CMM blades are different for each Chassis. If the numbers are the same, contact Check Point Support. |
||
|
3 |
Make sure that Chassis ID is configured correctly on the CMM:
|
||
|
4 |
Run this command in the Expert mode to make sure that the CMM ID is correct:
Example output:
|
||
|
5 |
Repeat these steps to validate the IDs of CMMs on the other Chassis. If the numbers are the same, contact Check Point Support. |
Setting the Chassis ID
|
Step |
Instructions |
||
|---|---|---|---|
|
1 |
Pull out the first CMM from the Chassis. |
||
|
2 |
Connect to the remaining CMM with a serial cable (baud rate - 9600). |
||
|
3 |
Log in with these user name and password: |
||
|
4 |
Edit the
|
||
|
5 |
Search for:
|
||
|
6 |
Set the correct Chassis ID:
|
||
|
7 |
Save the changes in the file and exit the editor. |
||
|
8 |
Remove the current CMM and insert the second CMM. |
||
|
9 |
Repeat Steps 2 - 6 for the second CMM. |
||
|
10 |
Insert both CMMs into the Chassis. |
||
|
11 |
Attach the correct identification labels to the Chassis and CMMs. This step is required if the Chassis has already been configured (after the First Time Configuration Wizard). |
||
|
12 |
Pull out all SGMs from the Chassis. Insert all SGMs into the Chassis.
|