19100, 19200, 29100, and 29200
|
|
Important -
|

|
|
Important - When removing a failed cooling fan unit, we recommend that you complete the procedure within 3 minutes to avoid a temporary impact on performance. If you require additional time, we recommend that you shut down the appliance beforehand. |
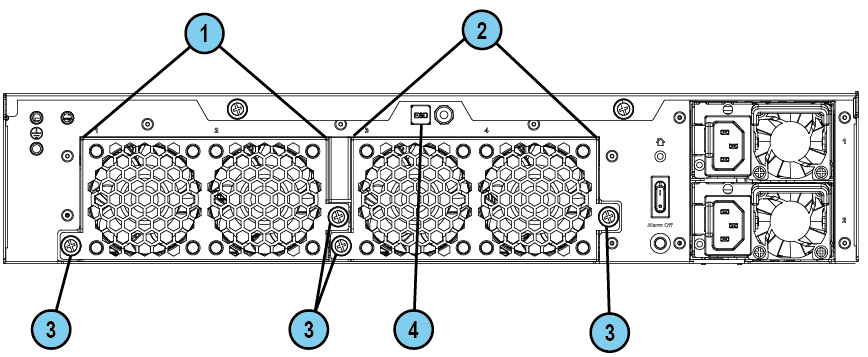
Rear Panel
|
Item |
Description |
|---|---|
|
1 |
Cooling fan unit (fan numbers 1 and 2) from right to left |
|
2 |
Cooling fan unit (fan numbers 3 and 4) from right to left |
|
3 |
Cooling fan screws |
|
4 |
ESD ground plug |
Units are numbered in stacks of two (one inner and one outer) for a total of 8 fans, four fans in each unit. When checking the hardware sensors in the CLI, they are referred to as Fan1_IN and Fan1_OUT to Fan4_IN and Fan4_OUT. See also Cooling Fan Units Naming Convention.
|
|
Caution - Components inside the appliance can overheat if they are not cooled, even for a short period of time. To prevent damage caused by too much heat:
|

To replace a fan unit:
-
Loosen the screws on the cooling fan unit to be replaced.
-
Hold the screws and pull the cooling fan unit away from the appliance.
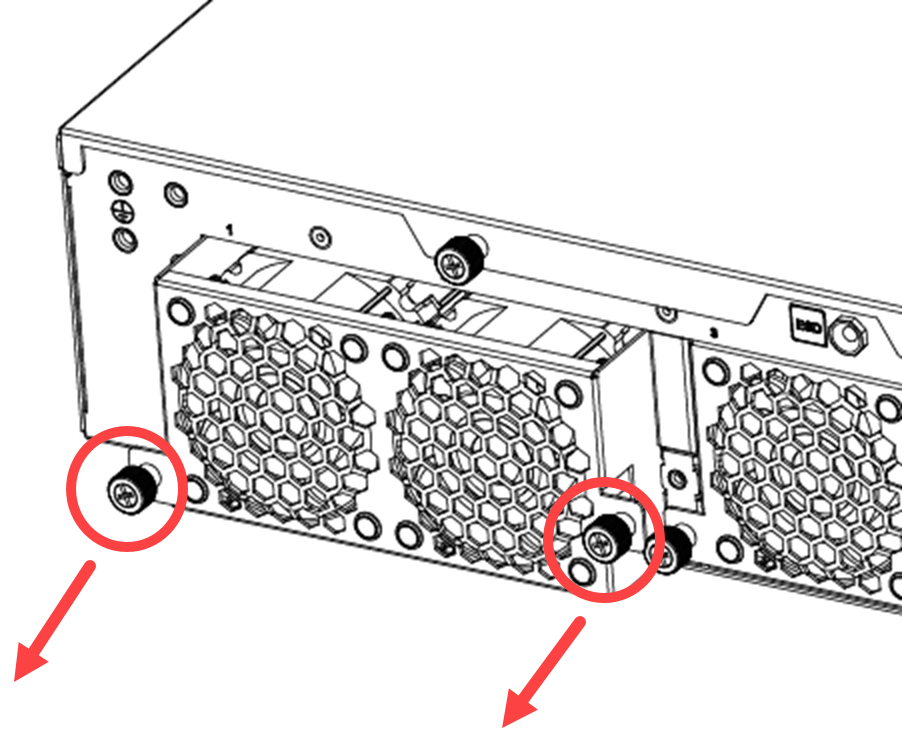
-
Position the new cooling fan unit in the empty cooling fan tray slot in the appliance.
-
Tighten the screws on the cooling fan unit.
Cooling Fan Units Naming Convention
When you check the hardware sensors in the Gaia Portal or Gaia Clish, note that the cooling fans use a different naming convention.
Use the below table to identify each of the 8 fans.
|
Gaia Portal |
CLI |
|---|---|
|
Fan 1 Inlet |
Fan1_IN |
|
Fan 1 Outlet |
Fan1_OUT |
|
Fan 2 Inlet |
Fan2_IN |
|
Fan 2 Outlet |
Fan2_OUT |
|
Fan 3 Inlet |
Fan3_IN |
|
Fan 3 Outlet |
Fan3_OUT |
|
Fan 4 Inlet |
Fan4_IN |
|
Fan 4 Outlet |
Fan4_OUT |