9800, 9700, 9400 and 9300
9800 / 9700 / 9400 / 9300 Appliances have a redundant power supply unit (PSU) and support DC PSUs.
If necessary, you can replace a PSU. Note that all PSUs on an appliance must be of the same type (DC).
|
|
Warning:
|

|
|
Warning - All work related to the |
|
|
Important - Each of the three DC power wires must be: 12 AWG, copper. |

|
|
Important - The DC power source must be reliably grounded. |
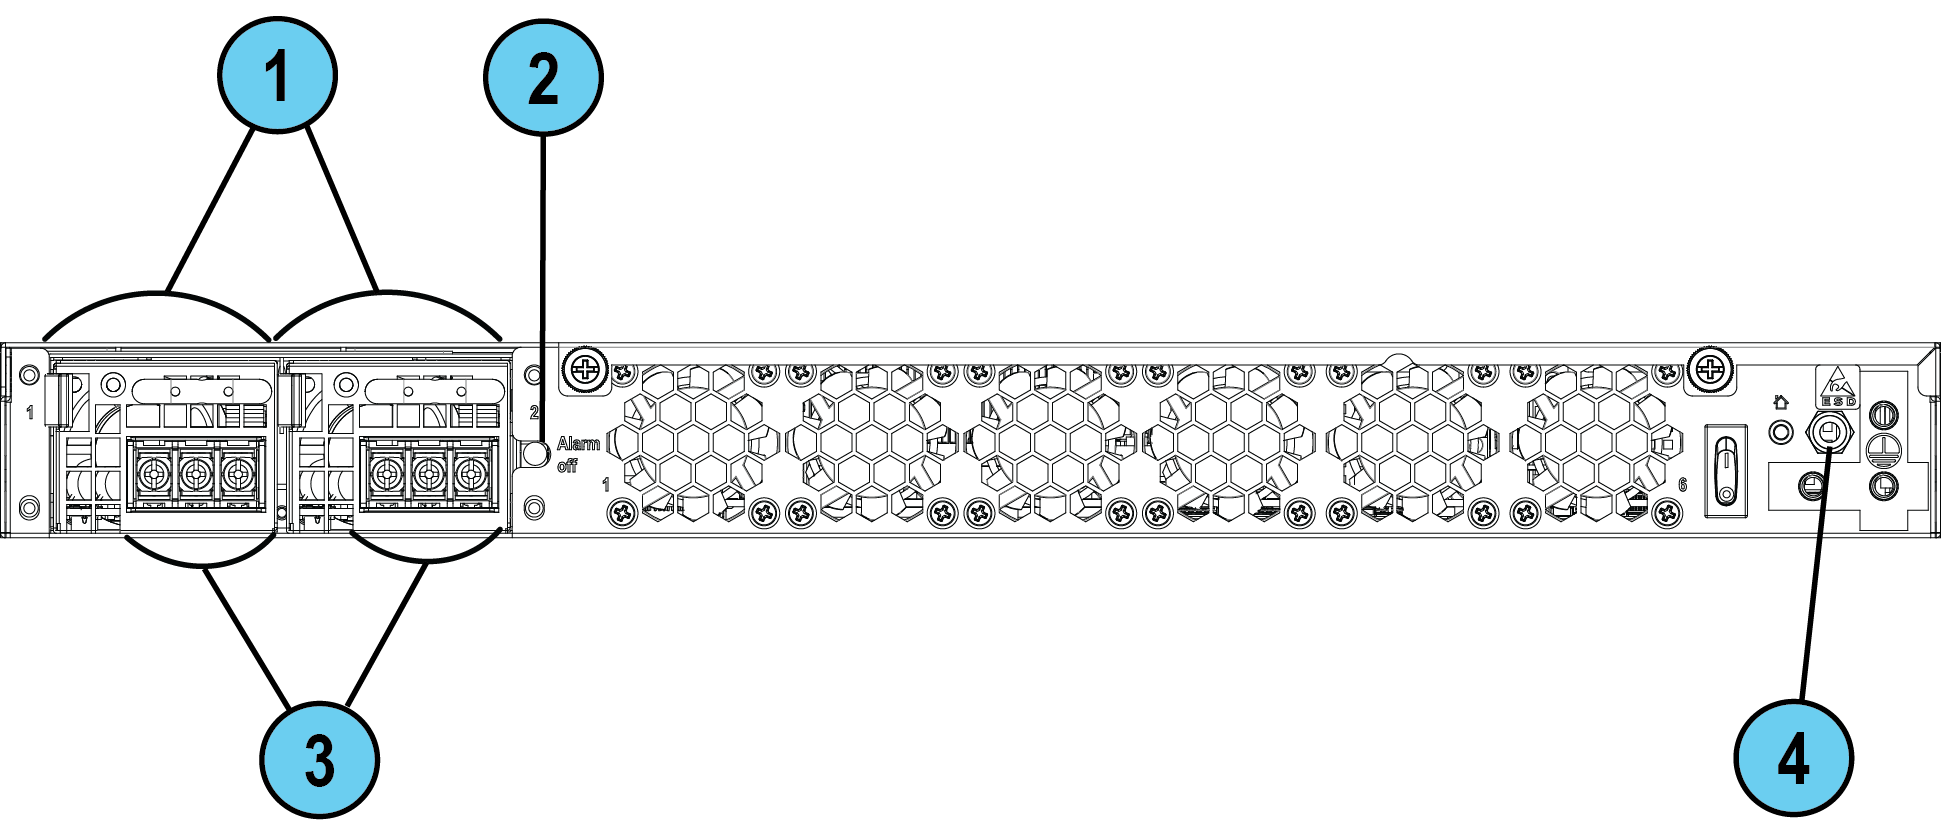
9800 / 9700
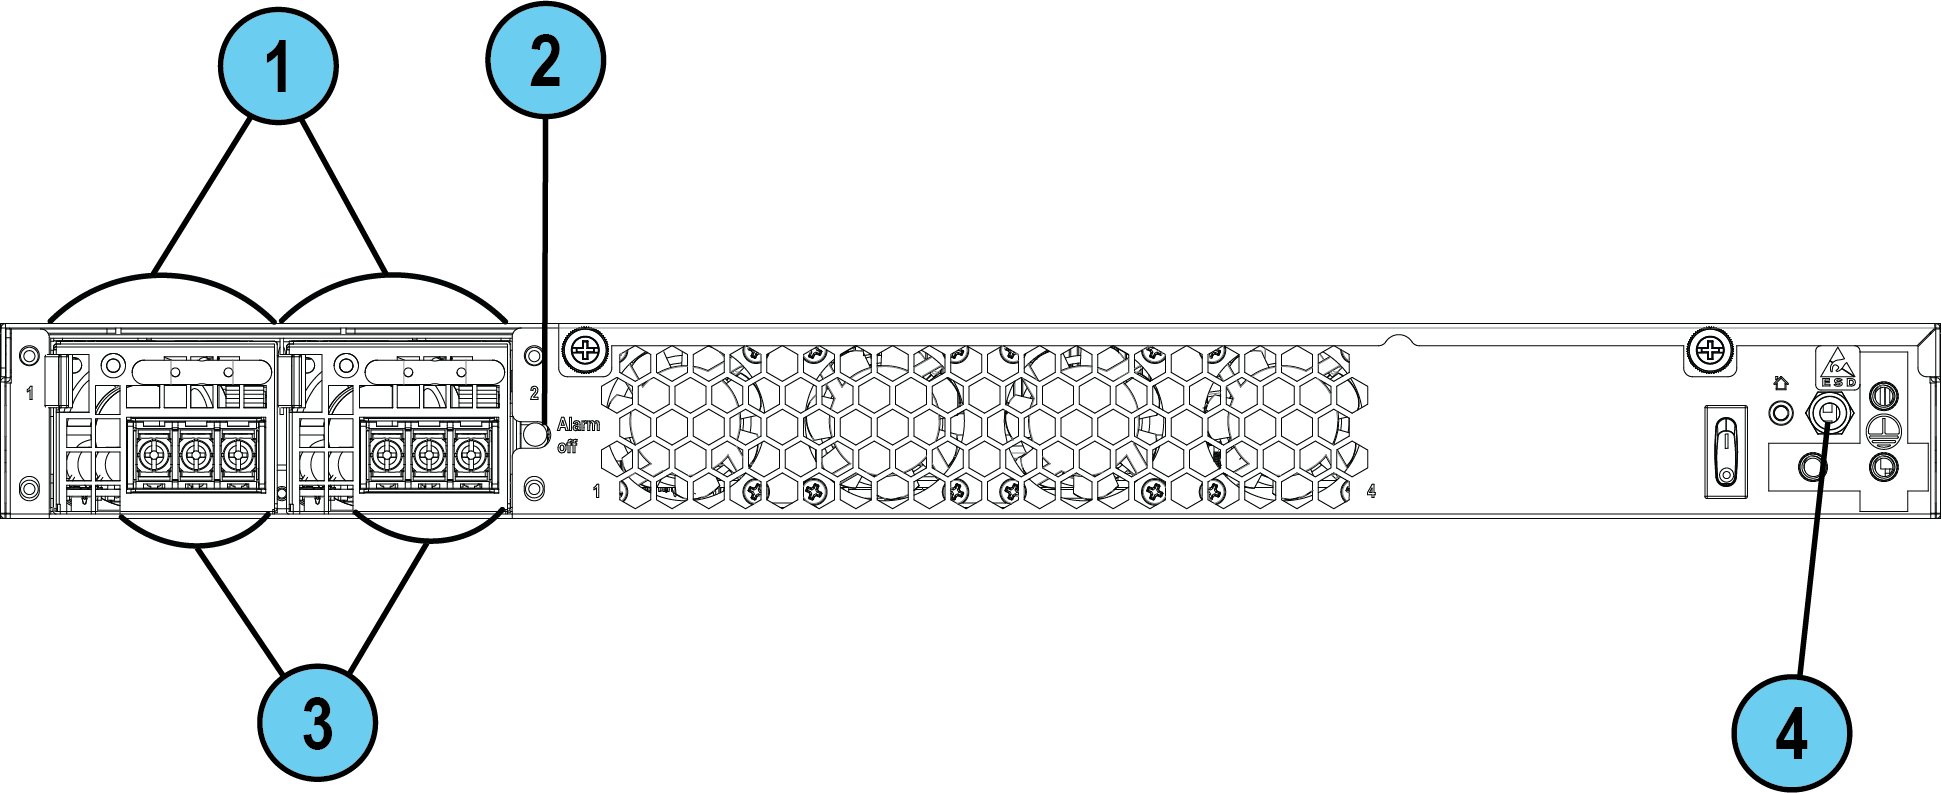
9400 / 9300
|
Item |
Description |
|---|---|
|
1 |
DC Power Supply Unit |
|
2 |
Alarm off button |
|
3 |
DC PSU terminal block |
|
4 |
ESD grounding point |
Removing a DC Power Supply Unit
|
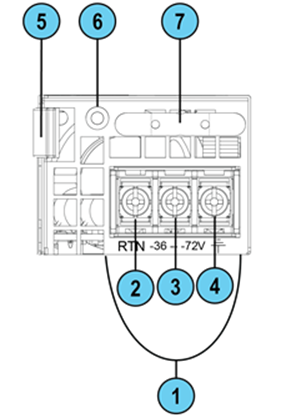
Item |
Description |
|---|---|
|
1 |
DC power connector (terminal block) |
|
2 |
DC return terminal (RTN) |
|
3 |
DC -36 — -72V terminal |
|
4 |
DC ground terminal ( |
|
5 |
Release lever |
|
6 |
LED indicator for each power supply unit: 9800 / 9700:
9400 / 9300:
|
|
7 |
Extraction handle |
To remove a DC Power Supply Unit:
-
Turn off the circuit breaker that supplies power to the DC Power Supply Unit.
Make sure that the power supply LED is off.
-
On the DC power terminal block, loosen these screws:
-
-36 — -72V DC terminal
-
RTN terminal
-
-
Disconnect the wires from the loosened DC power terminals:
-
-36 — -72V DC terminal
-
RTN terminal
-
-
Loosen the screw from the DC grounding terminal (
 ) and disconnect its wire.
 -
Hold the DC PSU release lever, push it to the right, and pull the extraction handle simultaneously to remove the DC PSU.

Legend Item
Description
1
Release lever
2
Extraction handle
|
|
Note - To prevent damaging the power supply, use only the extraction handle to remove the DC Power Supply Unit. |

Installing a Replacement DC Power Supply Unit
|
|
Important - To protect the appliance and the DC Power Supply Units from damage, make sure that you connect the wires to the DC power connector terminals correctly. |
To install a replacement DC Power Supply Unit:
-
Turn off the circuit breaker that supplies power to the DC PSU.
-
Insert the replacement DC PSU into its slot and push it until it clicks into place.
-
Connect the DC ground wire to the DC grounding terminal (
) on the DC PSU and tighten the screw to a maximum torque of 6 kgf/cm2. -
Connect the DC return wire to the RTN terminal on the DC PSU and tighten the screw to a maximum torque of 6 kgf/cm2.
-
Connect the DC minus wire to the -36 — -72V terminal on the DC PSU and tighten the screw to a maximum torque of 6 kgf/cm2.
-
Turn on the circuit breaker that supplies power to the DC PSU.
-
If the alarm sounds, press the red Alarm Off button located to the right of the DC PSUs.
-
Make sure that the green LED on the DC PSUs is illuminated.
PSU Configuration and Monitoring
See the Getting Started Guide for PSU configuration and monitoring options: