9300, 9400, 9700, and 9800
The appliances have a redundant Power Supply Unit (PSU). They support AC PSUs.
If necessary, you can replace a PSU. Note that all PSUs on an appliance must be of the same type (AC).
|
|
Warning:
|

|
|
Warning - All work related to the |
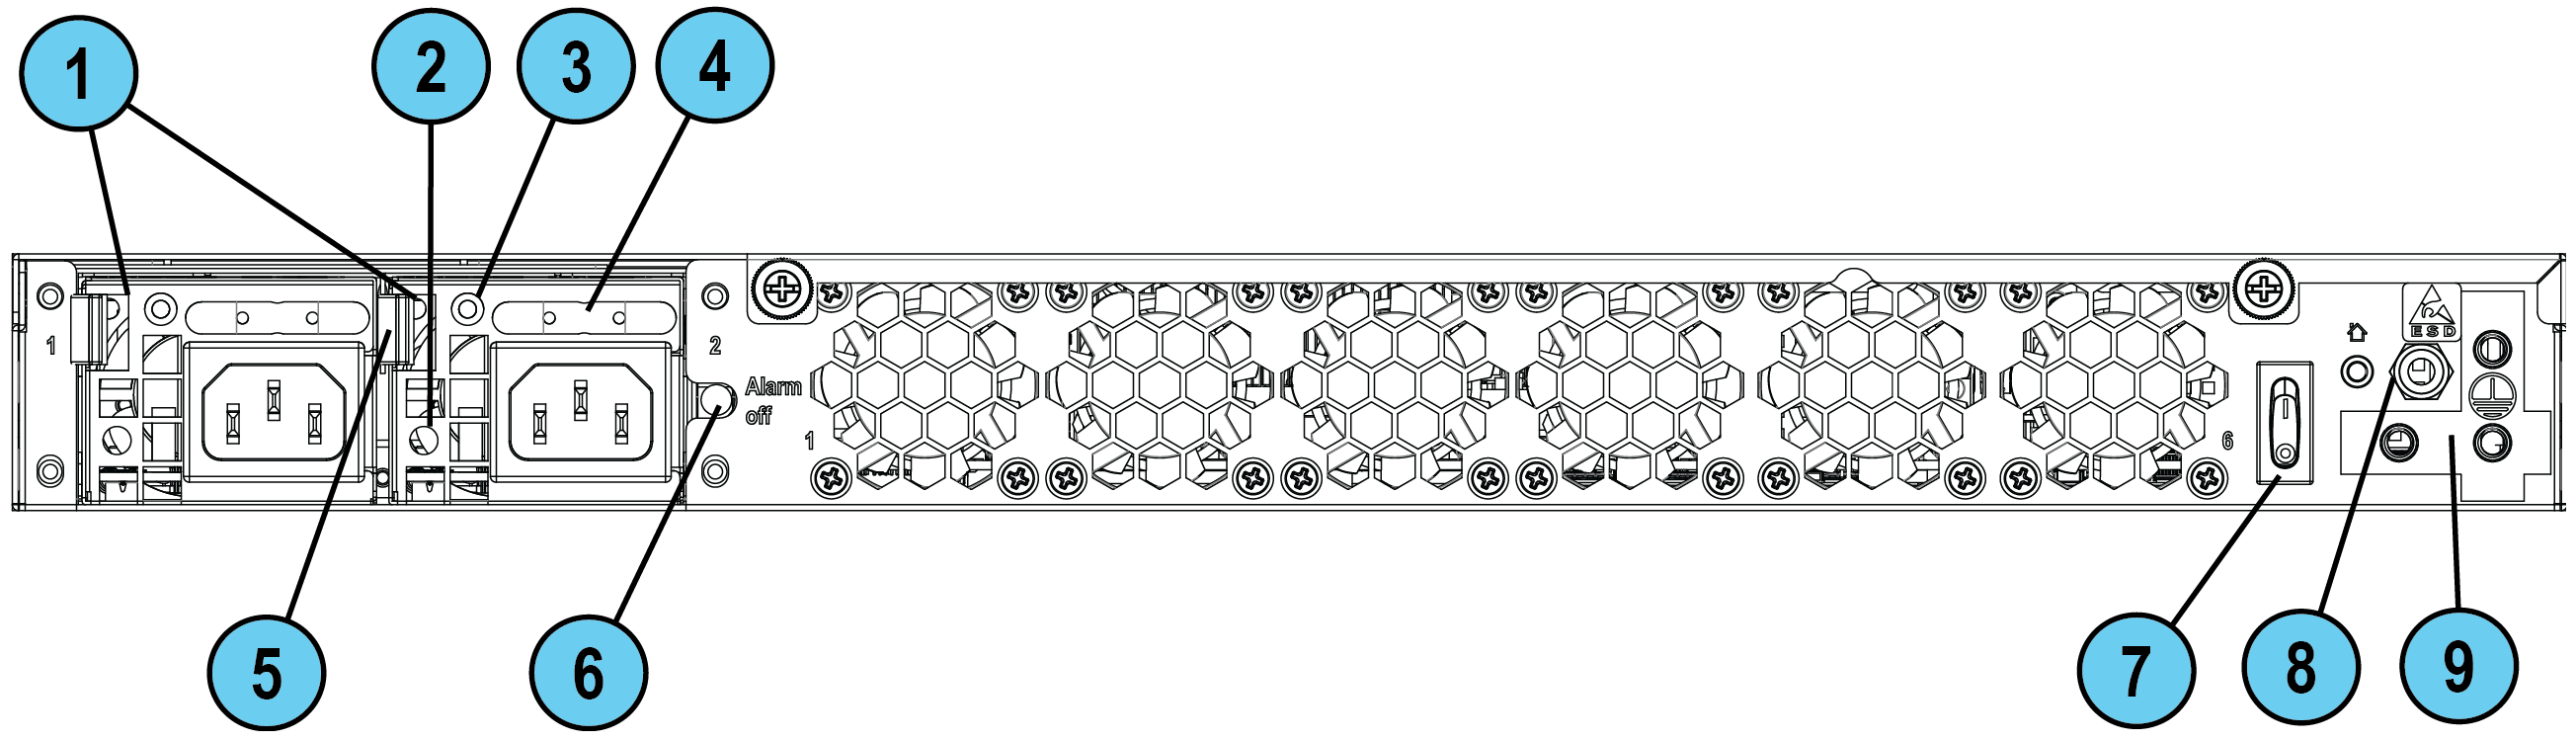
9700 / 9800 Appliance
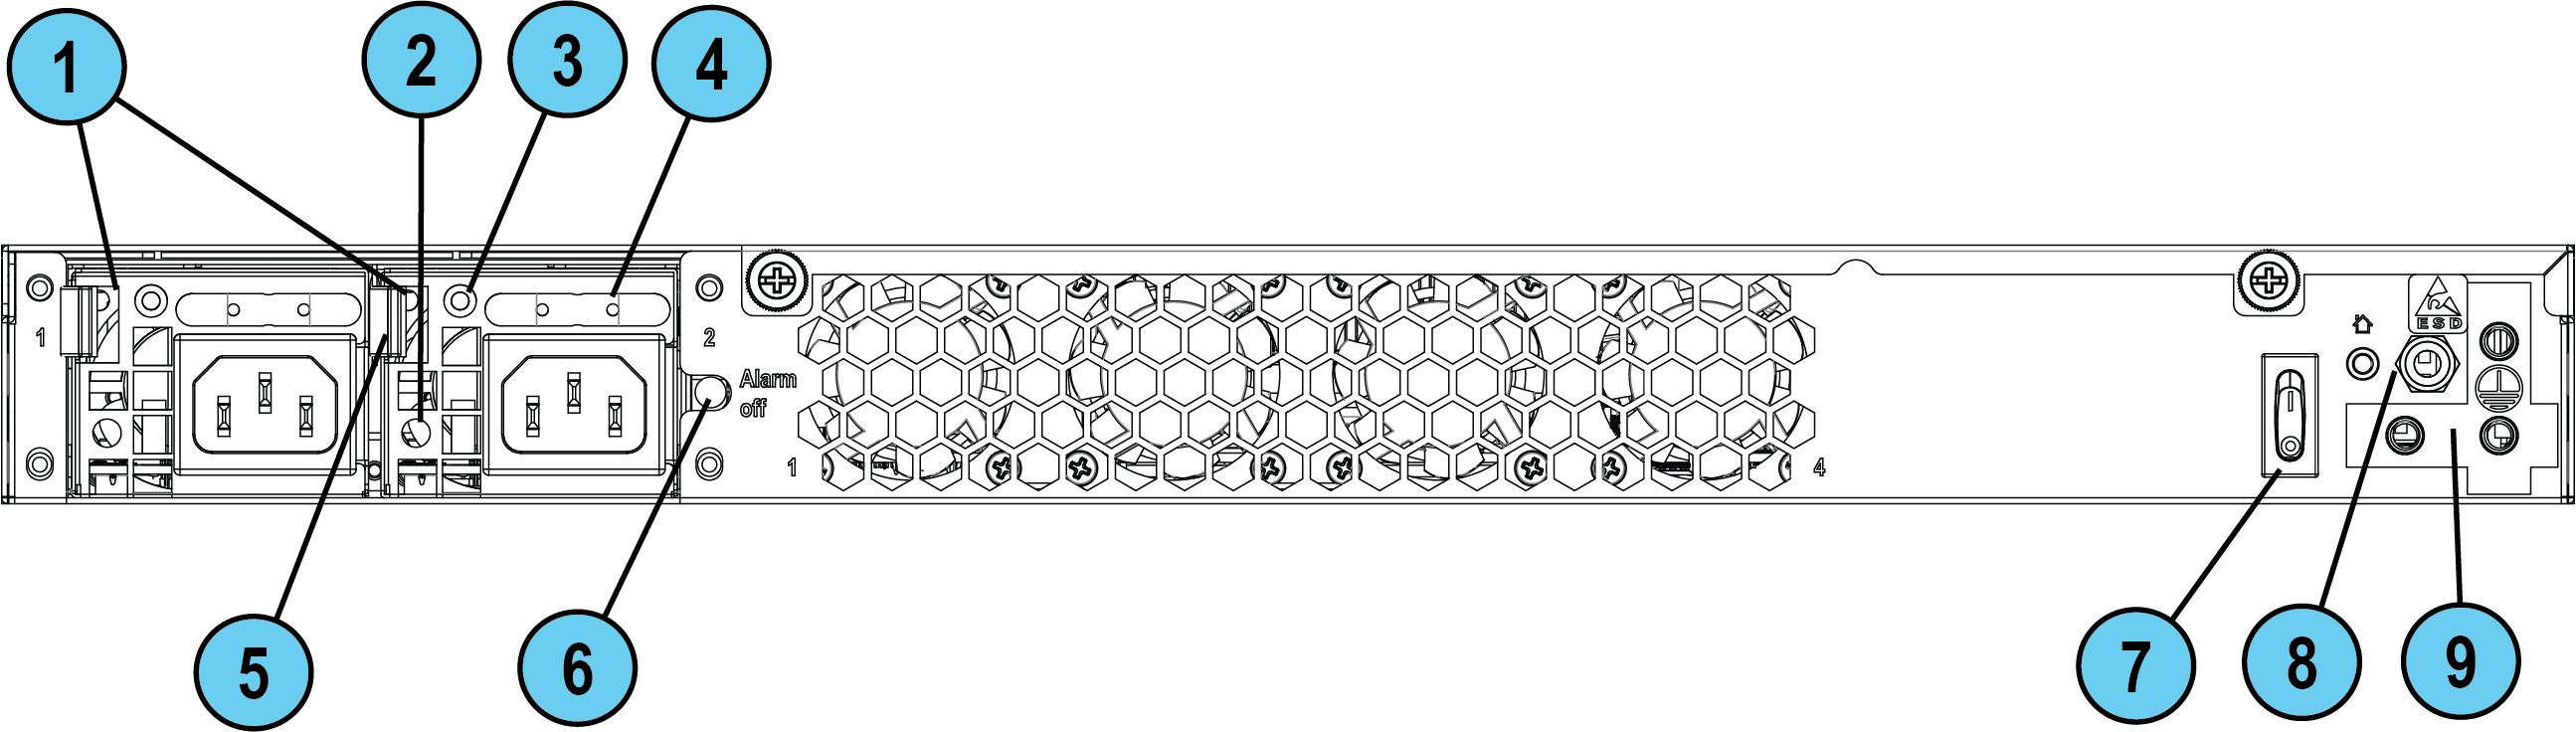
9300 / 9400 Appliance
|
Item |
Description |
|---|---|
|
1 |
Power supply units (PSUs) that you can hot swap. Each PSU connects to an electric outlet. In the 9300 Base / 9400 Base / 9700 Base / 9800 Base Appliance, one PSU is included. An optional redundant hot-swappable PSU is available. In the 9300 Plus / 9400 Plus / 9700 Plus / 9800 Plus Appliance, two PSUs are supplied. You can use the cable restraints to avoid accidental removal of the power supply cable. The PSUs are numbered from left to right in the OS as Power Supply #1 (left) and Power Supply #2 (right). |
|
2 |
Restraint strip slot. |
|
3 |
LED indicator for each PSU
|
|
4 |
Extraction handle |
|
5 |
Release lever |
|
6 |
Alarm off button for PSUs - If a power supply cable is not connected to the outlet, an alarm sounds continuously. Press this button to turn off the alarm. Note that this button is functional immediately after powering up the appliance. |
|
7 |
Main power switch. |
|
8 |
ESD grounding point - When servicing the appliance, connect an ESD strap to this point. |
|
9 |
Grounding lug used to connect grounding. |
Removing a Power Supply Unit
Before you remove a Power Supply Unit, we recommend that you make sure that:
-
A second AC power supply is installed and connected to a working power source.
Or
-
The appliance is shut down.
To remove an AC Power Supply Unit:
-
Remove the power supply cable from the AC PSU.
-
If the alarm sounds, press the Alarm Off button to the right of the AC PSU.
-
While holding the PSU release lever, pull the extraction handle to remove the AC PSU.
|
|
Note - To prevent any damage, remove the PSU only with the extraction handle. |

Installing an AC Power Supply Unit
To install a replacement AC Power Supply Unit:
-
Insert the AC PSU into the power supply slot.
-
Push in the AC PSU until the release lever clicks.
-
Insert the AC power supply cable into the power supply socket.
-
Make sure that the power LED on the AC PSU is lit up.
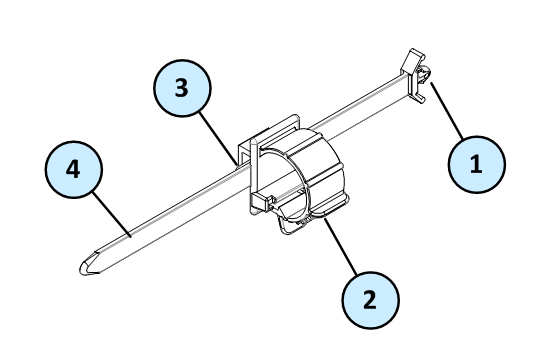
Installing the AC Power Supply Cable Restraint
Use the power supply cable restraint to prevent accidental removal of the power supply cable.
|
Item |
Description |
|---|---|
|
1 |
Restraint anchor |
|
2 |
Cable loop |
|
3 |
Restraint strip tab |
|
4 |
Restraint strip |
|
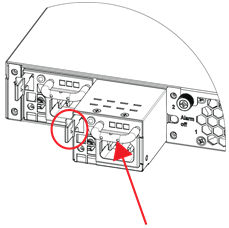
Item |
Description |
|---|---|
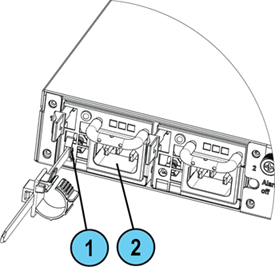
|
1 |
Restraint strip slot |
|
2 |
Power supply socket |
To install the AC power supply cable restraint:
-
If a power supply cable is connected to the power supply socket, disconnect it.
-
Locate the restraint strip slot above the power supply socket.
-
Make sure that the cable loop on the restraint faces the power supply socket.
-
Insert the restraint strip anchor into the slot until it fastens and locks.
-
Connect the power supply cable to the power supply socket.
-
Pull the restraint tab to the side to move the cable loop on the restraint strip.
-
Move the cable loop until you can position it around the power supply cable.
-
Insert the open side of the cable loop into the loop slot until it fits tightly against the power supply cable.
-
Make sure the cable loop is secured and the power supply cable cannot be removed.

PSU Configuration and Monitoring
See the Getting Started Guide for PSU configuration and monitoring options: