3000 Appliances Hardware
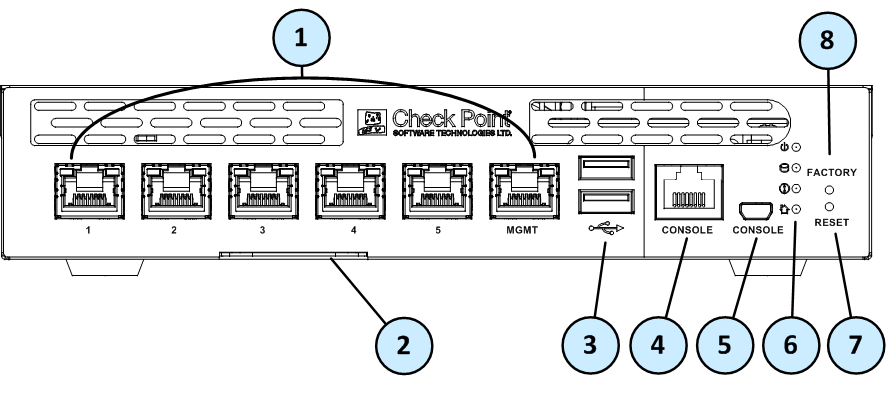
Front Panel
3100/3200
3600/3800
|
Item |
Component |
Description |
||
|---|---|---|---|---|
|
1 |
On board Ethernet ports |
Six 10/100/1000Base-T RJ-45 ports. |
||
|
2 |
A slide out card that identifies the appliance and shows its serial number and MAC address. In some appliances, it also contains a QR code that you can scan to onboard the appliance and view documentation. |
|||
|
3 |
USB ports |
Two USB ports. |
||
|
4 |
RJ45 console port |
For a serial connection to the appliance. See Connecting to the 3000 Appliances CLI. |
||
|
5 |
Console port |
3100/3200 - MiniUSB console port for a serial connection to the appliance. |
||
|
6 |
System LEDs |
|
System power |
|
|
|
Storage device activity |
|
||
|
|
Alert |
|
||
|
|
Location |
In 3100/3200 only -
|
||
|
|
Power supply status |
In 3600/3800 only -
|
||
|
7 |
Reset |
Insert a pin for 5 to 8 seconds to perform a hardware reset. |
||
|
8 |
Factory |
In 3100/3200 only - Insert a pin to restore the appliance to its factory defaults. |
||


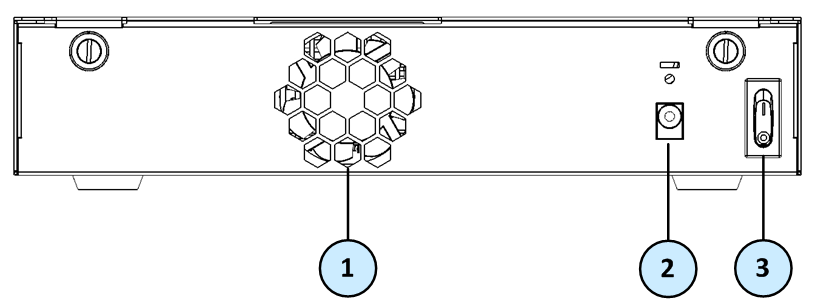
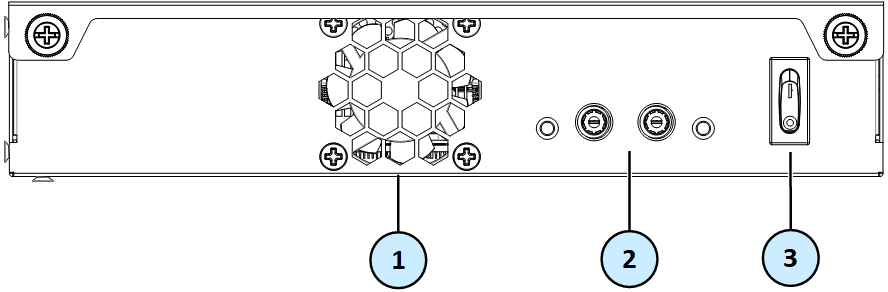
Rear Panel
3100/3200
3600/3800
Installing the Power Adapter Retaining Clip in 3100/3200 Appliances
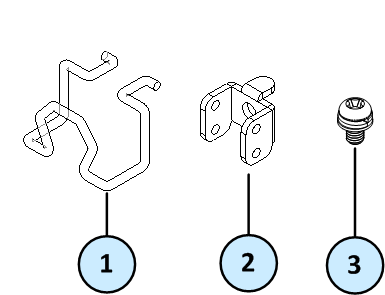
In 3100/3200 appliances, the Assembly Kit bag that comes in the Accessories bag in the shipping carton contains the retaining clip parts:
-
Retaining clip
-
Bracket
-
Screw
Make sure you have these parts and a screwdriver to install the retaining clip.
In 3600/3800 appliances, the adapter cable is screwed (there is no retaining clip).
.

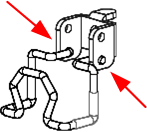
To install the retaining clip:
-
Place the bracket (#2) in its designated slot (#4) on the rear of the appliance.
-
Insert the screw (#3) through the bracket hole and screw it into the hole (#5).
-
Squeeze the retaining clip (#1) sides and insert the hooks into the two bottom holes on the bracket (#2).

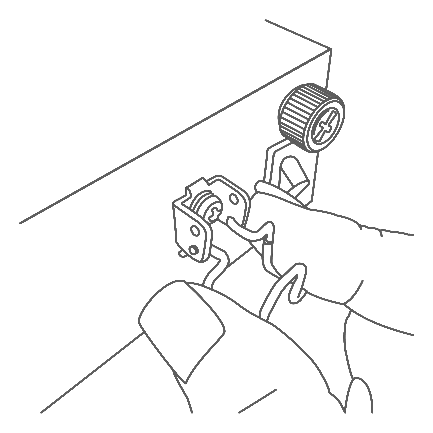
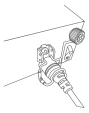
To secure the power adapter cord with the retaining clip:
-
Make sure the retaining clip is in its open position.
-
Connect the power adapter cord to the power outlet.

-
Push down on the retaining clip to secure the cord.


Dual Redundant BIOS
To ensure resilience in the event of a BIOS failure, 3000 Appliances are equipped with dual redundant BIOS images.
If an appliance encounters a BIOS failure, it will boot up from a recovery, read-only BIOS image that enables full functionality of the appliance.
These notifications are shown in the event of a BIOS failure:
-
The appliance's Alert LED on the front panel will blink red.
-
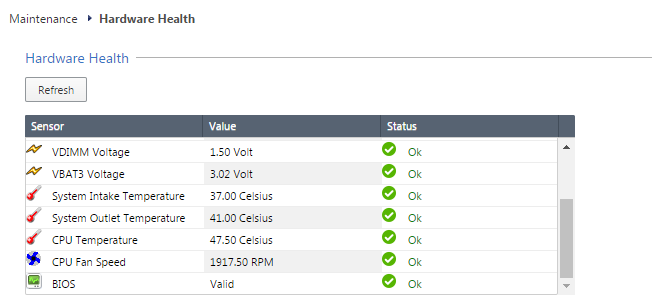
The Gaia WebUI Hardware Health window shows that the BIOS sensor is Invalid and its status is Off.
-
An SNMP trap message (if the biosFailure trap was configured in the WebUI or through Clish).


To recover from a BIOS failure, see sk108517 or contact Check Point support. The appliance is fully functional until the BIOS recovery is completed.
Replacing and Upgrading Components
The 3000 Appliances has parts that you can easily replace to minimize downtime. There are also components that you can install to upgrade the appliance. These are the parts and components that can be used with the appliance:
-
Shelf rack mounting - Optional for the appliances
-
AC Power Adapter
For more information about installing these components, see the appliance home page.
Unless directed to do so by Check Point technical support, you are prohibited by warranty and support agreements from replacing any parts.