Configuring Appliances
Connecting to the Appliance CLI
You can configure advanced options in Gaia from the Gaia Portal or the CLI.
To connect to the command line interface of the appliance, use one of these:
-
An SSH connection to the management interface (if SSHD is configured).
-
A serial console cable and terminal emulation software, such as PuTTY (from Windows) or Minicom (from Unix/Linux).
The appliances support these serial console connectivity options:
-
USB type-C - Using the included USB type-C console cable.
-
RJ45 - Using the included DB9 DTE to RJ45 serial console cable.
Connection parameters for the appliances are: 9600bps, 8 bits, no parity, 1 stop bit (8N1), Flow Control - None.
If you use both the USB type-C and RJ45 console ports, the USB type-C port has priority. To use the RJ45 port, disconnect the USB type-C console cable.
When you finish using the RJ45 port, reconnect the mini USB console cable.

Note - To use the USB type-C console port, a driver must be installed on the console client machine (desktop/laptop). For installation instructions and the download link, see the appliance home page.
-
Starting the Appliance
Connect the appliance to a power source and turn on the appliance. When the appliance is ready, you can do the First Time Configuration Wizard to configure it.
|
|
Note - To avoid power supply alarms and system notifications in 26000/28000 appliances, you must install all 3 AC power supply units. |
To start the appliance:
Connect the power cables to the power supply units in the rear panel.
The appliance turns on.
|
|
Note - When one of the power supply unit cords is not connected to the outlet, an alarm sounds continuously. If you hear the alarm, reconnect the cord to the outlet. To turn off the alarm, press the red Alarm off button on the rear panel of the appliance. |
Available Software Images
The 26000/28000 appliances come with software images. See the appliance home page.
Reverting to a software image takes a few minutes. To follow progress and see when the appliance is ready, connect to the appliance using a serial console.
Synchronizing RAID
All 26000/28000 appliances support two storage devices (excluding 28600HS).
In appliances that use two storage devices, RAID1 mirroring across both storage devices is used. This lets the appliance continue to work if there is a storage device failure.
The mirror rebuild is automatic. Both storage devices must be the same type.
First Boot Up
At first boot up, wait for up to six hours to let the storage devices fully synchronize. If you reboot the appliance before the storage devices are synchronized, the synchronization starts again from scratch at the next boot.
To monitor the RAID status of the storage devices from the CLI:
-
Connect to the command line on the appliance.
-
Log in to Gaia Clish or the Expert mode.
-
Run this command to monitor the RAID status of the storage devices:
raid_diagnosticThis command shows data about the RAID and storage devices, with the percent of synchronization done.
DiskID 0is the left storage device.DiskID 1is the right storage device.After the first boot and after you replace a second storage device, the RAID state (in the VolumeID line) shows
DEGRADED(this indicates that the drives are not synchronized). The DiskID:0 state showsONLINEand the DiskID:1 state showsINITIALIZING.After the RAID is synchronized, the RAID state (in the VolumeID line) shows
OPTIMAL(this indicates that the drives are synchronized). The DiskID:0 and DiskID:1 states showONLINE.For example:
MyAppliance> raid_diagnostic
This example shows that the storage devices are fully synchronized (disk sizes and vendor may vary).
To monitor the RAID status of the storage devices from the Gaia Portal:
-
Log in to the Gaia Portal.
-
From the left tree, click Maintenance > RAID Monitoring.
To monitor the RAID status of the storage devices from SmartConsole:
-
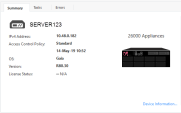
From Gateways & Servers, select the object that represents the appliance.
-
In the Summary tab, click Device Information.
-
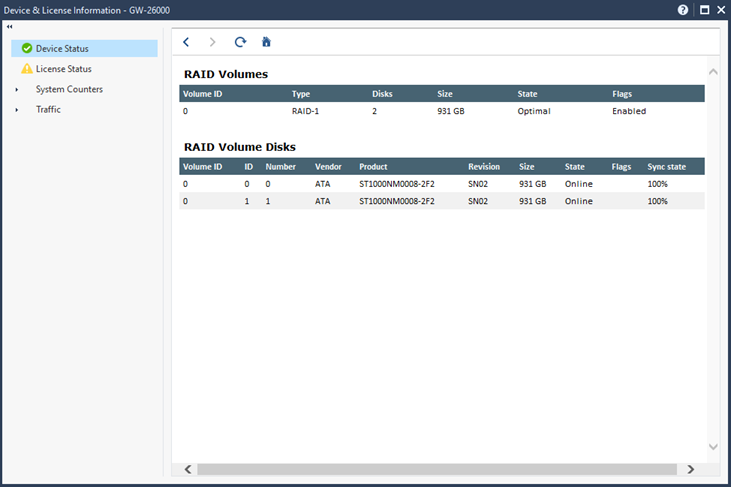
Click RAID Volumes.
The window shows volume and disk information.


To monitor the RAID status of the storage devices using SNMP:
Set up SNMP traps to send information about the RAID.
Use OID: 1.3.6.1.4.1.2620.1.6.7.7
For more about how to configure the SNMP settings on the appliance, see the Gaia Administration Guide for the applicable version.
To hot swap a storage device:
|
|
Important - Make sure that there is at least one fully synchronized storage device in the system. |

|
|
Note - This cannot be done on 26000THS. |
-
When the system is up, remove the failed storage device.
-
Wait 15 seconds.
The appliance recognizes that you removed a storage device.
-
Insert a new storage device. If necessary, you can reboot the appliance with one storage device and install the new storage device later.
The system automatically adds the new storage device to the RAID configuration.
Initial Configuration
Configure the appliance with the First Time Configuration Wizard. See the Installation and Upgrade Guide for your software version.
Go to the Installing Security Gateways on Appliances section, and see the instructions to use the First Time Configuration Wizard.
Creating the Network Object
Configure a Security Gateway object on the Management Server:
-
Connect with SmartConsole to the Management Server.
-
Configure a new Security Gateway object for the appliance.
-
Enter the IP address for the appliance.
-
Create Secure Internal Communication (SIC) between the Security Gateway and the Management Server. Enter the activation key you used in the First Time Configuration Wizard.
-
Configure the topology.
-
Configure and install the Security Policy.